Table of Contents
Plan the management of electric vehicle charging stations

This article describes the installation planning. For on-site implementation and equipment configuration on the Climkit platform, refer to the links at the end of the article.
1. Electric vehicle charging station management - typical installation
The standard case illustrated in this section consists of installing a basic infrastructure in a building already equipped or simultaneously equipped with the Climkit solution for electricity and metering management as part of an RCP with a single grid connection point.
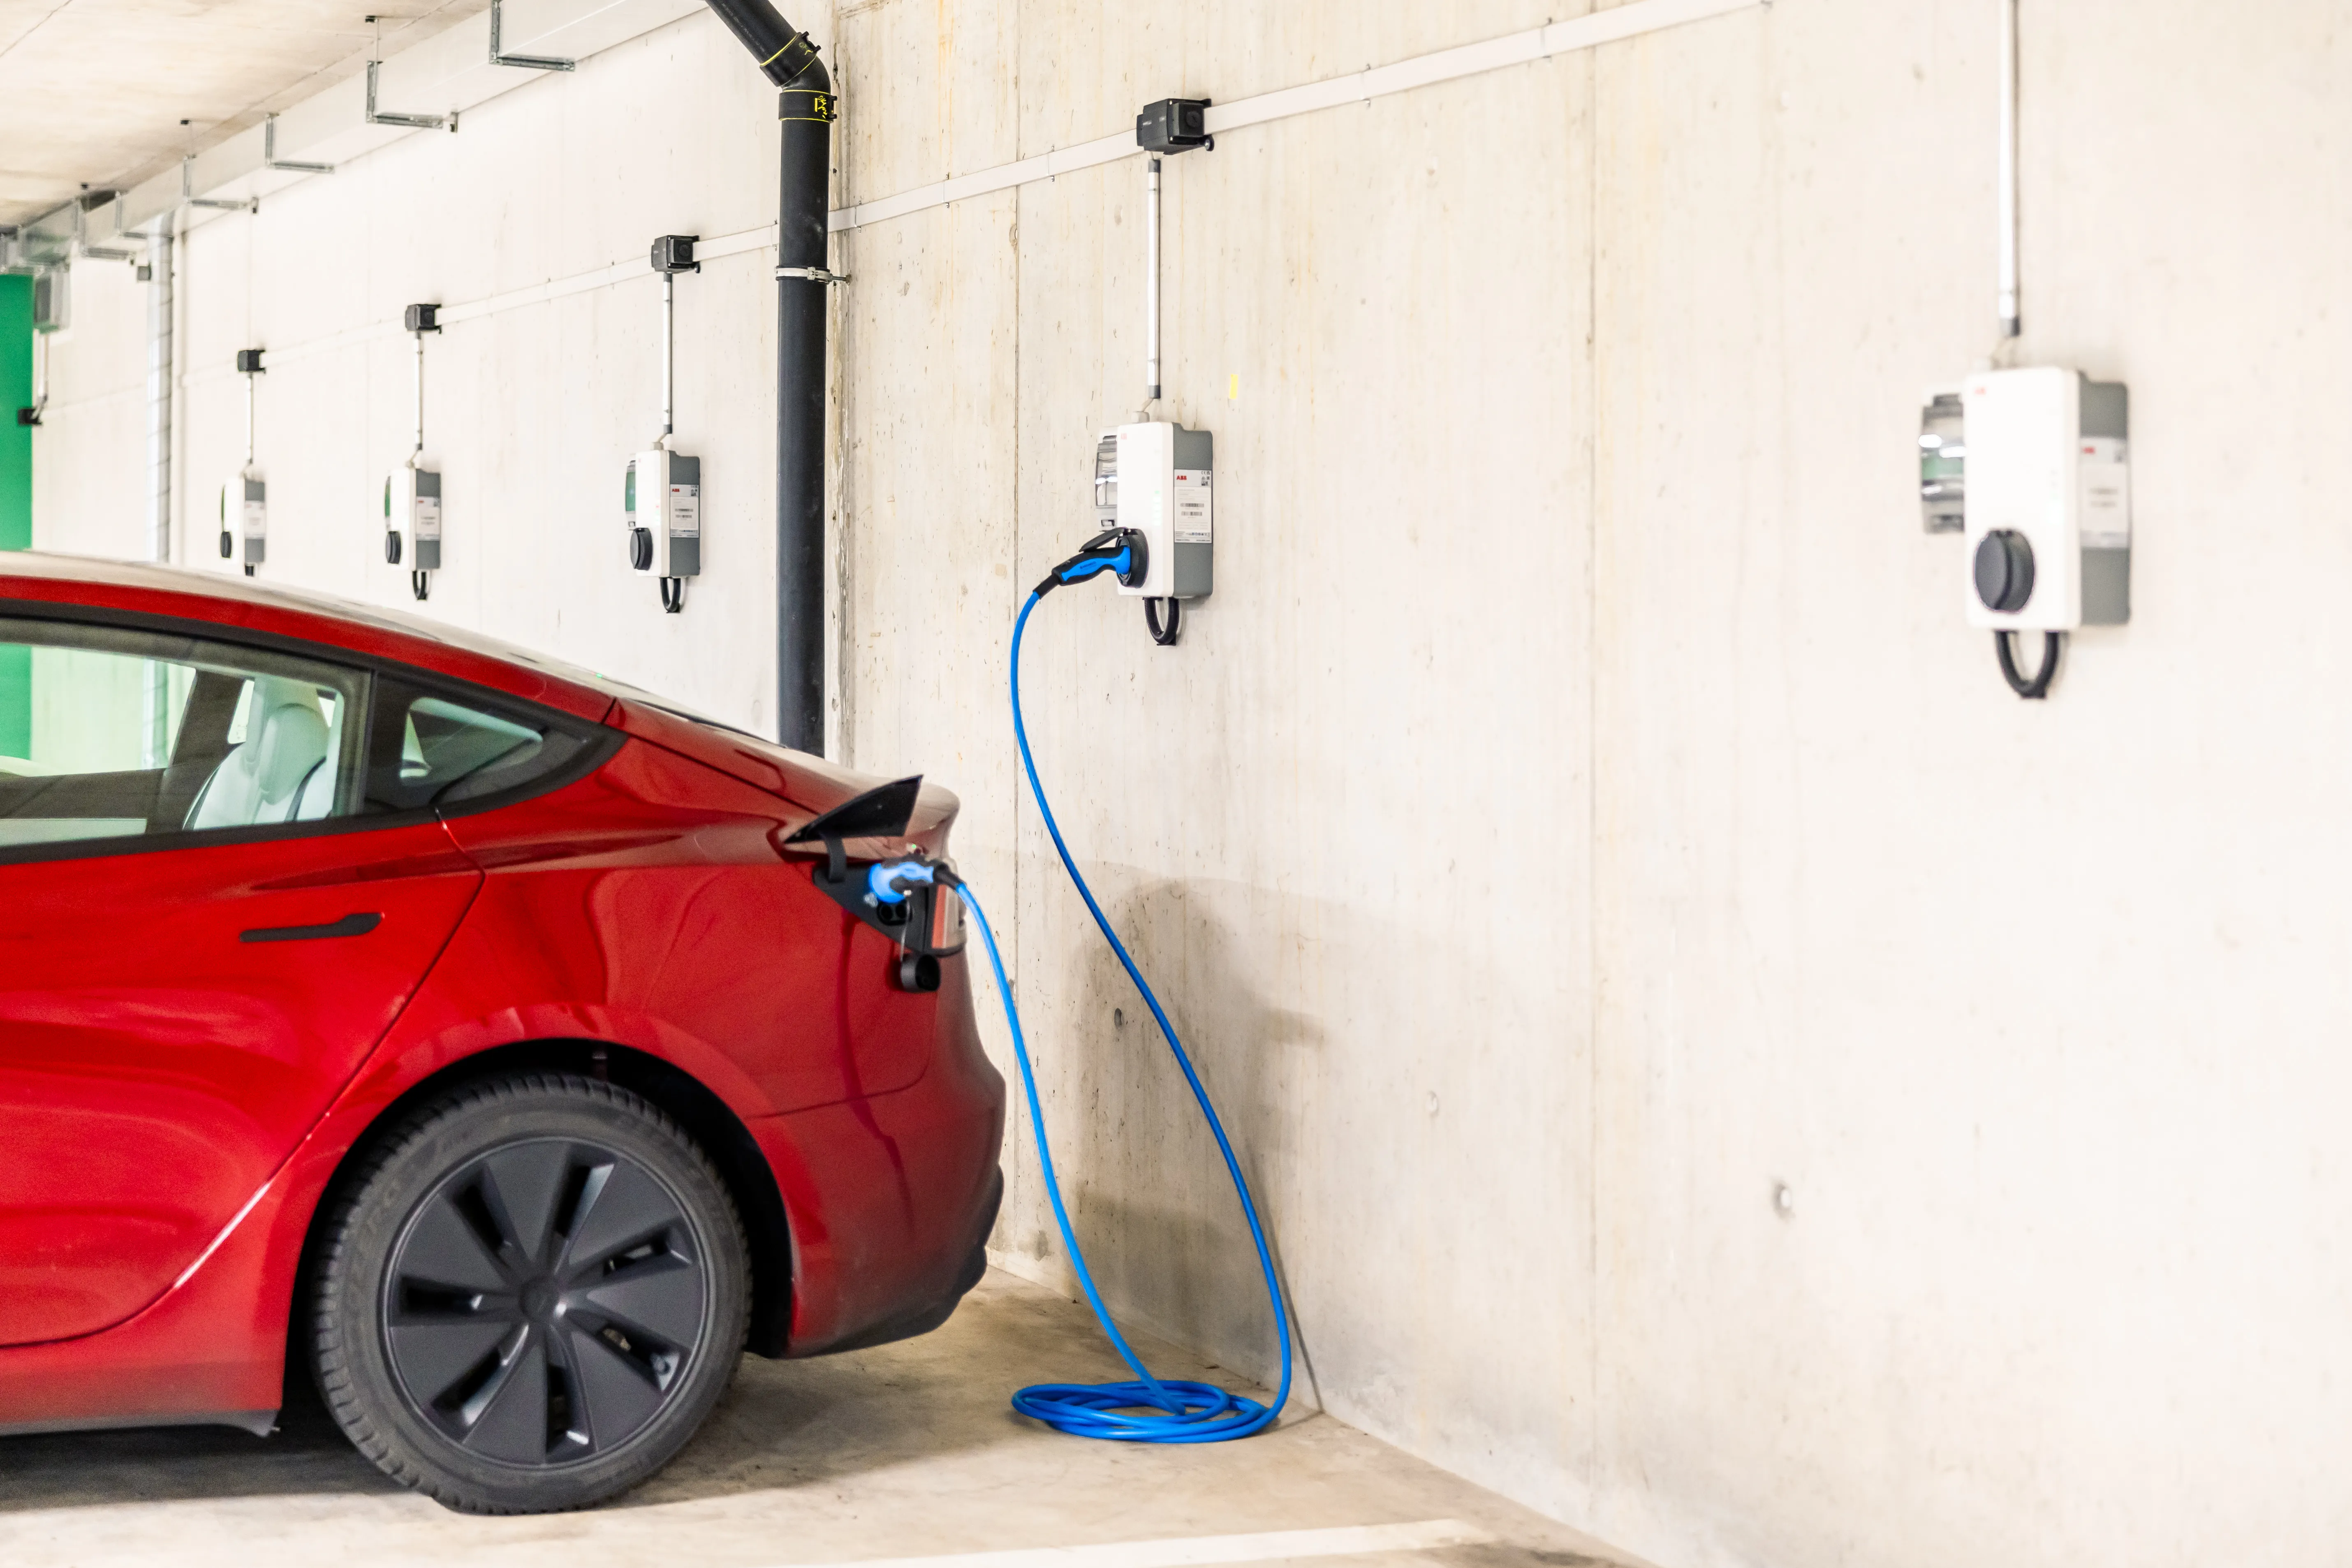
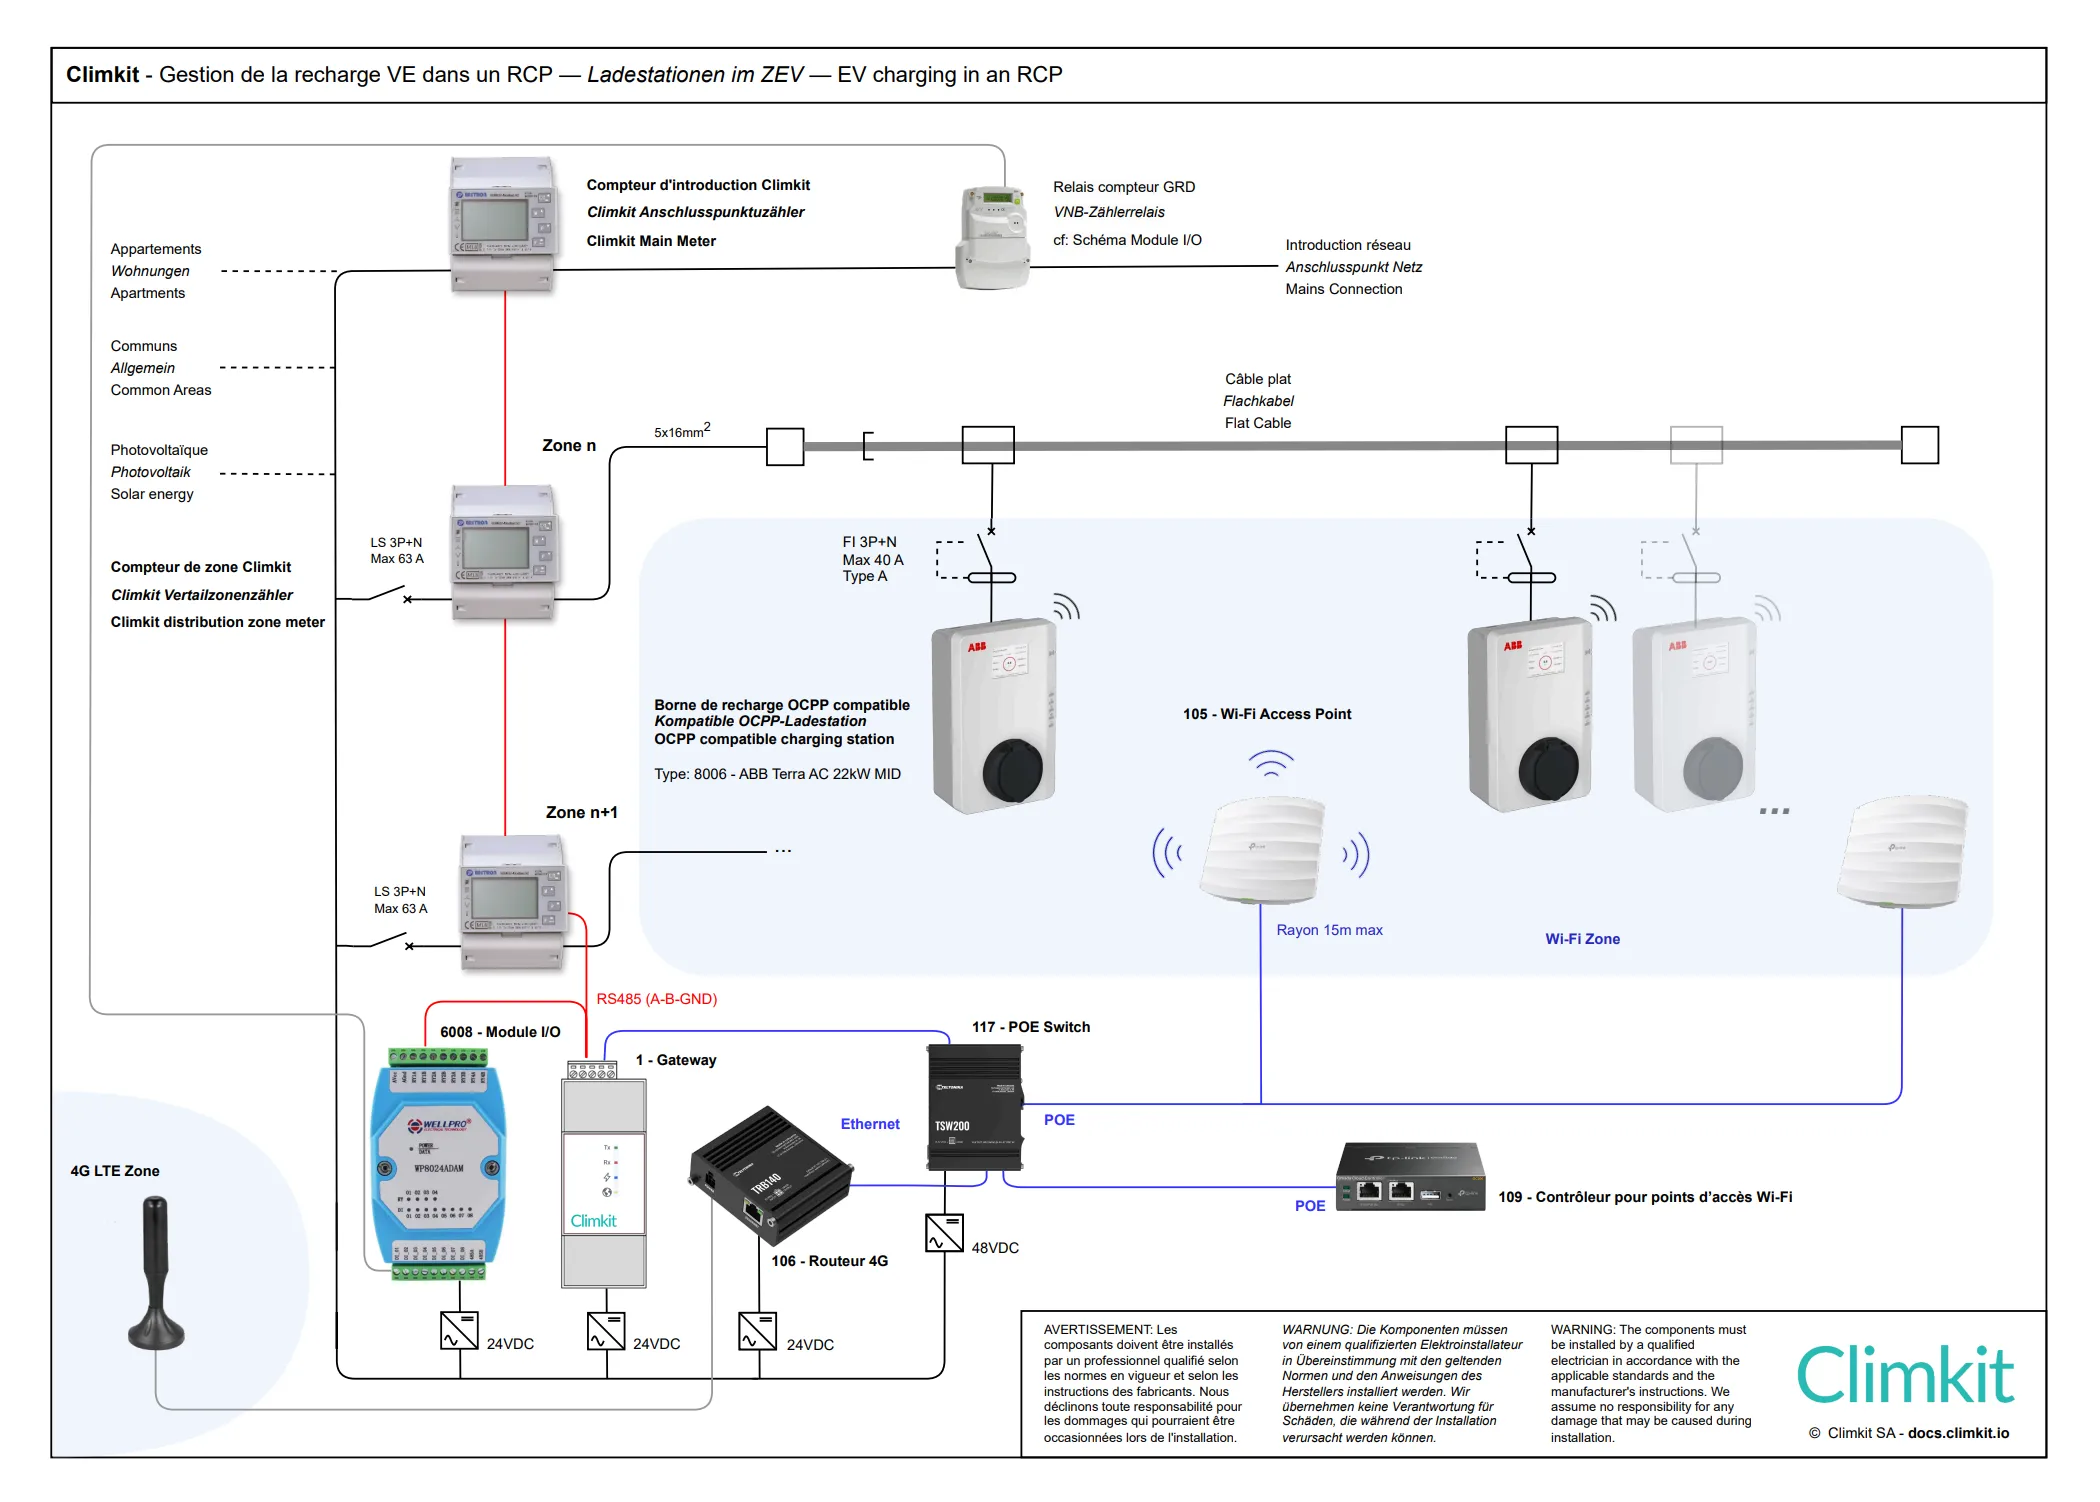
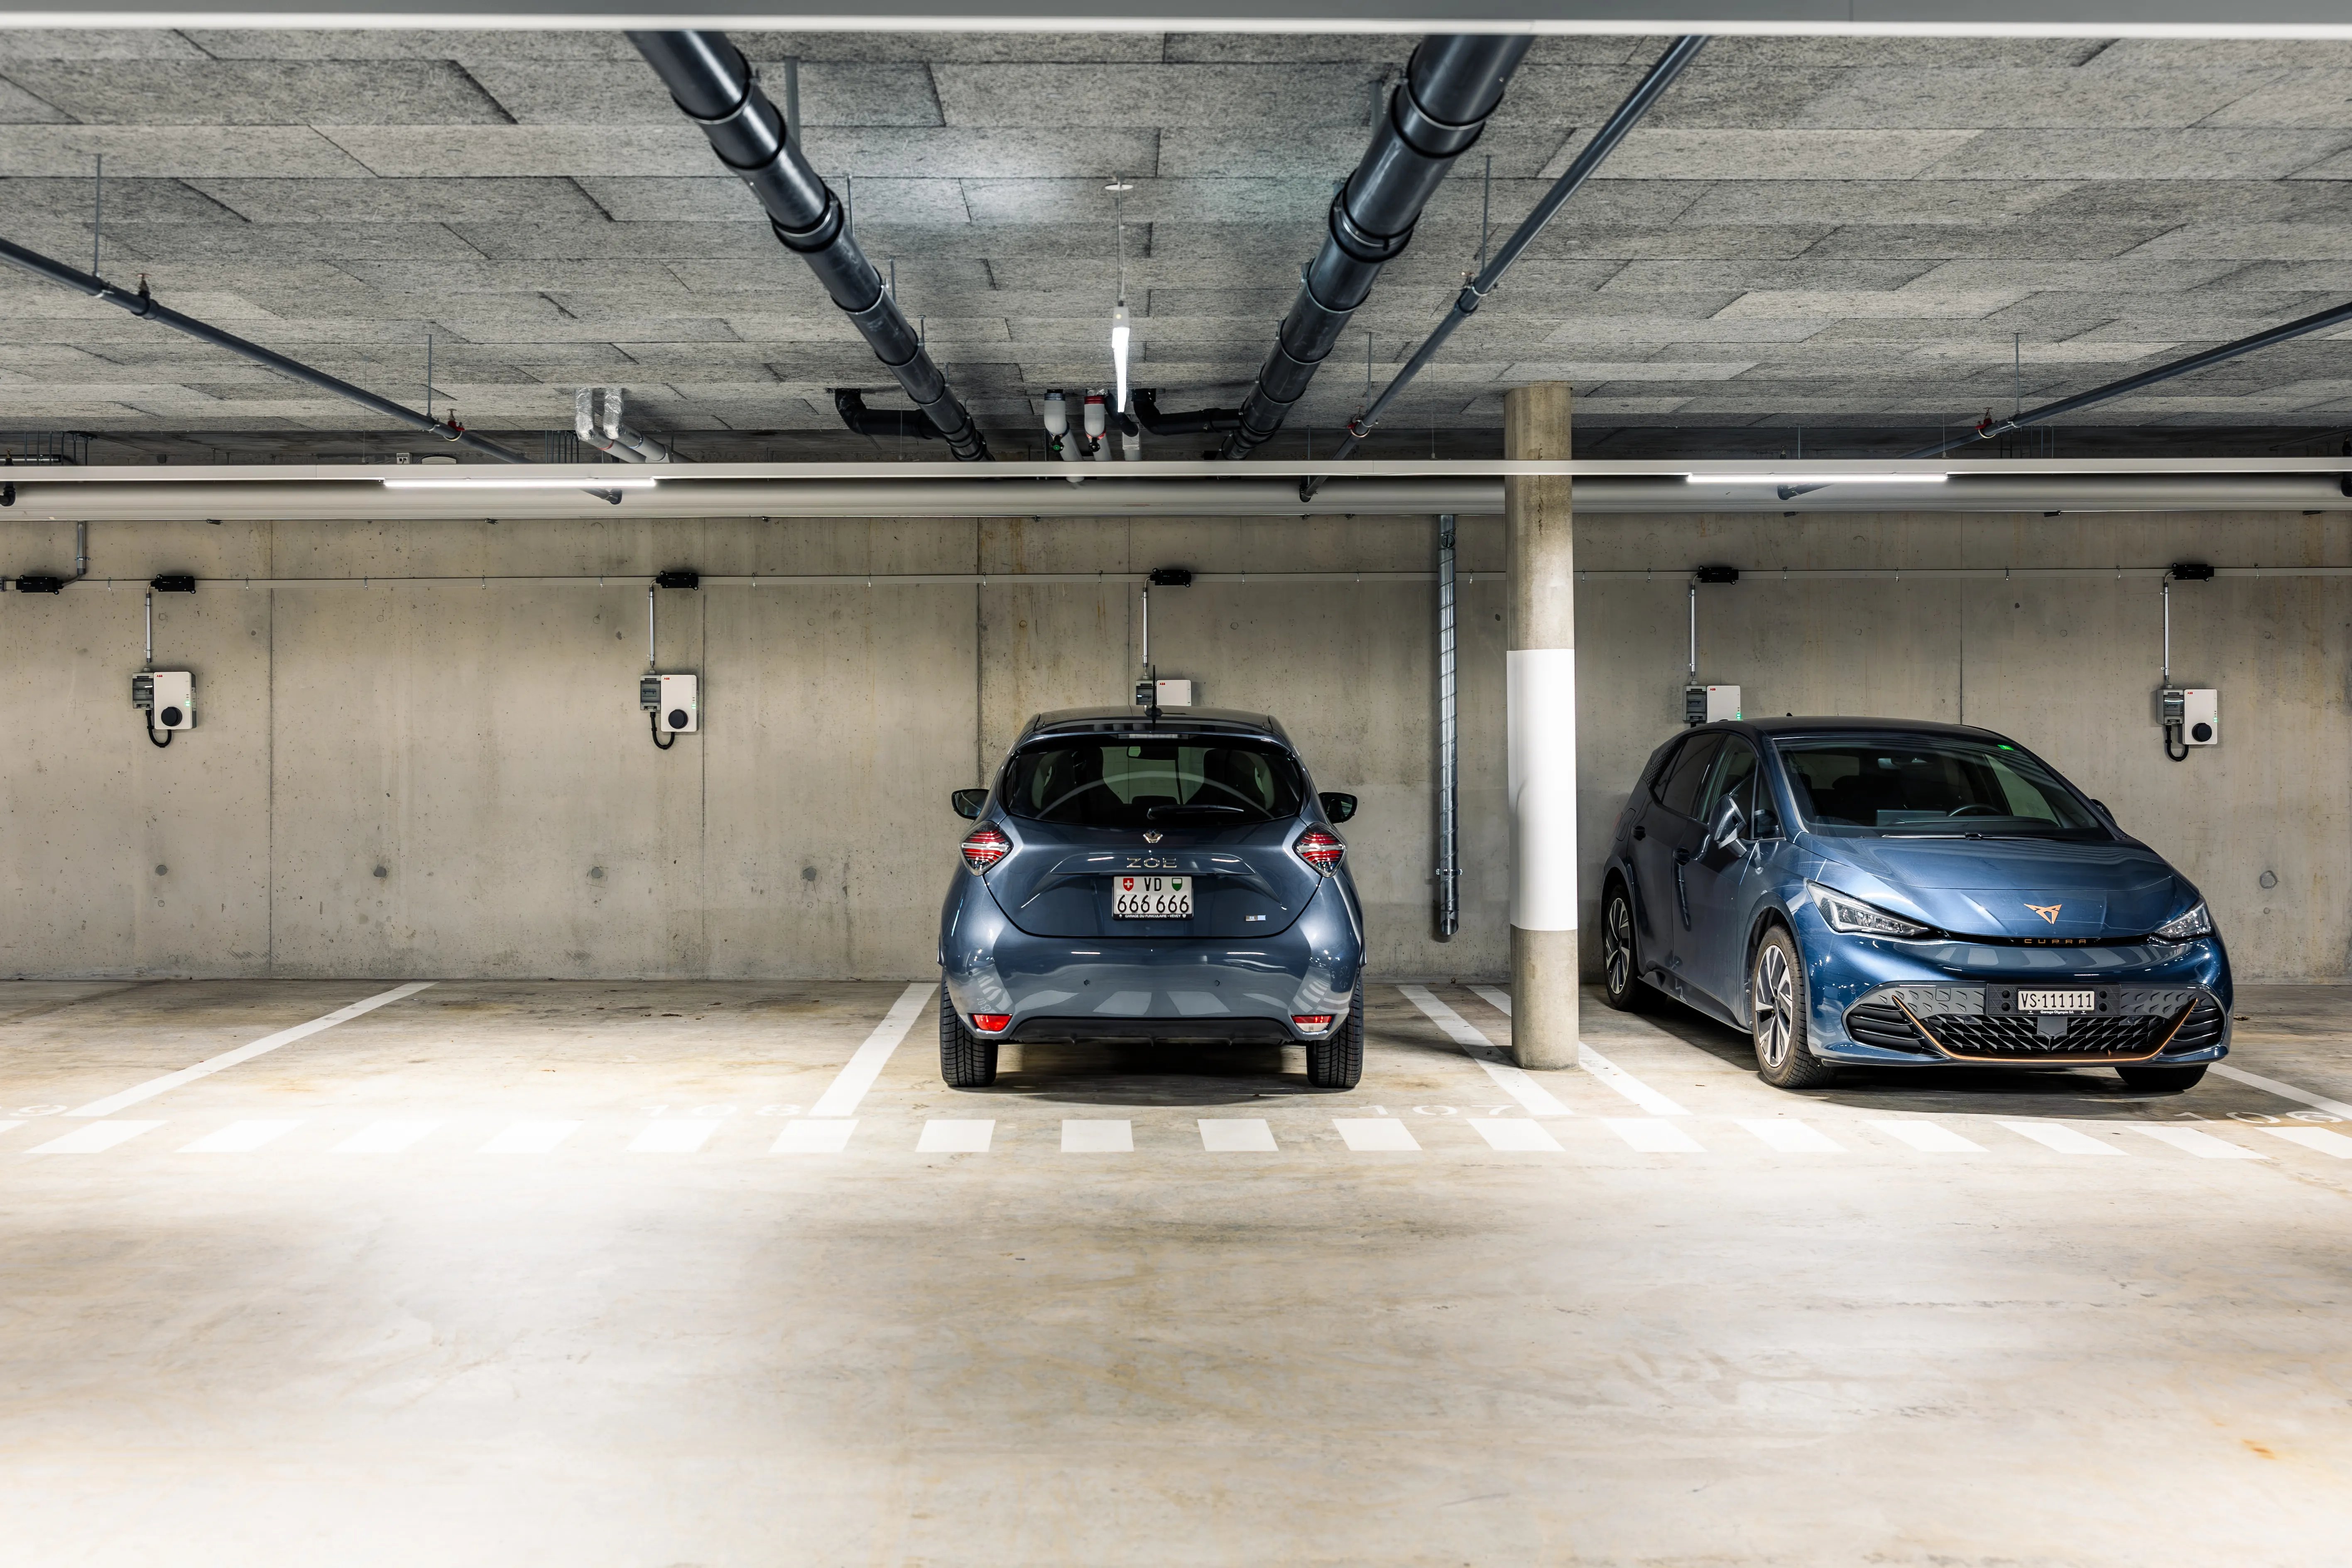
The system consists of installing charging stations in the building's collective car park. The stations communicate with the Climkit Gateway via a LAN network (wired or Wi-Fi) and use the standard OCPP communication protocol.
Thanks to this communication, the Climkit Gateway regulates the available power allocated to the charging stations according to available energy and manages user access authenticated via RFID badges.
Other installation variants are explained below under "Other configurations depending on site type".
Standard connection diagram with RCP
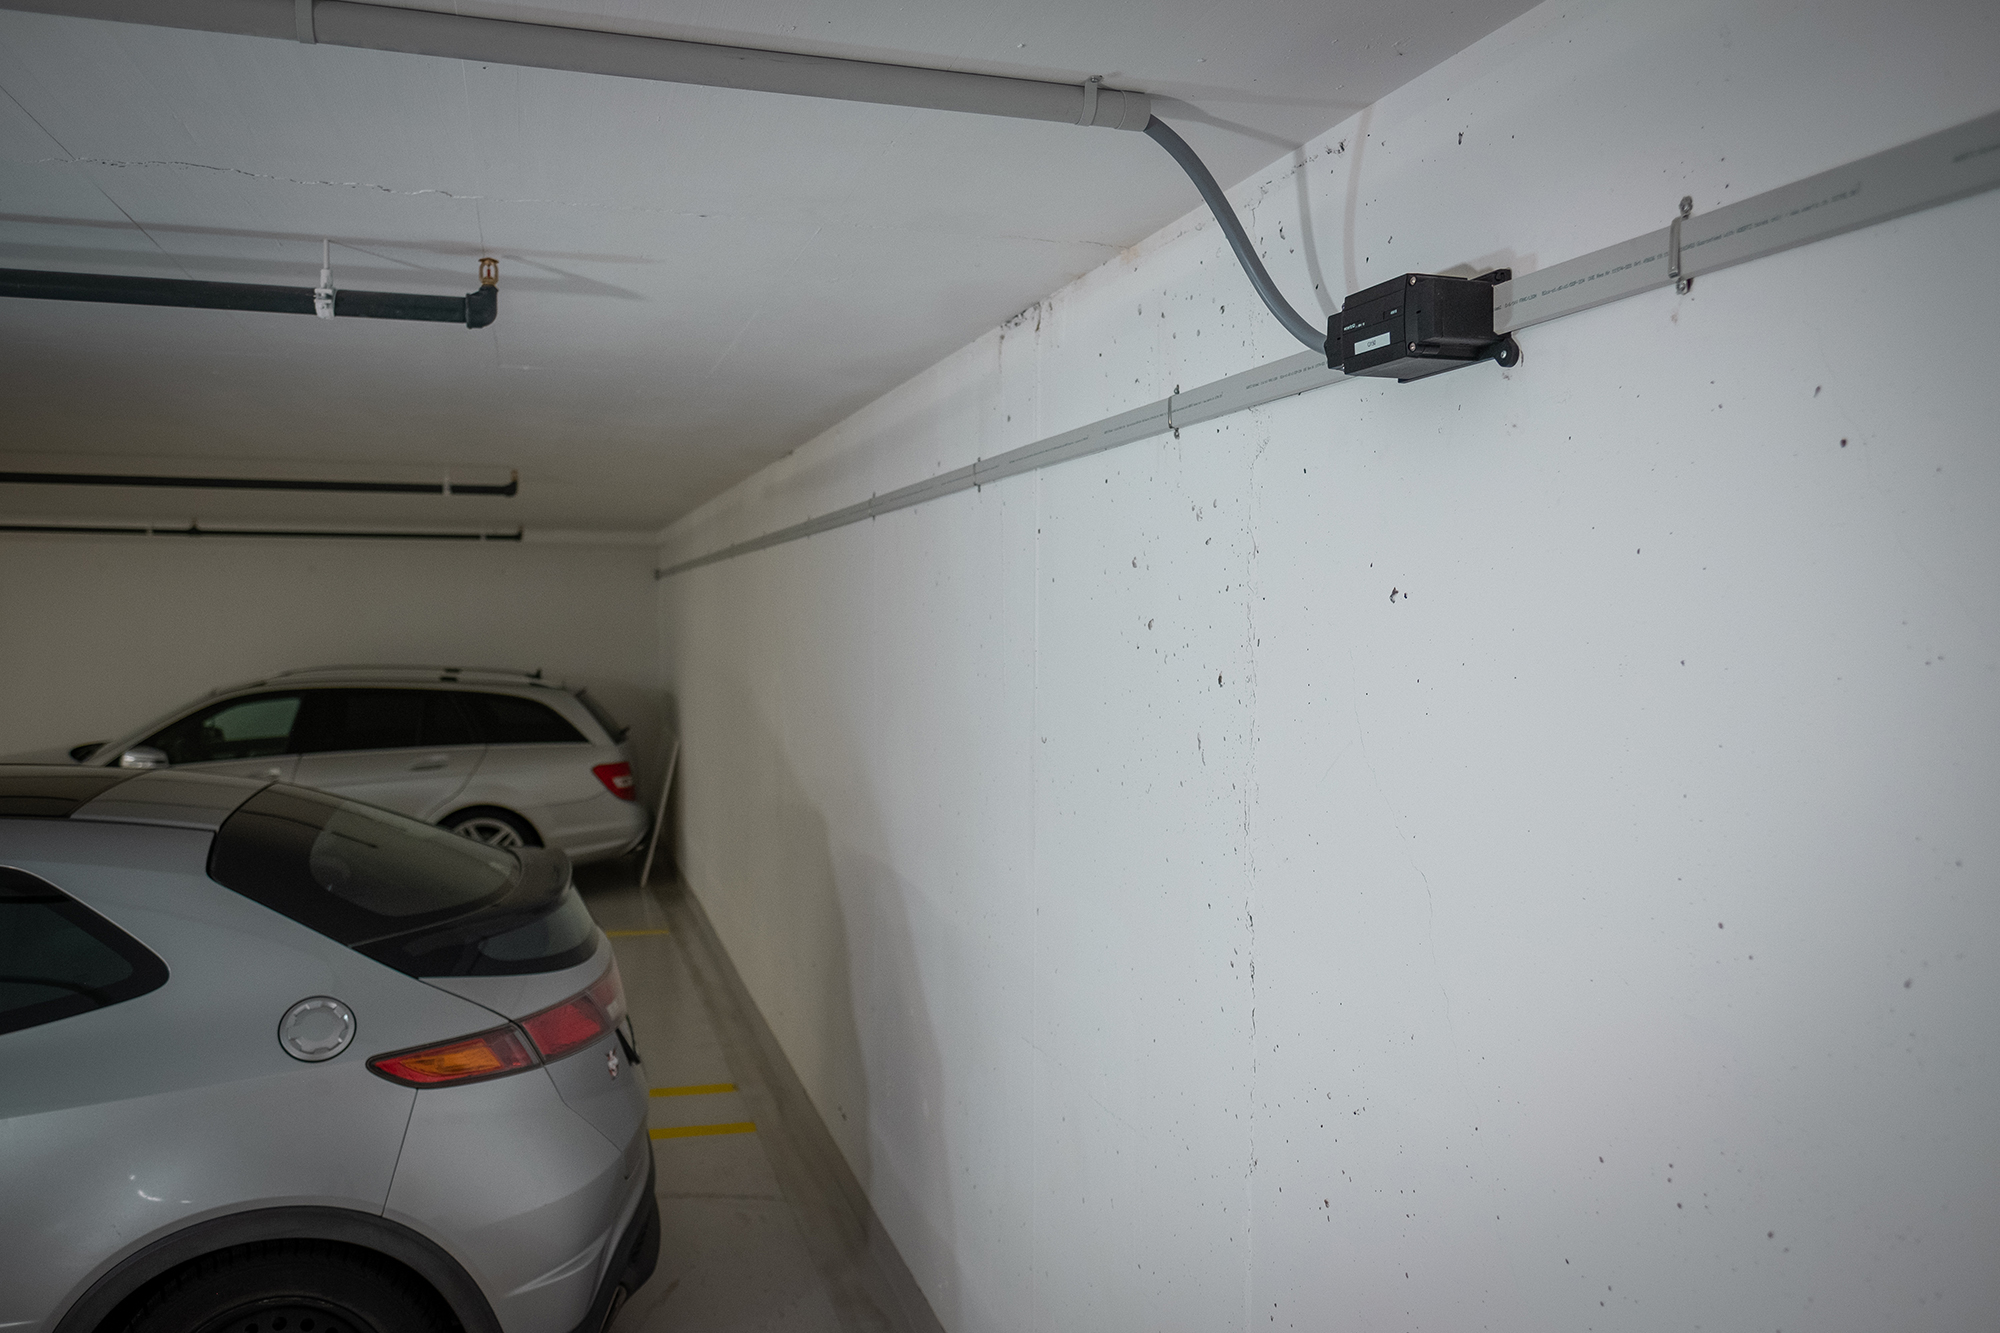
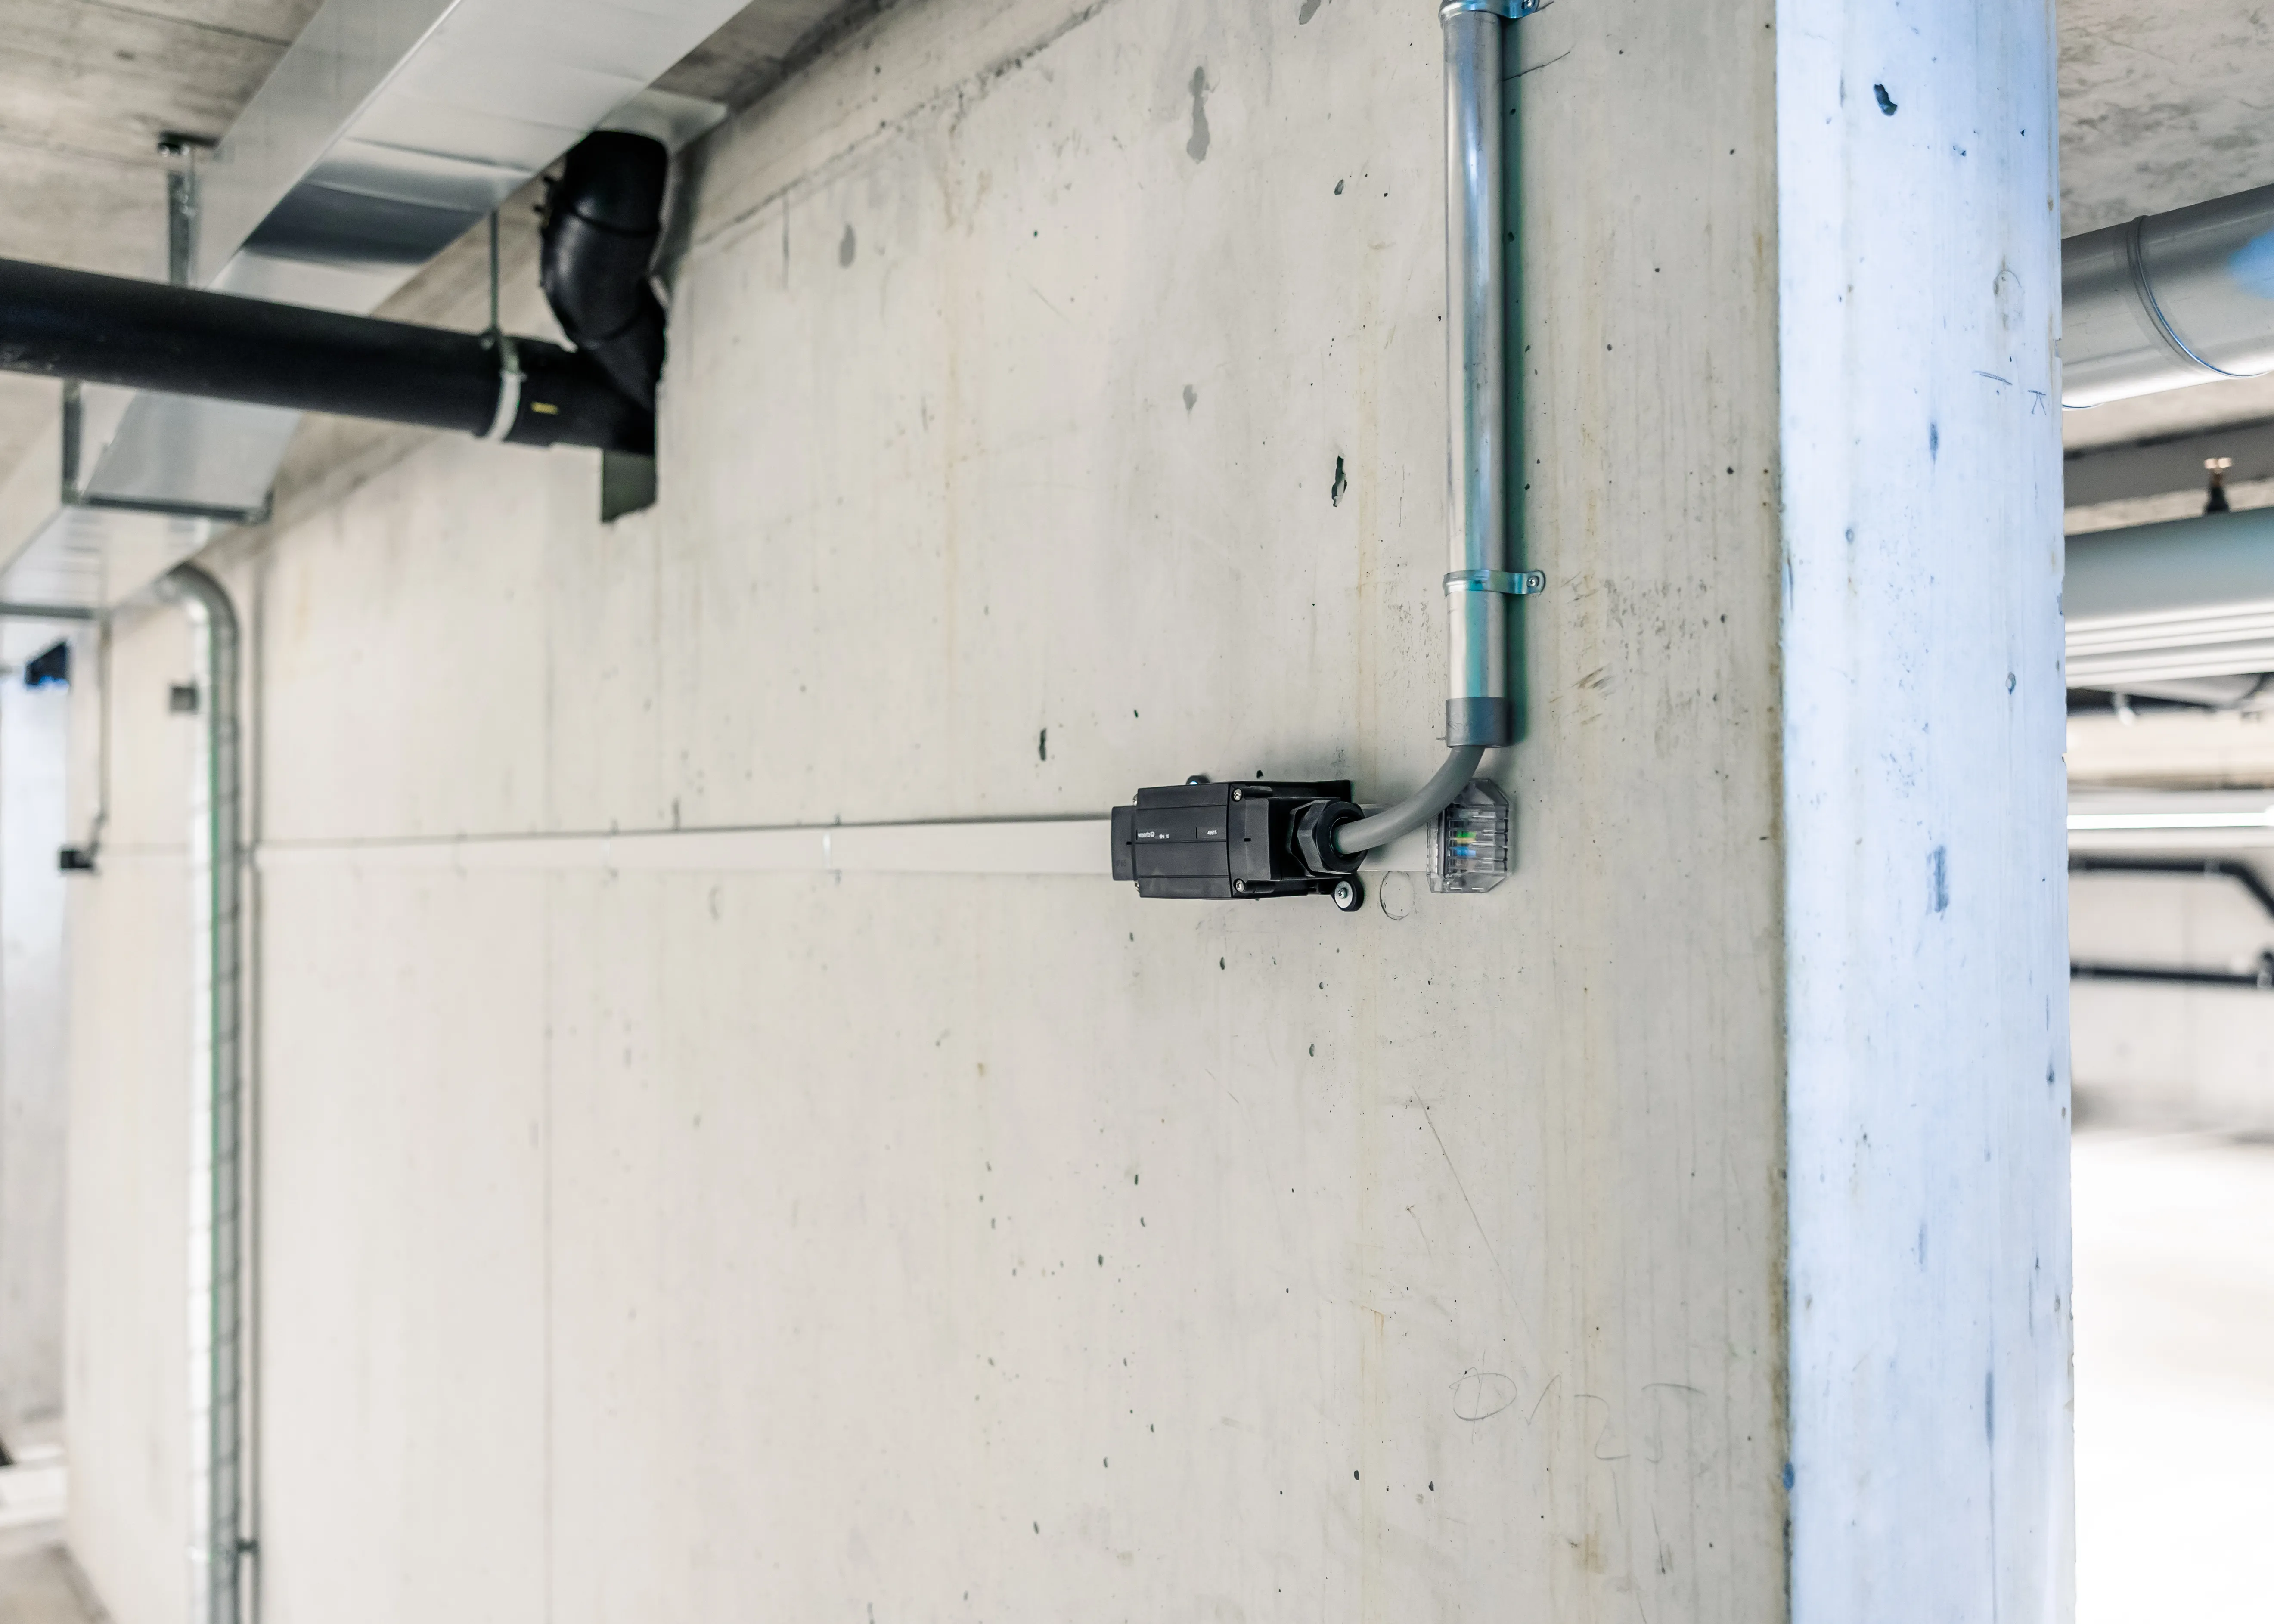
Flat cable
It is recommended to install a flat cable to bring electricity to each parking space. This solution facilitates the progressive installation of charging stations as residents wish to equip themselves. This approach corresponds to level C1 of the SIA 2060 standard.
Electrical connection
The flat cable is powered from the electrical panel via a 3P+N circuit breaker of 63A maximum.
The connection is made as follows:
- A dedicated feeder in the electrical panel with a 63A circuit breaker
- A dedicated meter installed at the same level as the other consumers' meters (behind the input meter and never behind the common areas meter)
Each feeder corresponds to a distribution zone. Although the number of charging stations per zone is technically unlimited, it is recommended not to exceed 30 charging stations per zone and to provide an additional feeder beyond this threshold.
The Gateway reads the instantaneous amperage from the input meter and regulates the charging power of the stations accordingly, in order to avoid tripping the main circuit breaker or the zone circuit breaker.
IP and Wi-Fi network setup
Wi-Fi access points are positioned to cover the entire car park with sufficient signal. Their distribution takes into account signal attenuation caused by conduits, ceiling equipment, and parked vehicles, in order to ensure a stable connection for the charging stations.
Climkit offer
The Climkit standard offer includes the elements necessary for system operation: hardware equipment, software features, as well as services related to commissioning.
All hardware is provided preconfigured in order to simplify installation and ensure proper meter communication.
- Basic infrastructure equipment:
- LAN router or 4G router
- PoE switch
- Climkit Gateway
- Wi-Fi access points (minimum 2)
- Wi-Fi access point controller
- I/O module for charging station load shedding via the DSO meter
- Individual charging station(s)
- Software features:
- Charging station management and dynamic load management
- Commissioning service:
- Configuration and commissioning of the basic infrastructure
- Configuration and commissioning of each charging station
- Administrative commissioning
All products are ordered directly from Climkit.
In most cases, the installation can be carried out by the installer without on-site intervention by a Climkit technician.
Telephone support is available if needed during commissioning.
Details of equipment used
LAN or 4G Router
An internet connection is essential for the system to function. If no connection is available, Climkit can provide it via a 4G router equipped with an active multi-operator SIM card.
If an internet connection already exists, a Climkit LAN router is systematically provided.
The LAN or 4G router allows creating a dedicated IP network to which all system equipment (gateway, charging stations, and Wi-Fi access points) connects, allowing independent administration.
Using Climkit's TRB140 4G router offers several advantages:
- Simplified installation: the router is easily installed inside the electrical panel, directly on the DIN rail
- Complete delivery: supplied with its DIN rail mount and 24V DC power supply
- Ready to use: delivered preconfigured with an activated SIM card
- Cost-effective 4G subscription: low-cost internet connection
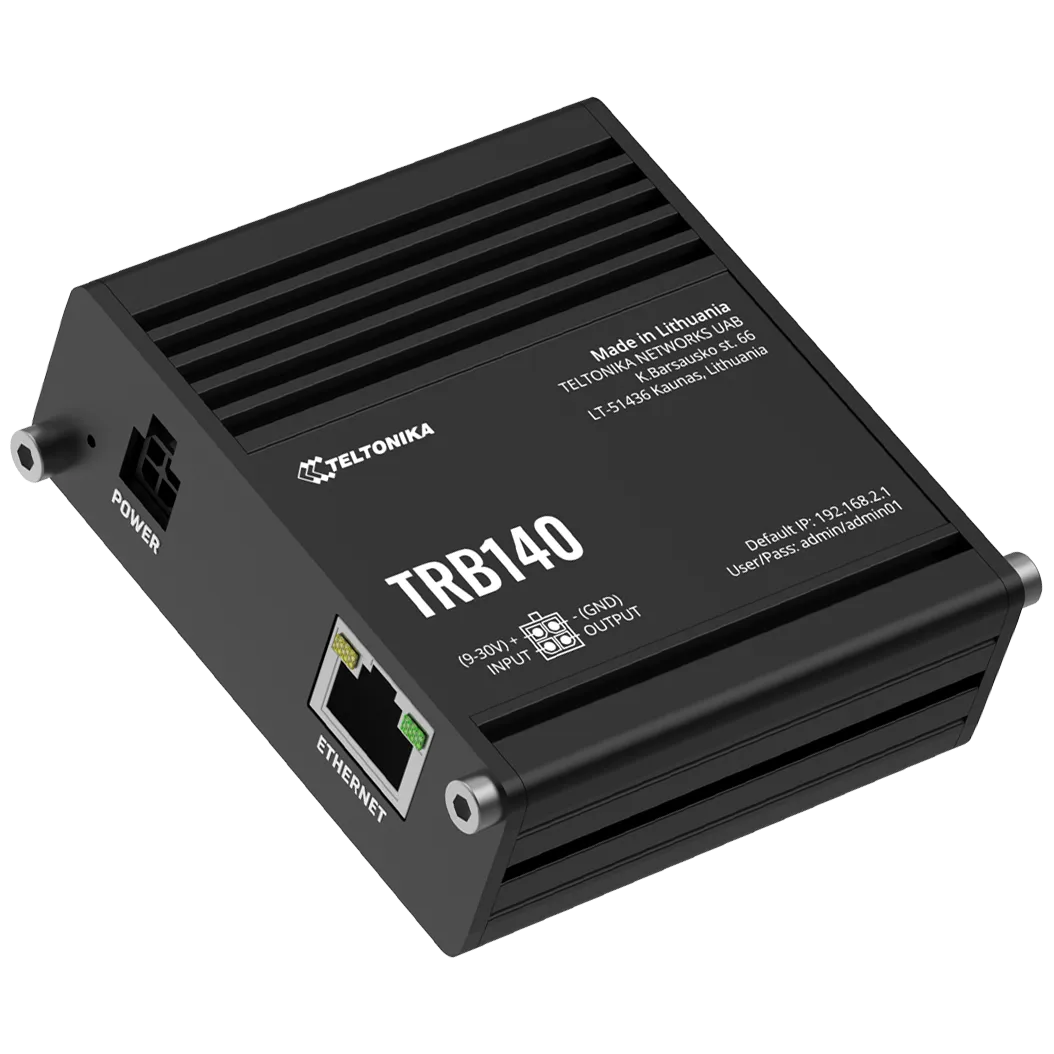
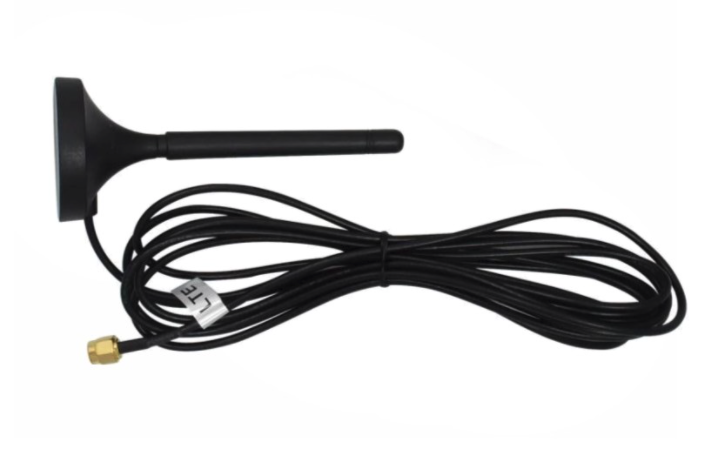 Useful link: TRB140 Router Datasheet
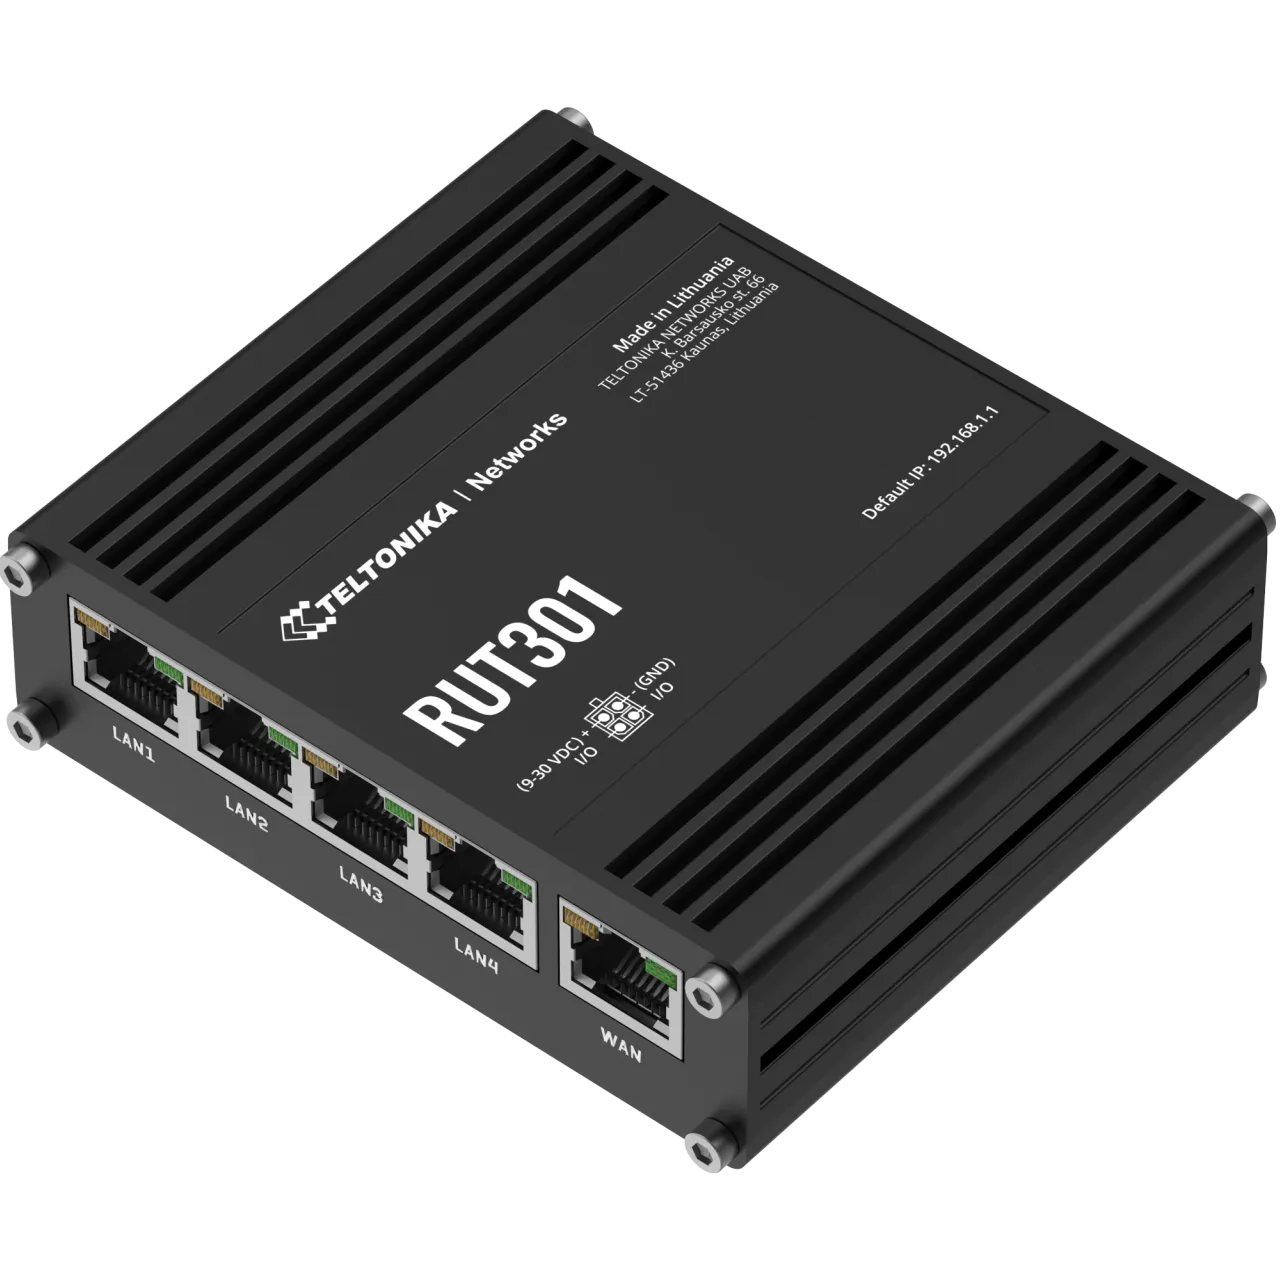
In the case of a LAN router, Climkit provides the preconfigured Teltonika RUT301 router with 4 LAN + 1 WAN ports. It is delivered with its DIN rail mount and 24V DC DIN rail power supply.
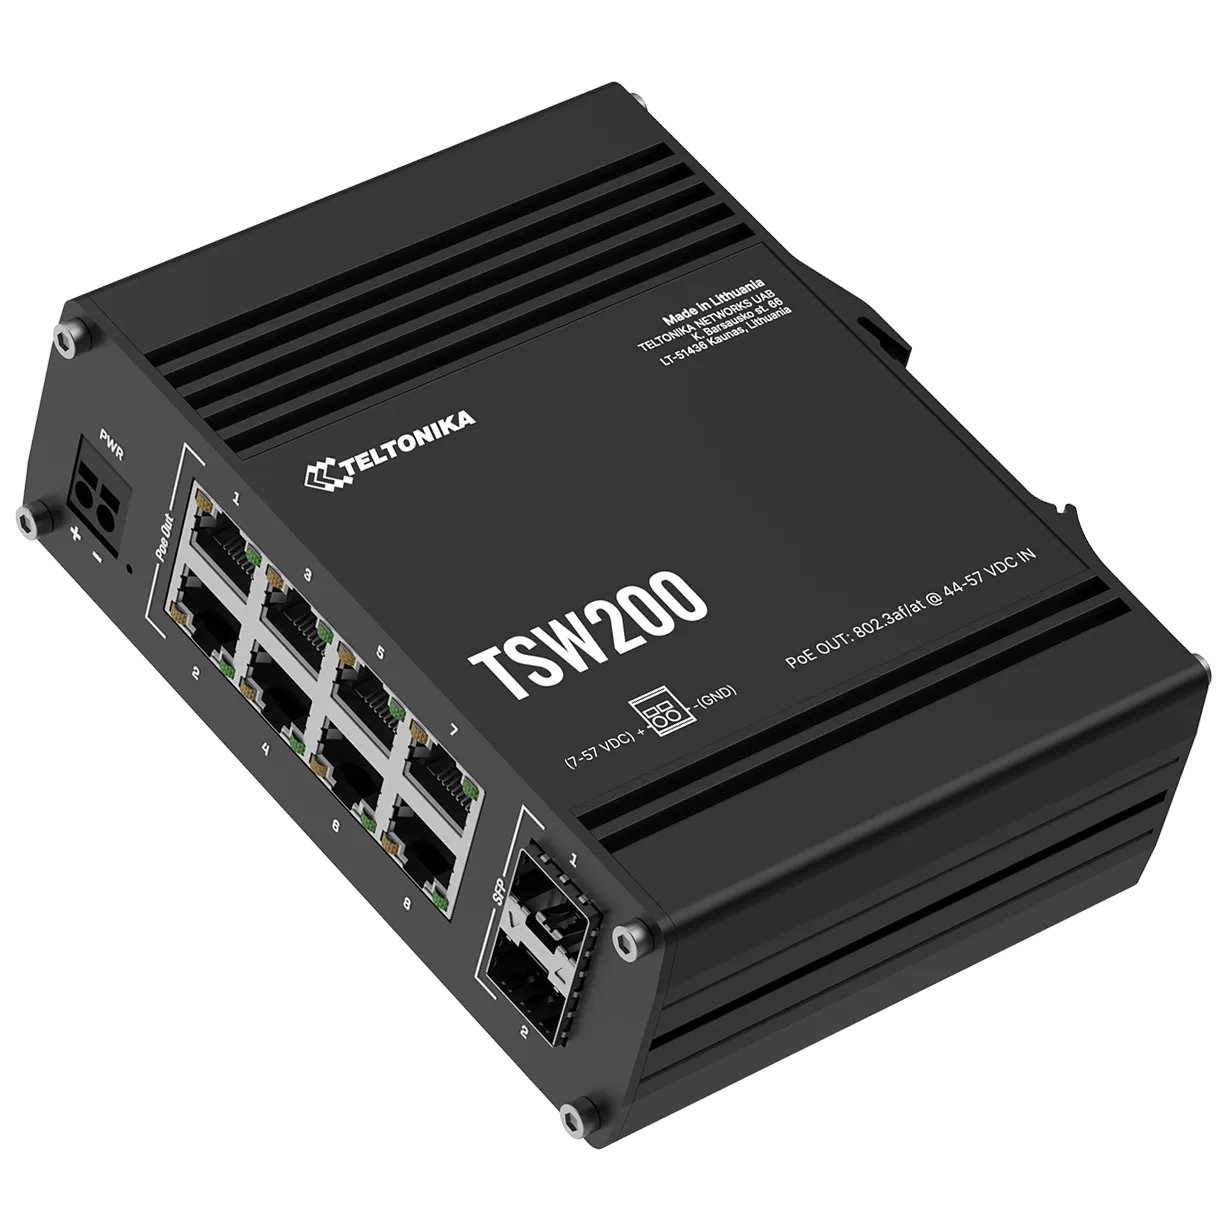
PoE Switch
For Ethernet equipment requiring PoE power supply, a PoE switch is required.
It allows powering the Gateway, controller, and Wi-Fi access points directly via the Ethernet cable, without additional power supply.
Model provided by Climkit: Teltonika TSW200 (or equivalent), with 8 PoE Ethernet ports and 2 fiber optic SFP ports. Delivered with DIN rail mount and 48V DC, 150 W DIN rail power supply.
Climkit Gateway
The Climkit Gateway manages the charging stations locally and ensures communication with the Climkit platform. Its Ethernet interface enables connection to the IP network and interaction with the charging stations via the OCPP protocol. Its RS485 interface enables meter reading, particularly the input meter, via the Modbus protocol.
The Gateway is installed directly in the electrical panel on the DIN rail.
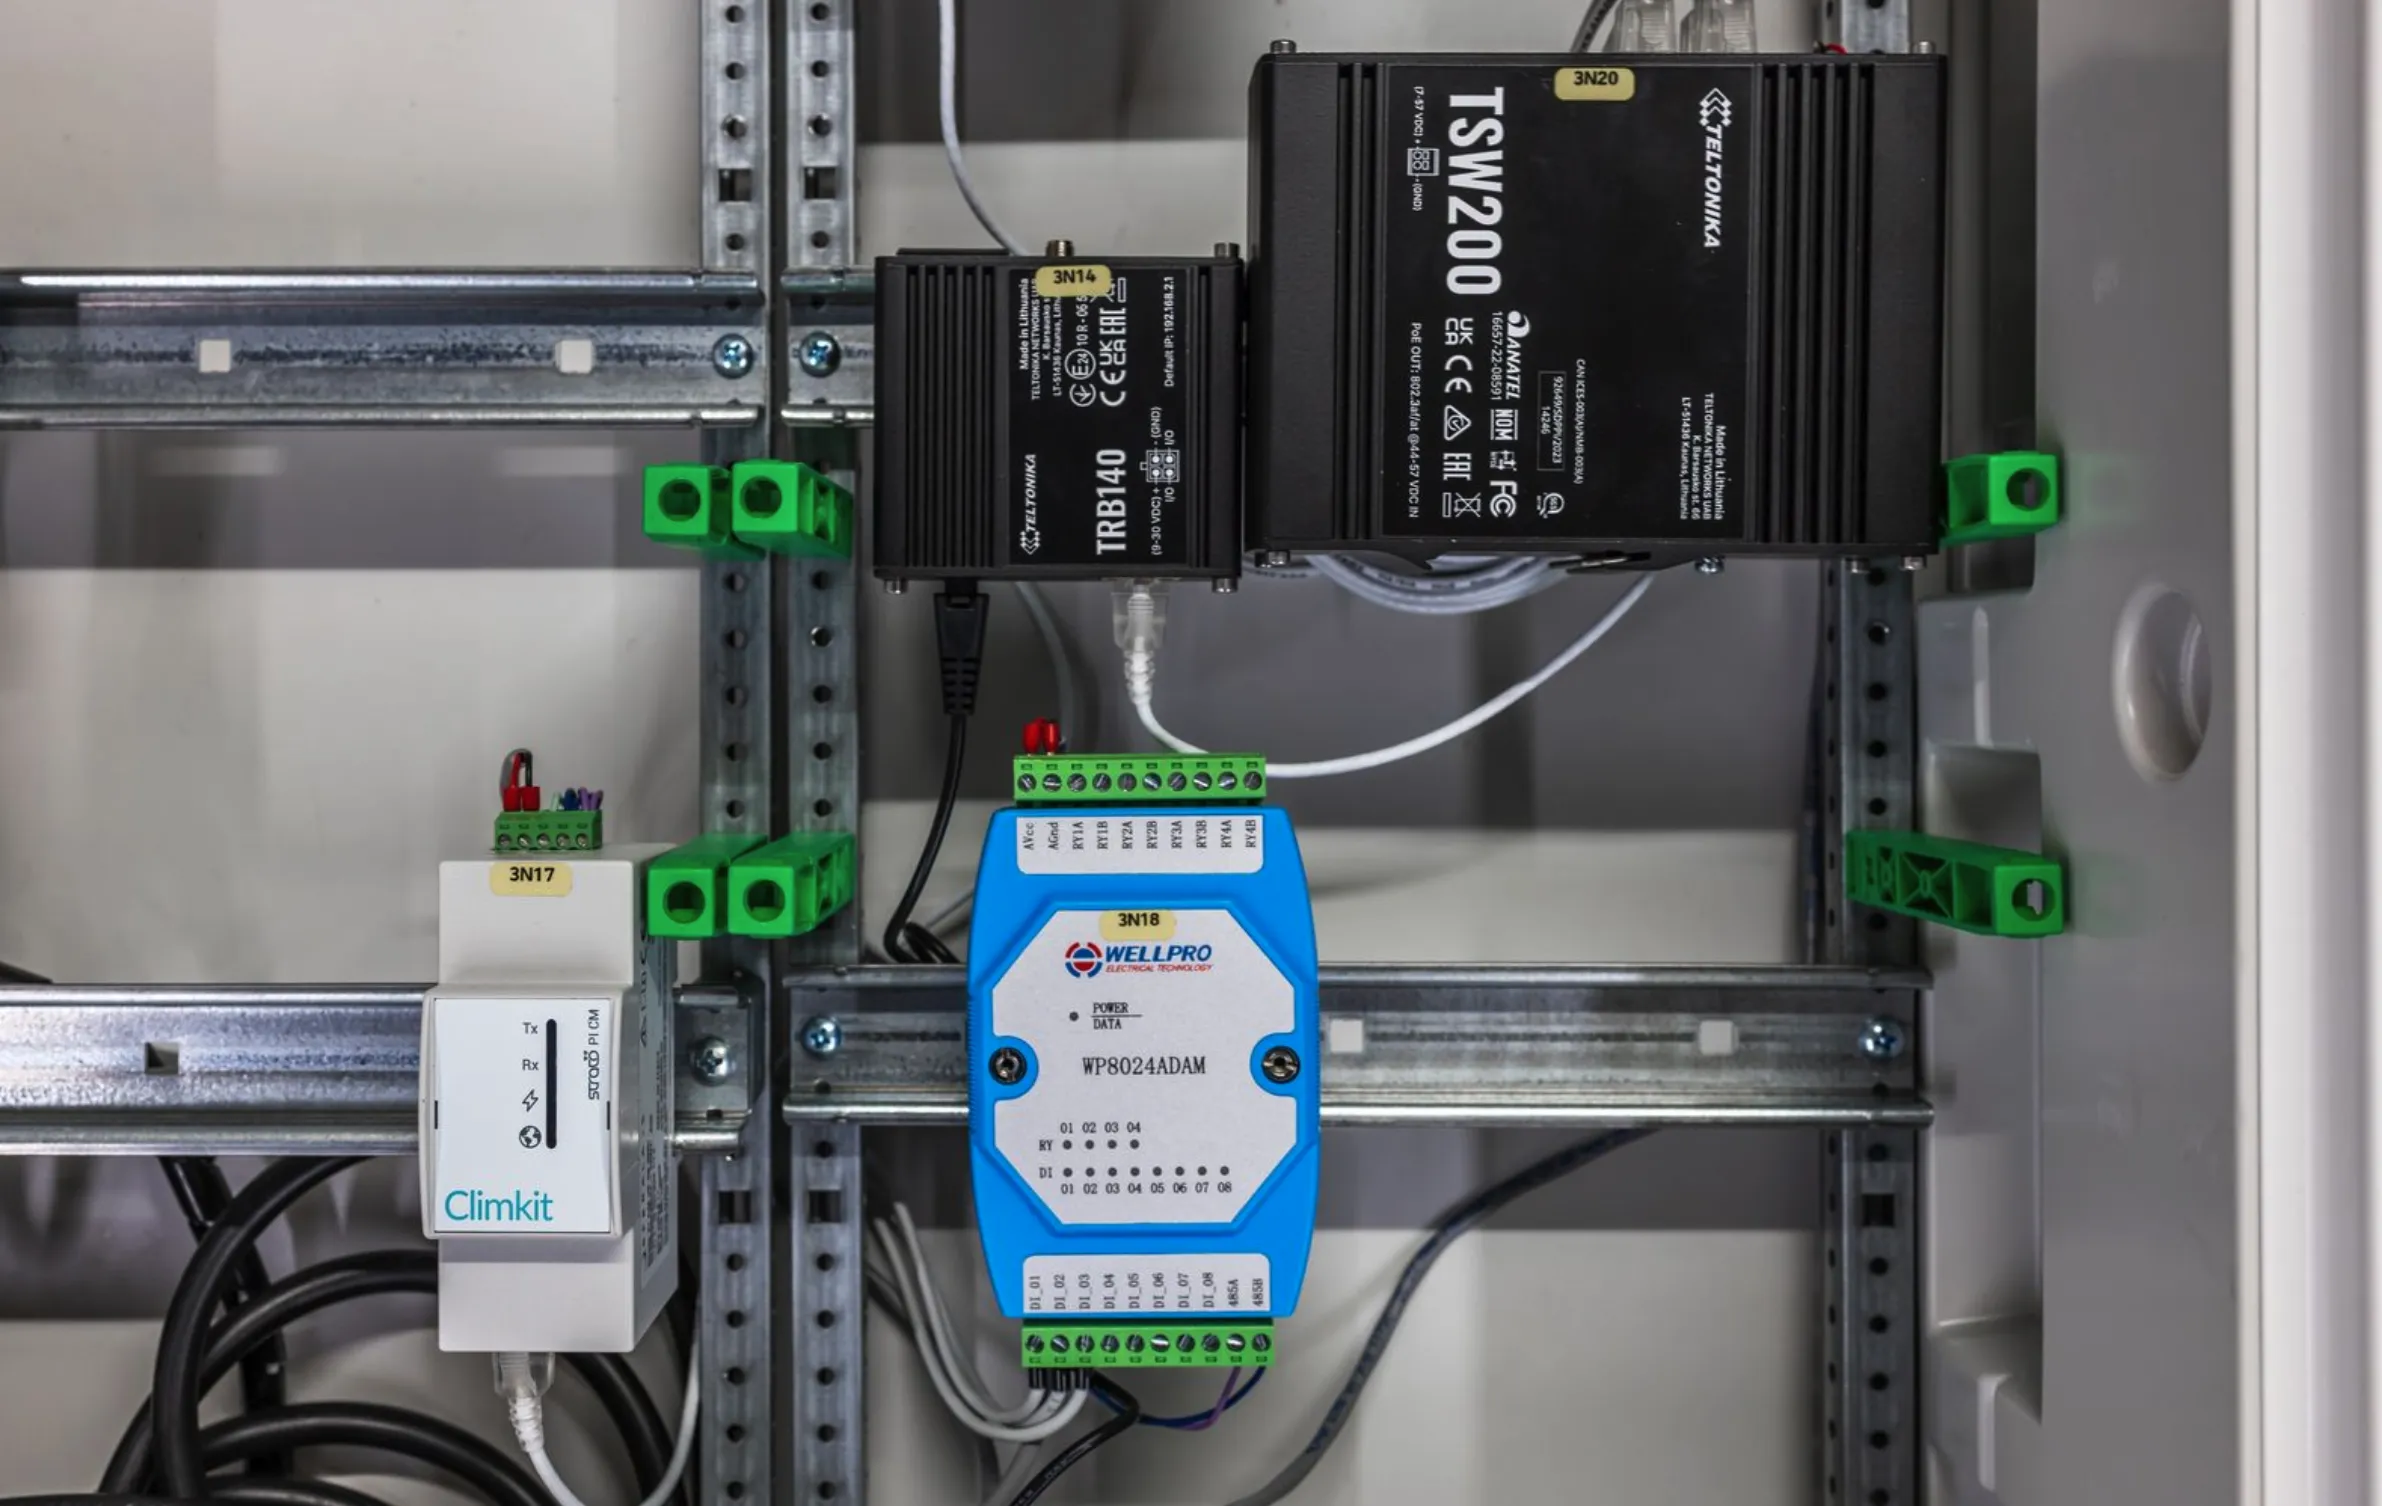
Climkit Gateway installed in an electrical panel with the TRB140 4G router, the TSW200 PoE switch, and the I/O module.
Wi-Fi Access Points
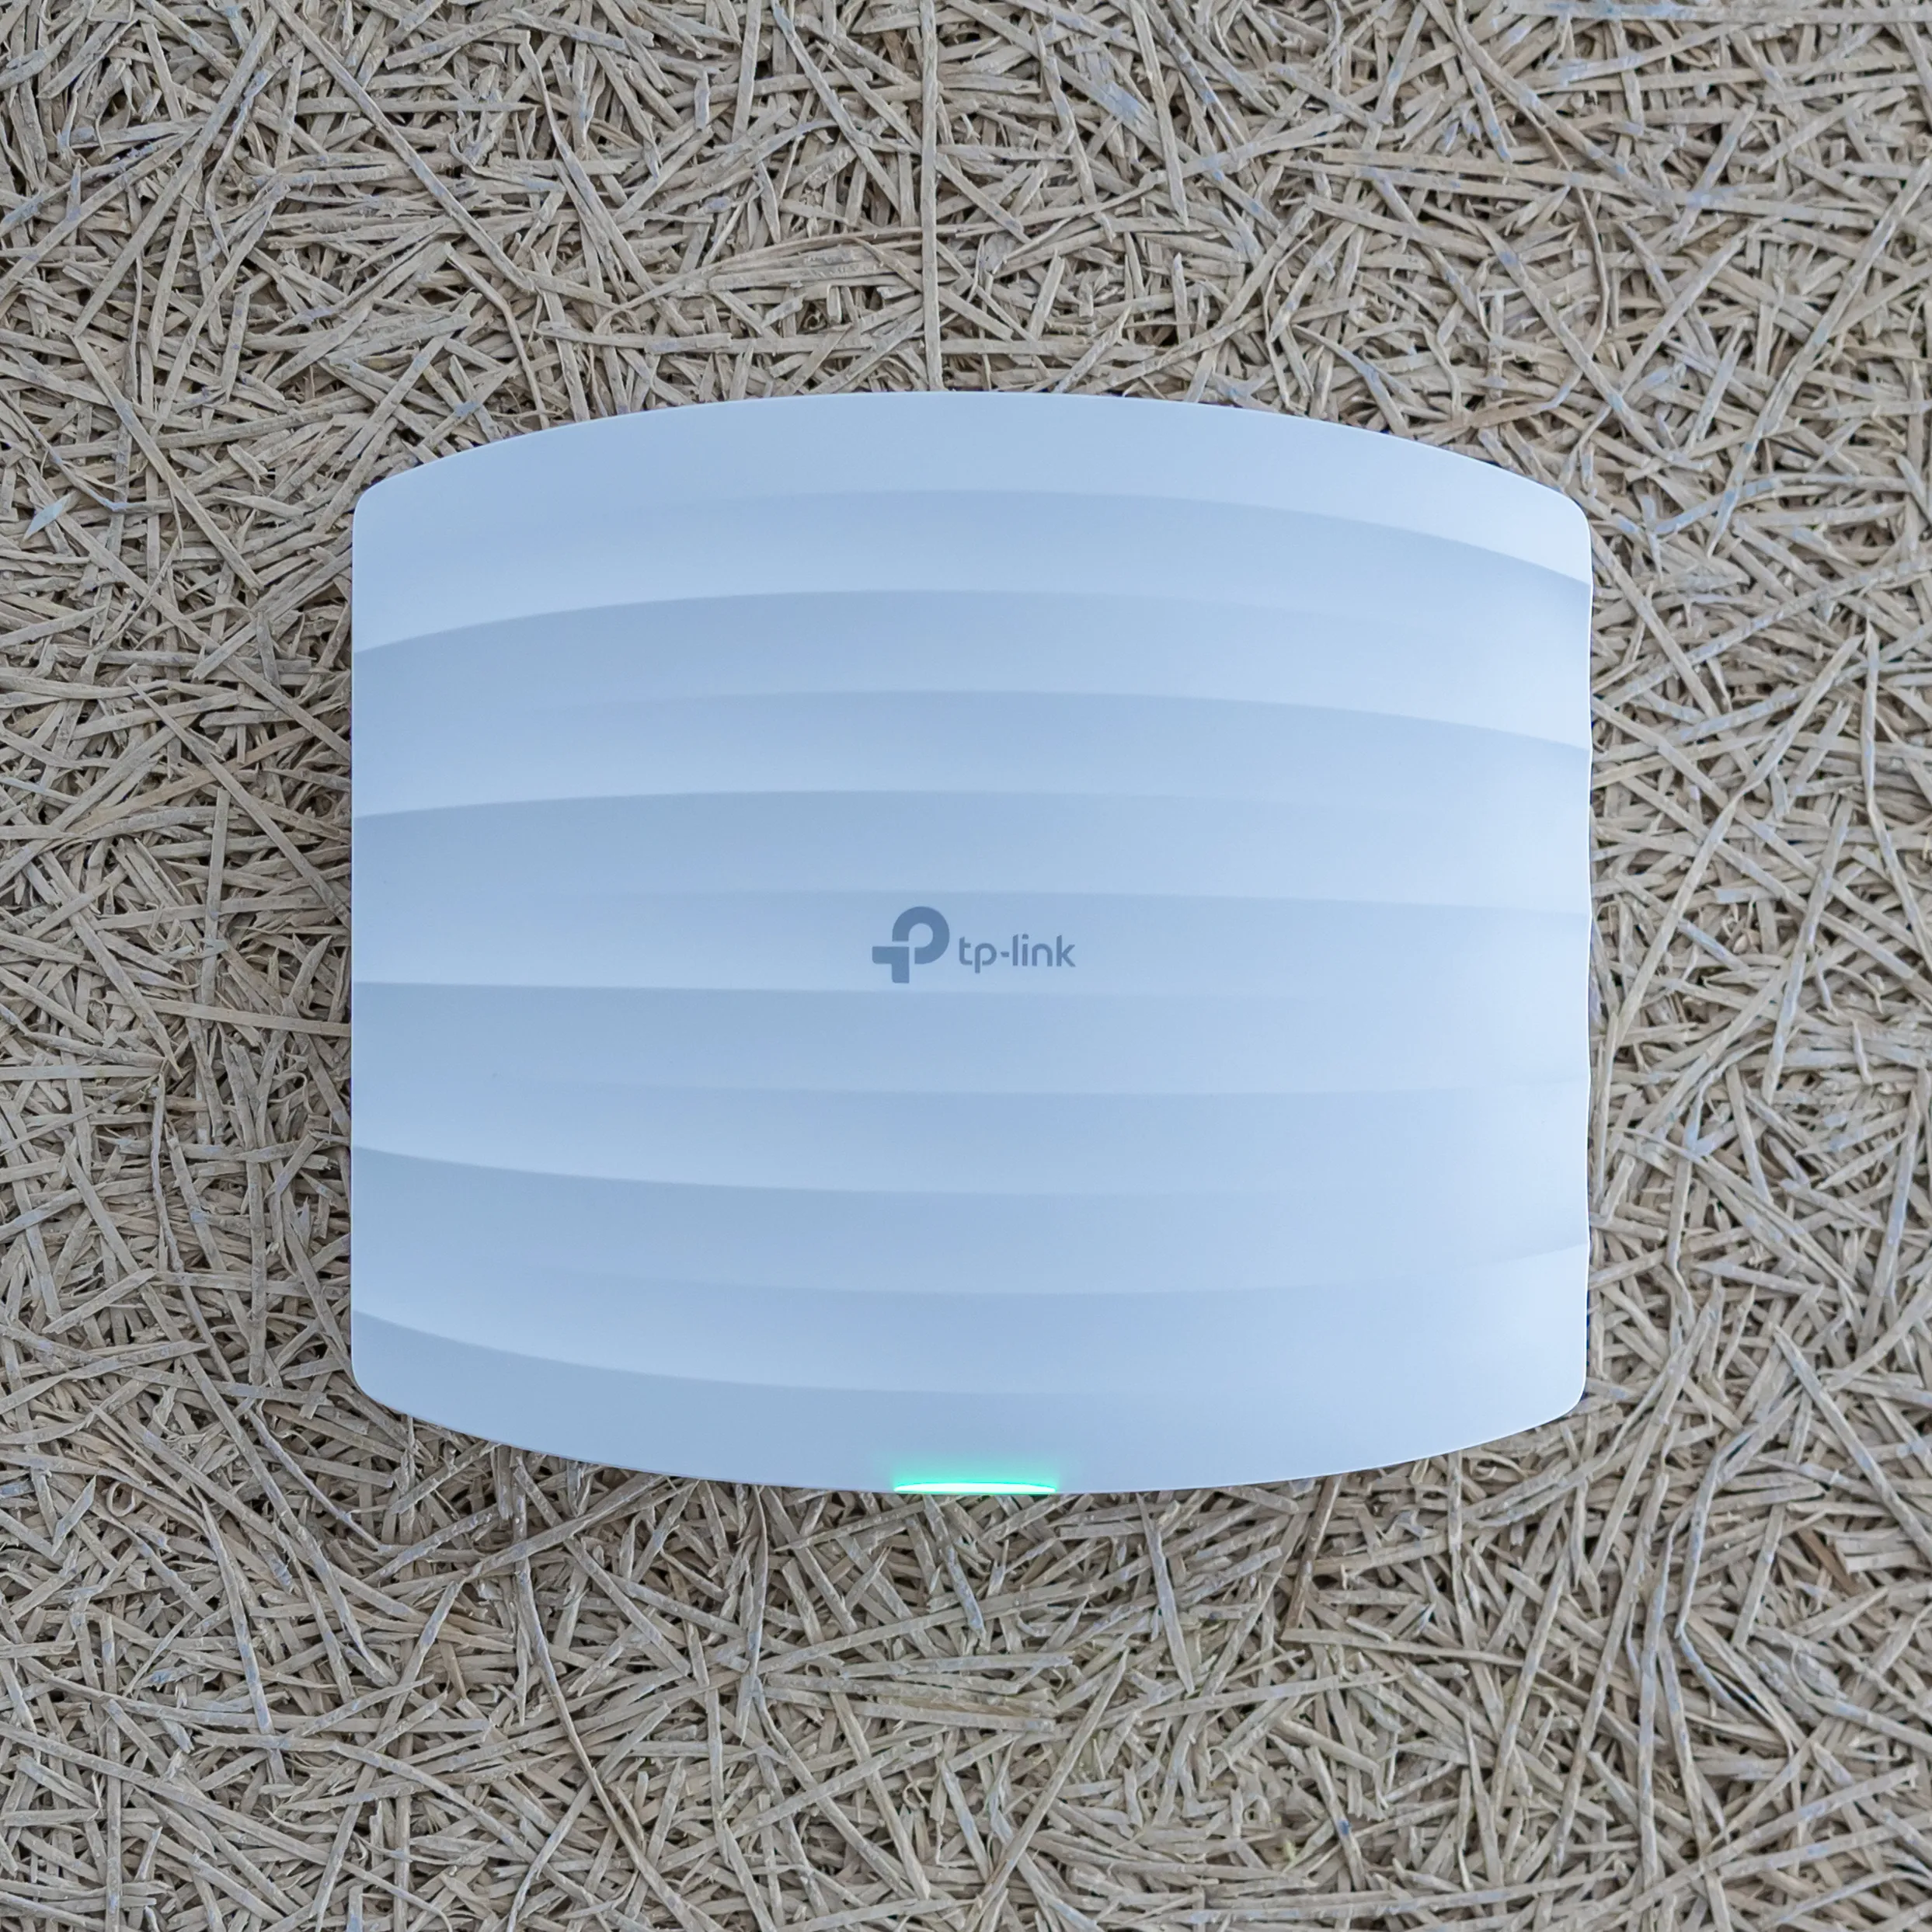
Wi-Fi access points create a wireless network covering the entire car park, allowing charging stations to be connected without additional cabling.
The recommended coverage radius per access point is approximately 15 m, or roughly two rows of 10 spaces facing each other. In practice, obstacles (walls, materials, vehicles) significantly reduce range. To ensure a stable and redundant connection, a minimum of 2 access points is systematically provided. As a guide, an 80 to 100-space car park requires 4 to 6 access points, depending on the layout and obstacles present.
Wi-Fi Access Point Controller
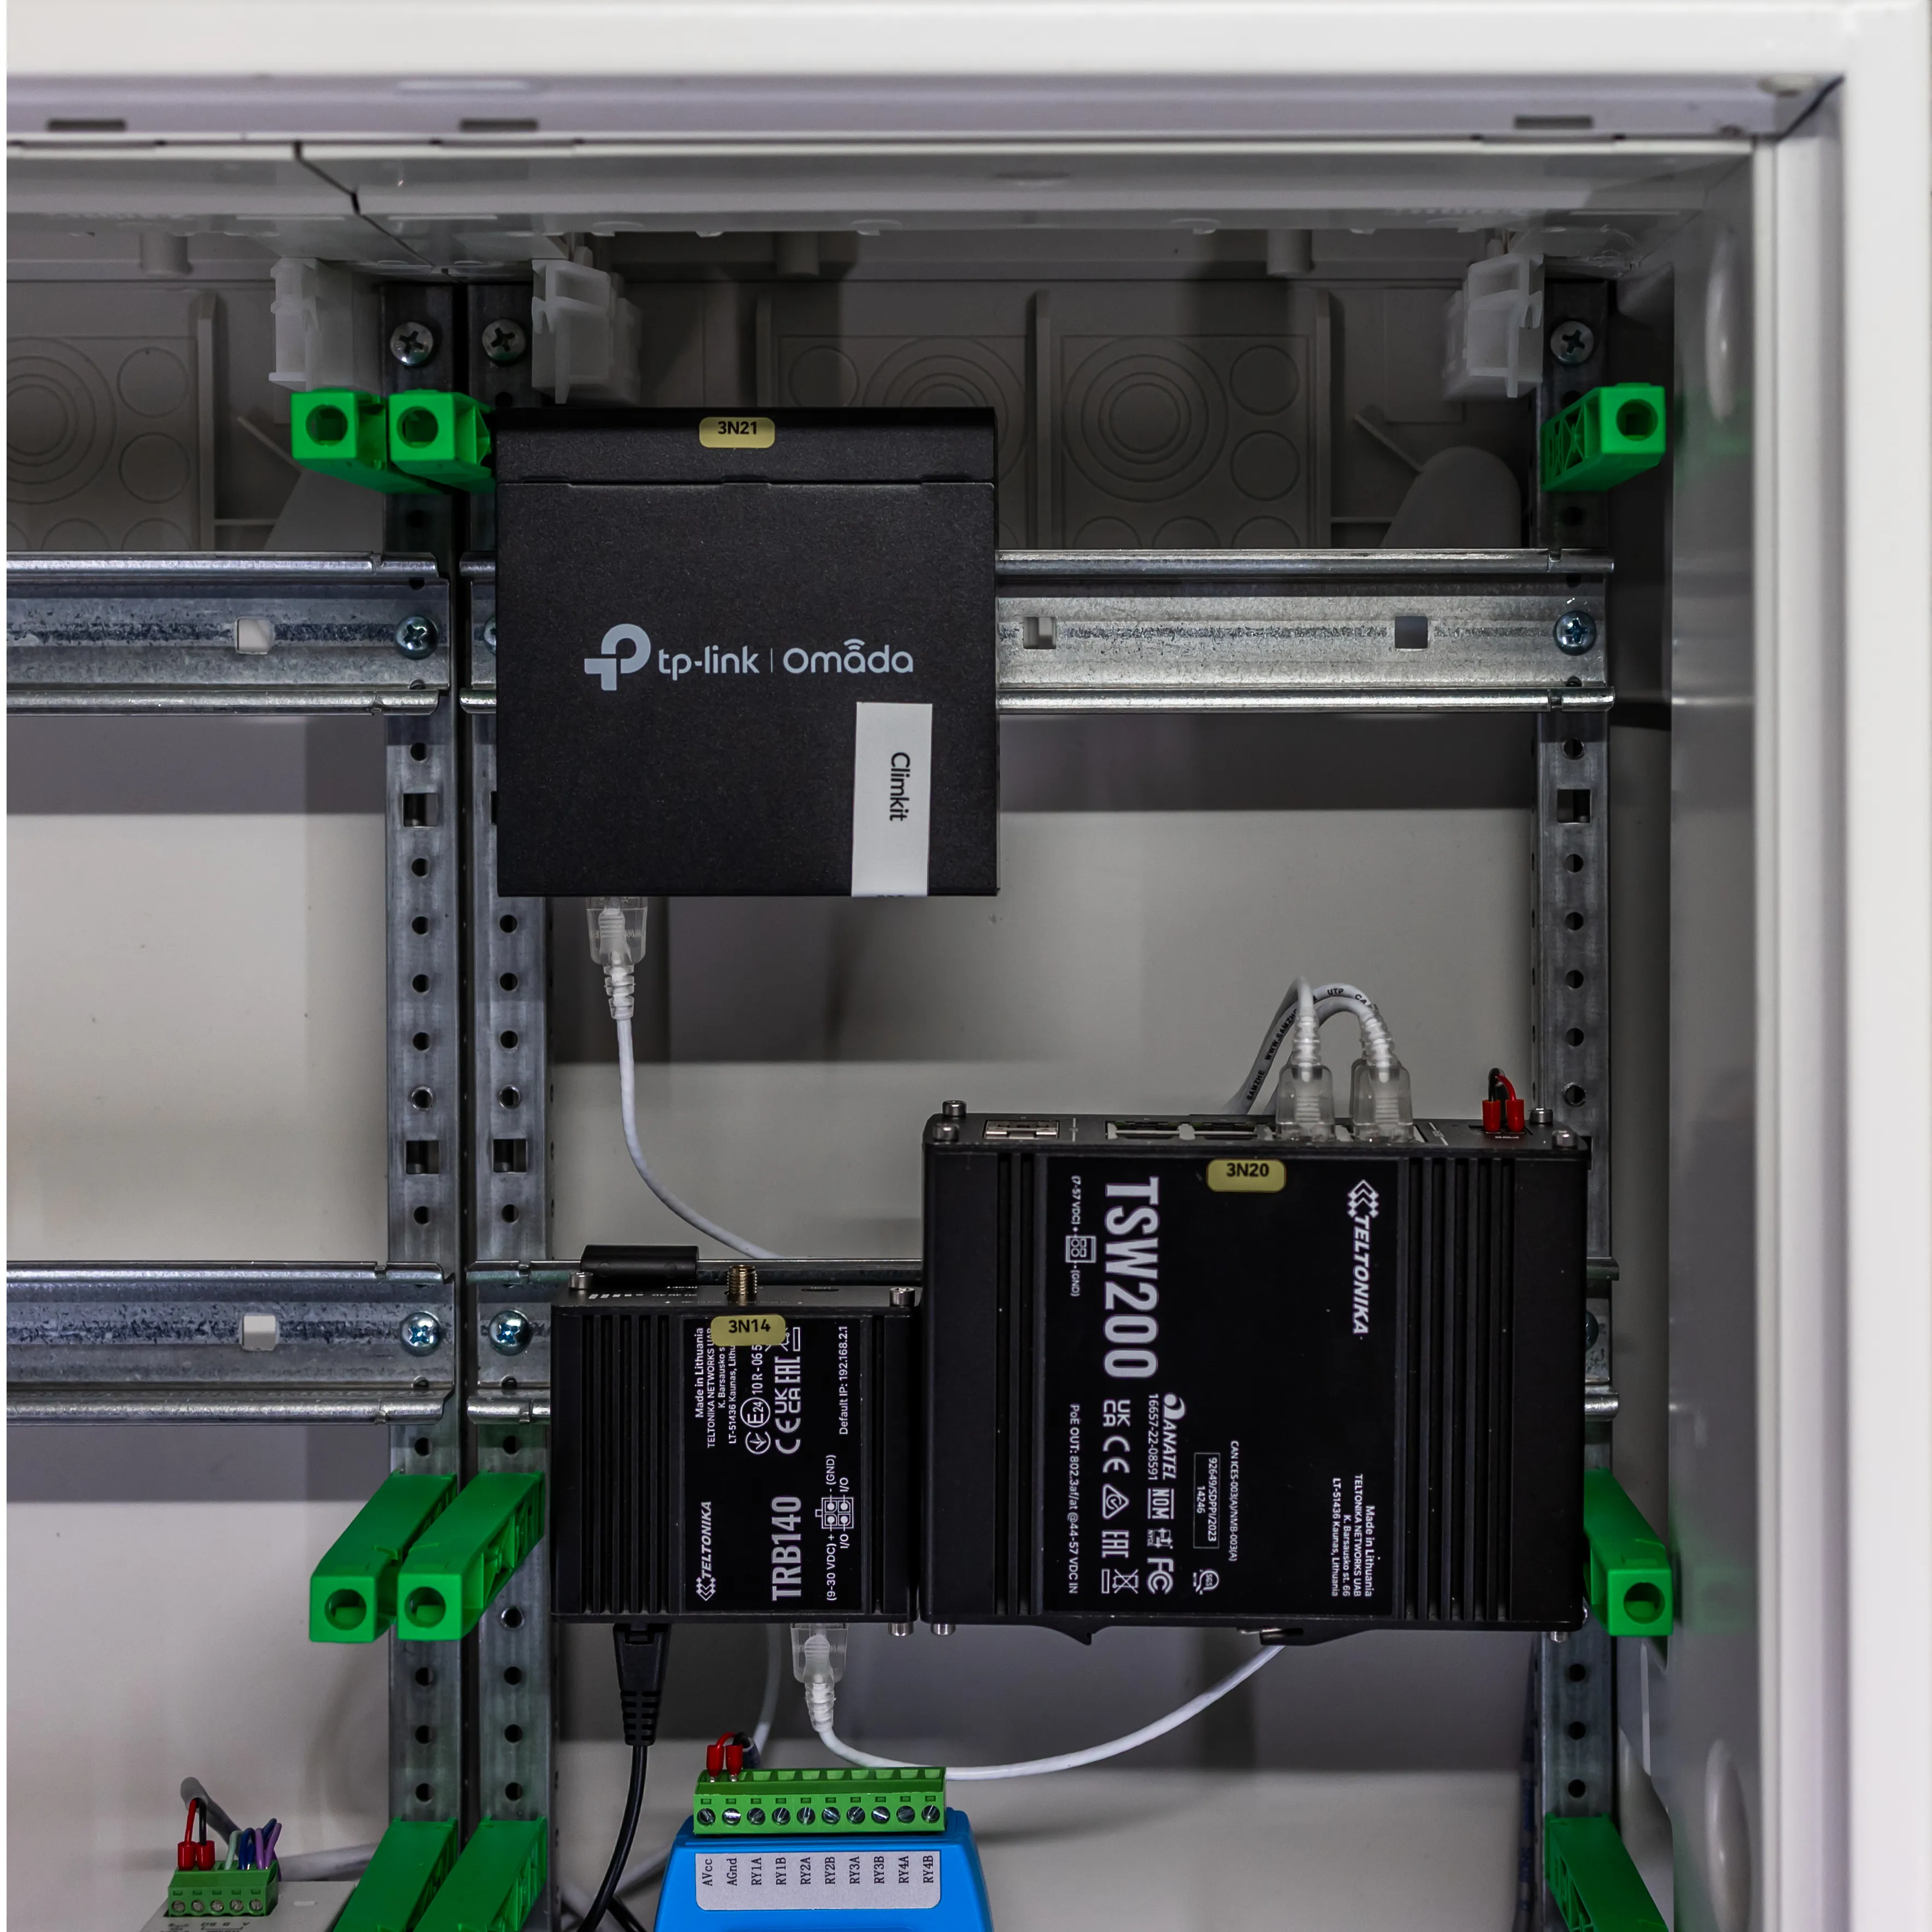
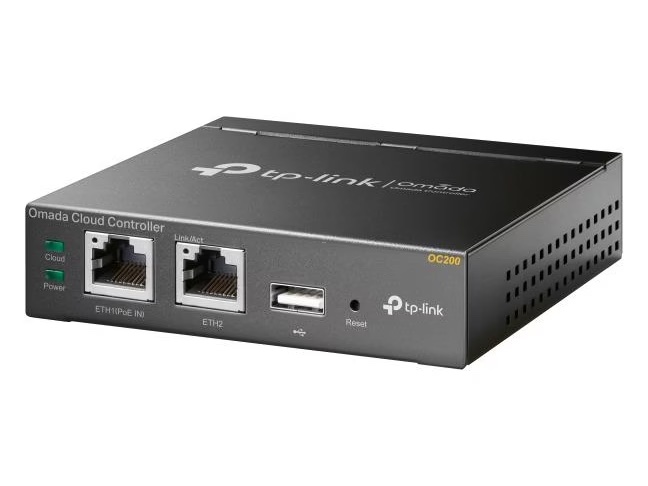
The TP-Link Omada OC200 controller optimizes the Wi-Fi network and manages device connections to the various access points.
It is easily installed on the DIN rail in the electrical panel and is powered exclusively via PoE from the PoE Ethernet switch.
It also generates alerts in the event of an access point failure or areas insufficiently covered by the Wi-Fi signal.
Relay I/O Module
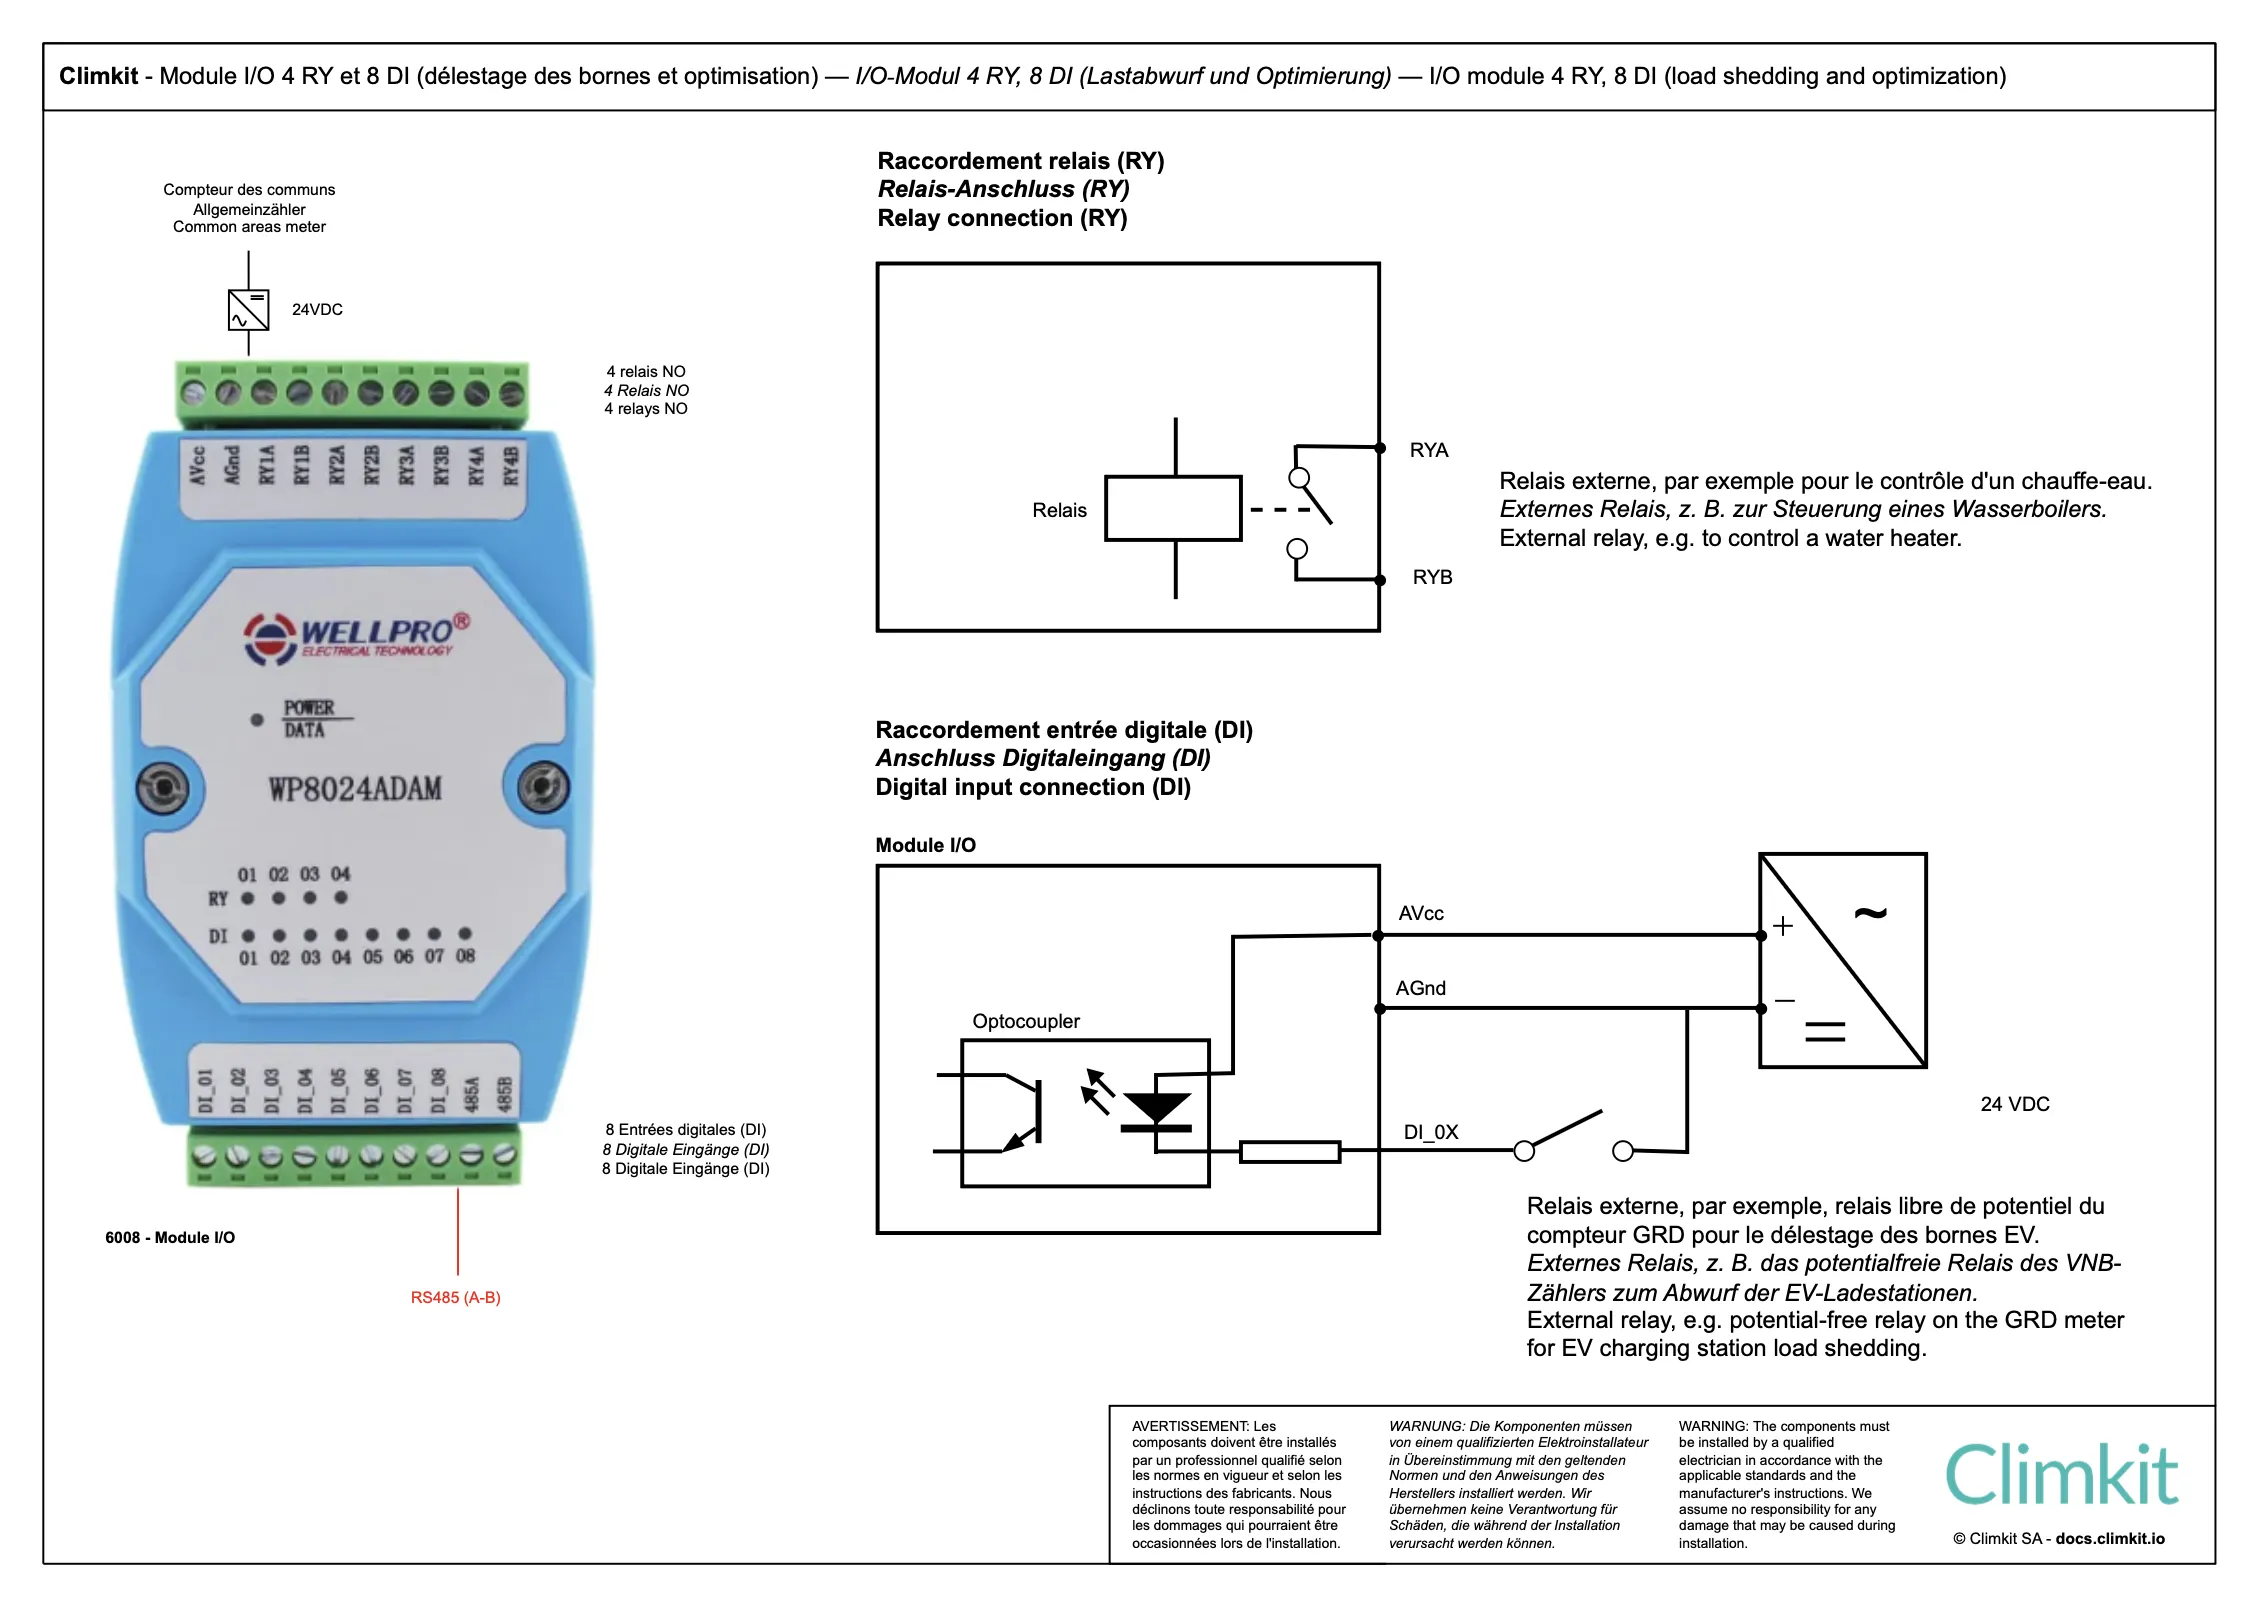
The WP8024 I/O module is delivered with a 24V DC DIN rail power supply and connects to the Climkit Gateway via RS485-Modbus.
Digital input no. 1 is connected to the charging station load shedding relay on the DSO input meter: when the meter opens the relay, the input is deactivated and the Gateway immediately cuts off electric vehicle charging.
Delivered with 24V DC DIN rail power supply.
2. Electric vehicle charging station
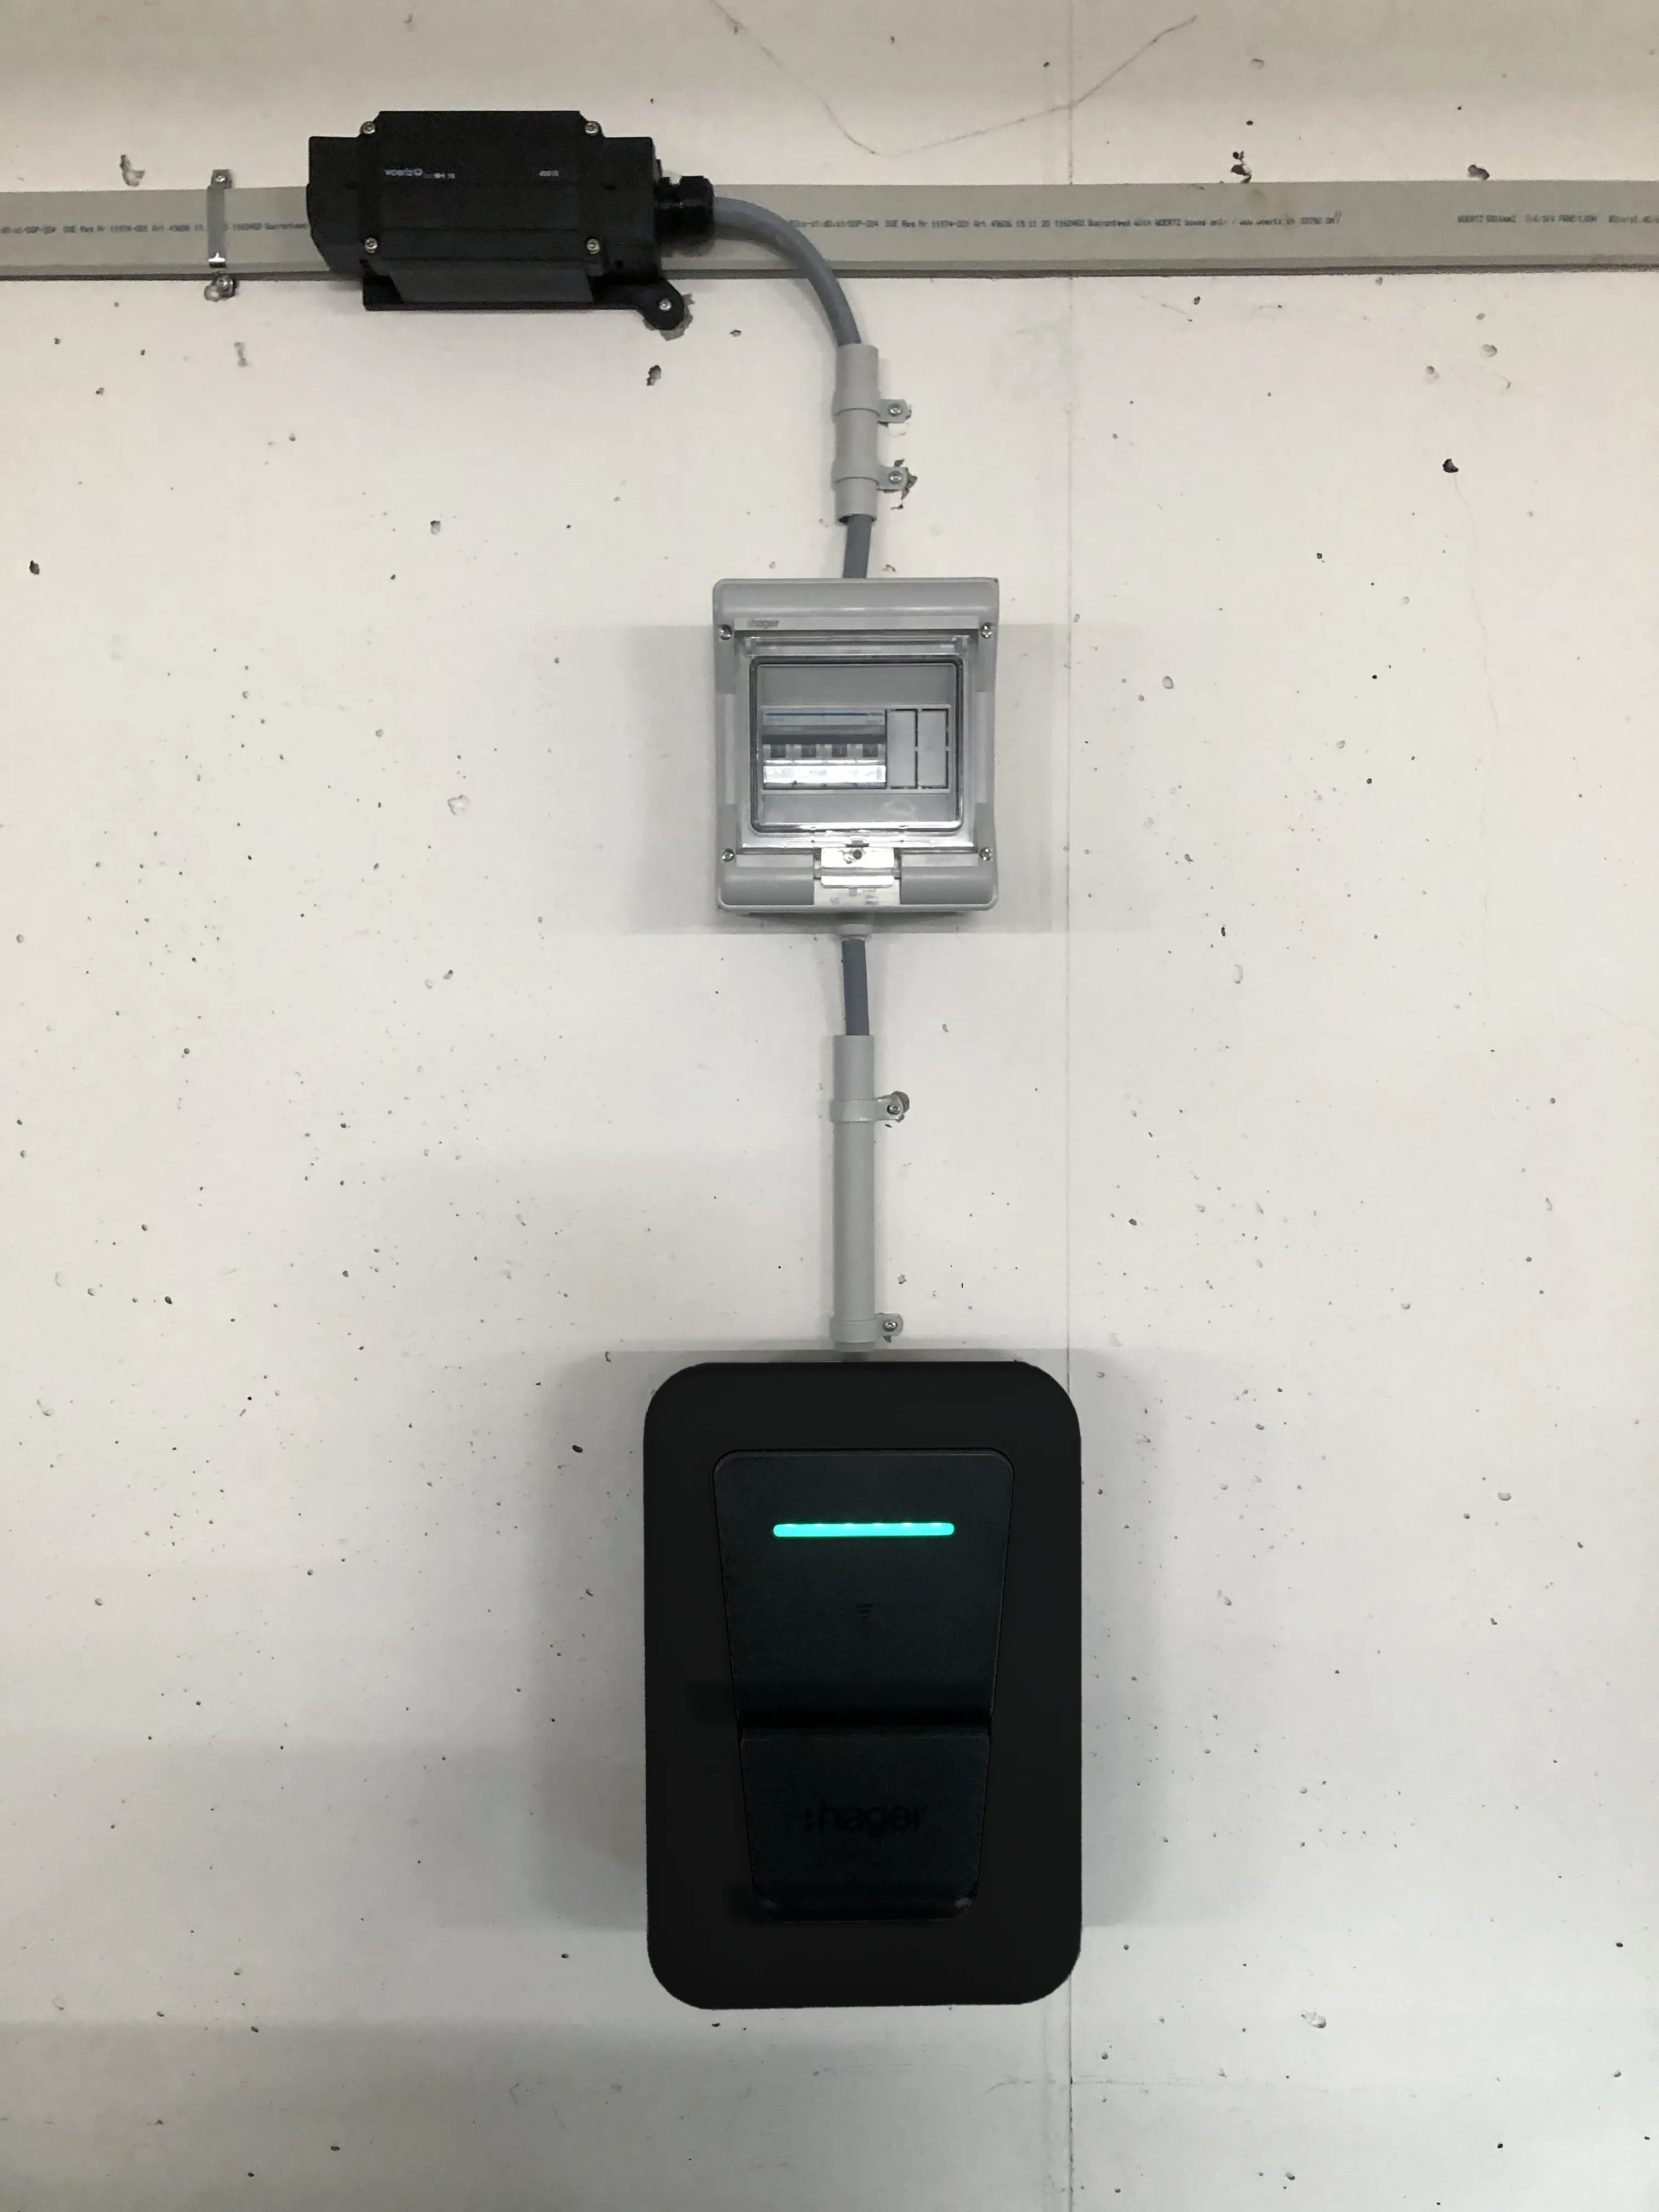
Climkit provides a 22 kW charging station, depending on availability the ABB Terra AC or the Hager Witty Pro, which can be installed indoors as well as outdoors. It includes all the features of a smart charging station for optimized and flexible charging.
With several hundred charging stations installed and managed by Climkit since 2021, this model has proven itself through its ease of installation, durability, and versatility (collective car parks, buildings, businesses, public charging stations, residential installations).
Before delivery, Climkit ensures complete preparation of each charging station: firmware update and configuration according to the specific needs of each site. Climkit technicians are trained and ready to provide all necessary support for installation and commissioning.
Thanks to its extensive stock, Climkit can deliver the required number of charging stations for each project within a few days.
During the operational phase, management and customer support are simplified with a charging station provided by Climkit, regardless of the model, as any issue can be handled directly by Climkit under warranty without involving the installer.
Charging station technical characteristics
- Maximum power of 22 kW
- Wi-Fi, Ethernet, or 4G connection
- RFID badge reader
- Integrated energy meter
- Communication via standard OCPP protocol
- Daisy-chain Ethernet connection possible
Features with the Climkit solution
Combined with the Climkit solution for electricity management, the charging station offers:
- Dynamic management of charging power according to available power
- User management via RFID badges and individual billing of consumed energy
- Self-consumption optimization by charging exclusively with generated solar energy
Hager Witty Pro
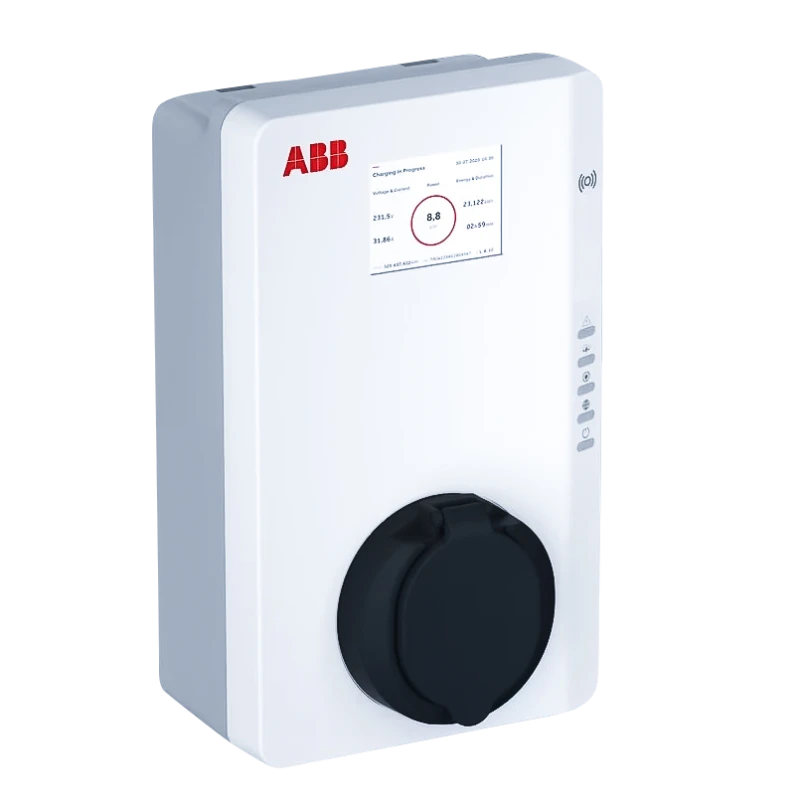
ABB Terra
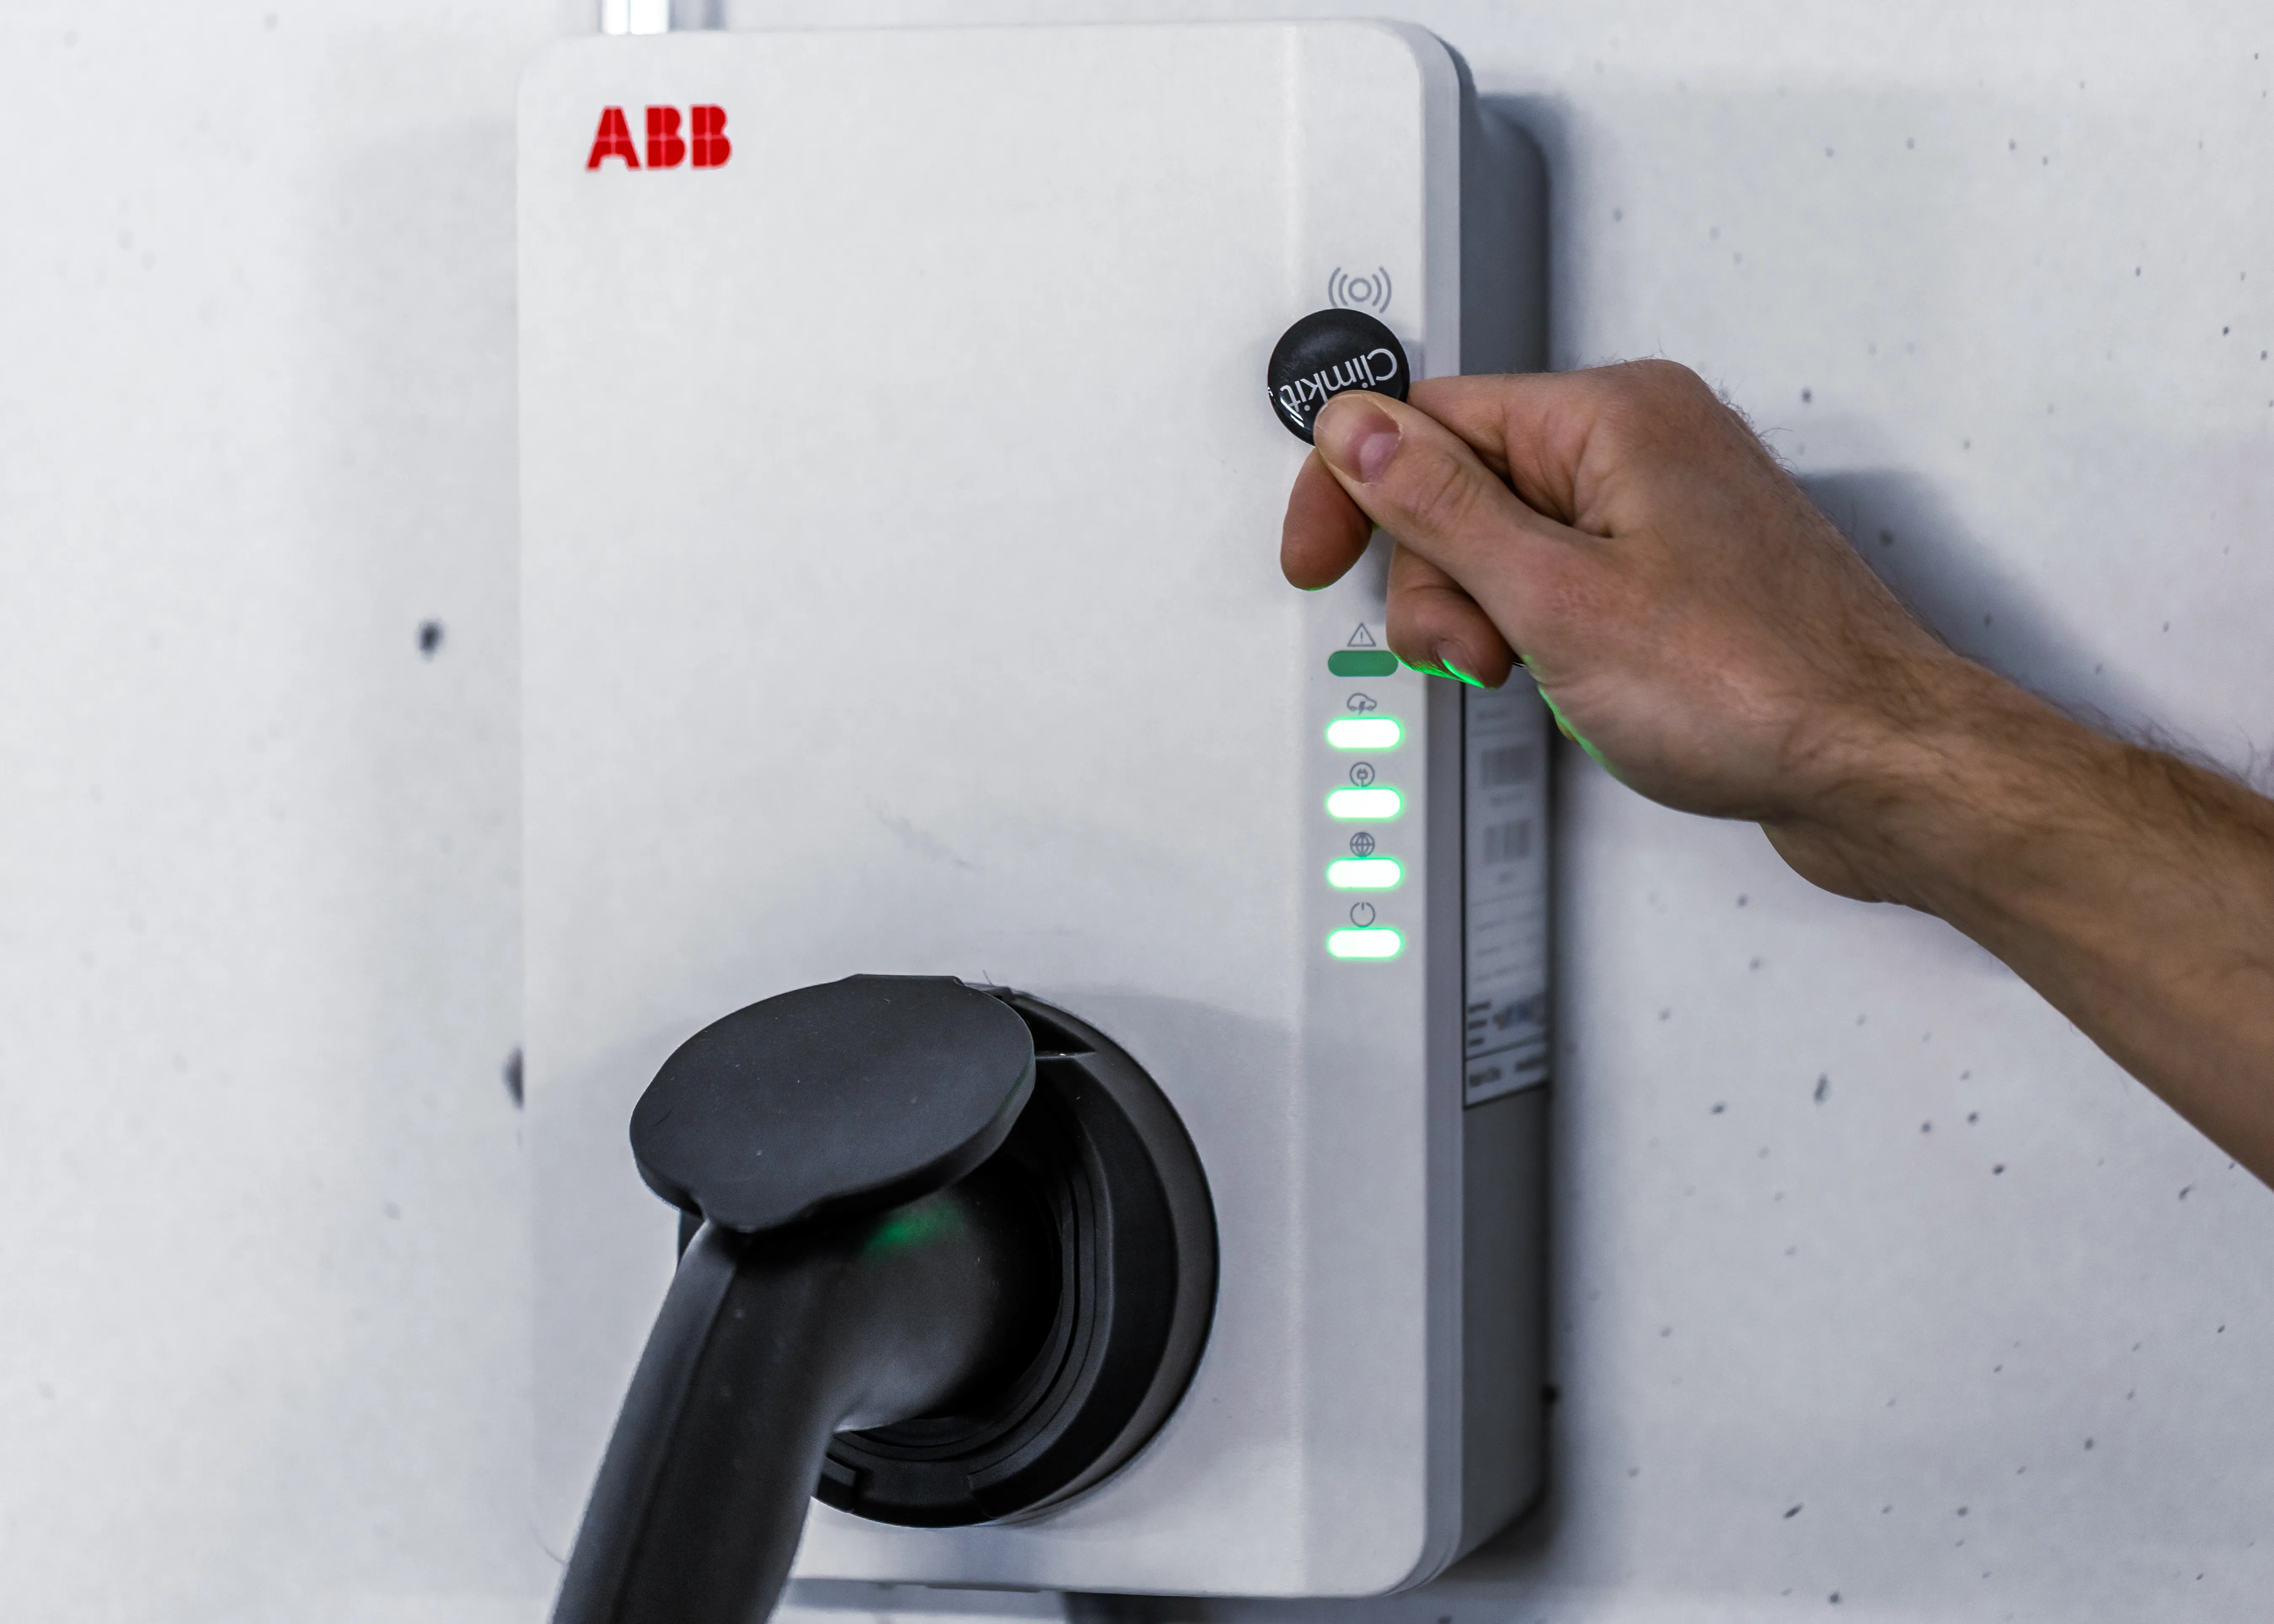
RFID badge access
Electrical connection
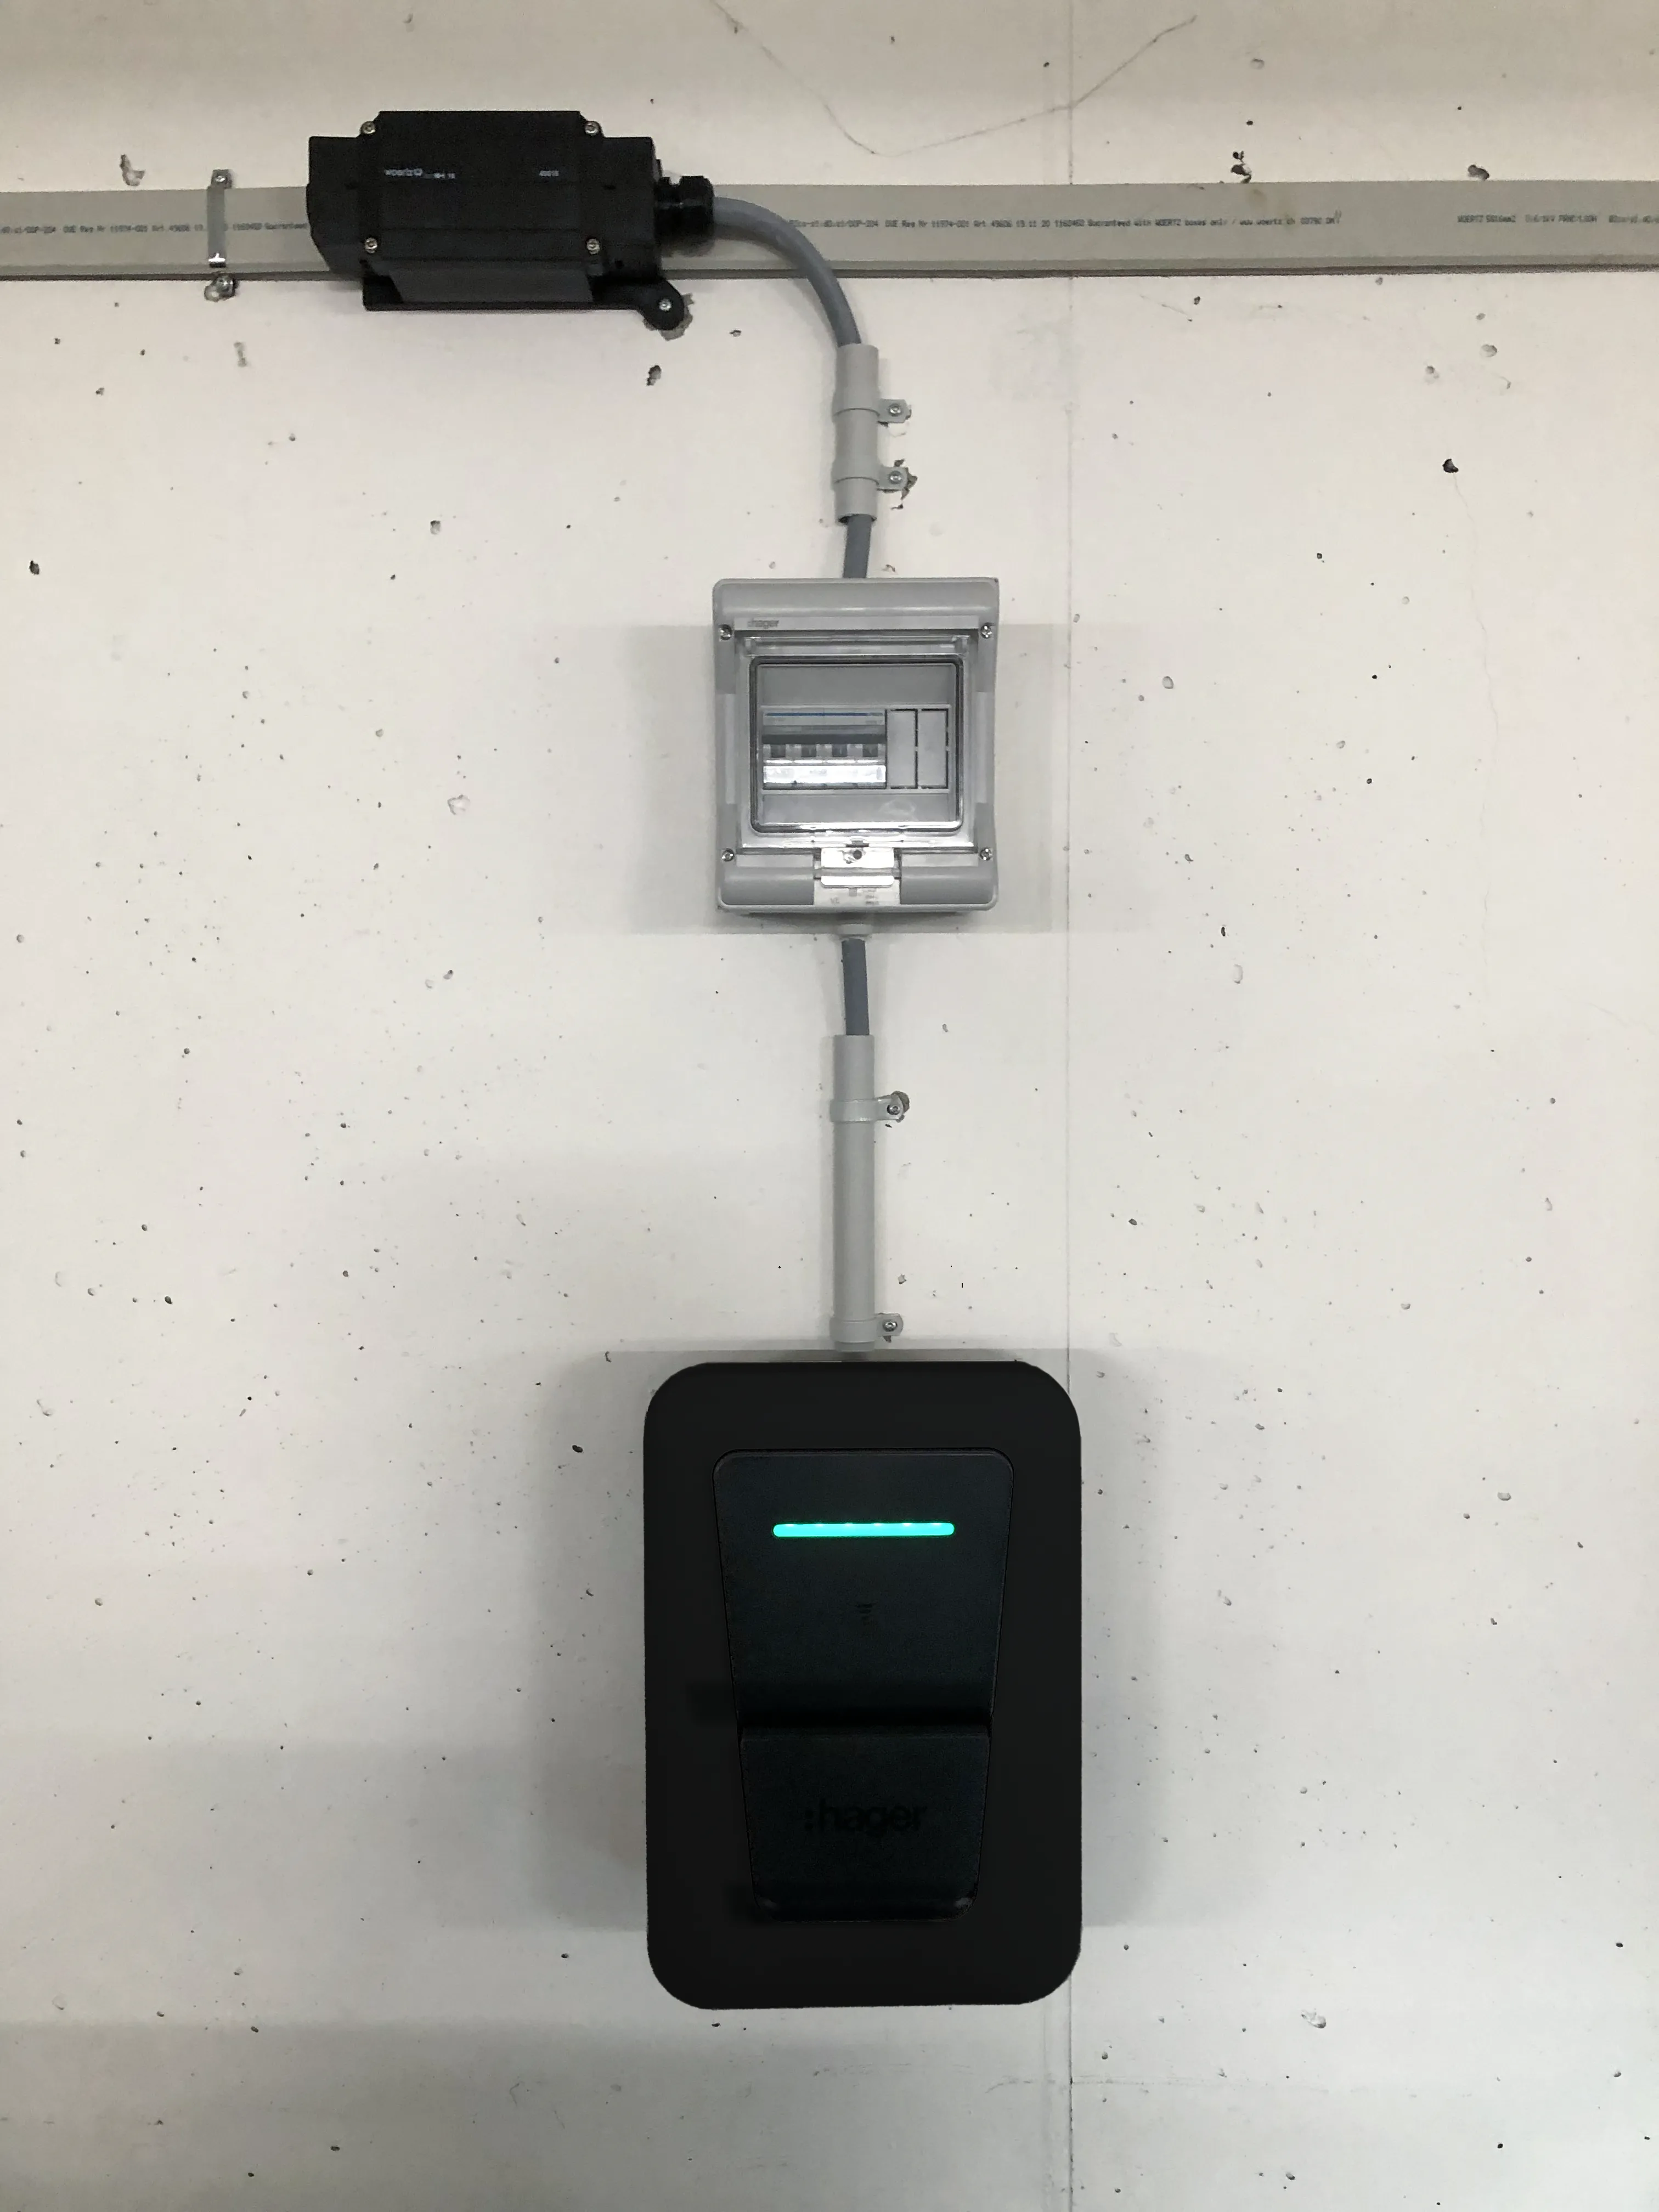
The charging station is connected to the flat cable via a junction box specific to the flat cable manufacturer.
The charging station can be configured to 22 kW (32A) maximum, or limited to 25A, 16A, or 10A depending on requirements.
A 3P+N Type A residual current circuit breaker is installed for each charging station, sized according to the cable cross-section and the selected maximum amperage. Expensive Type B or EV circuit breakers are not required. For the Hager Witty Pro, a standard circuit breaker is sufficient: 30 mA residual current protection is integrated into the charging station (reference XVL122SCH). The circuit breaker is installed directly in a small enclosure mounted next to the charging station.
IP network connection
The charging station connects to the IP network via Wi-Fi. It is delivered preconfigured with the Wi-Fi network settings (SSID and password) as well as the IP address of the Gateway to which it must connect.
Pedestal and outdoor installation
If the charging station cannot be wall-mounted, it can be installed on a metal pedestal, single or double for two back-to-back charging stations. The pedestal is specific to the charging station model.
The charging station is IP55 certified and can also be installed outdoors.
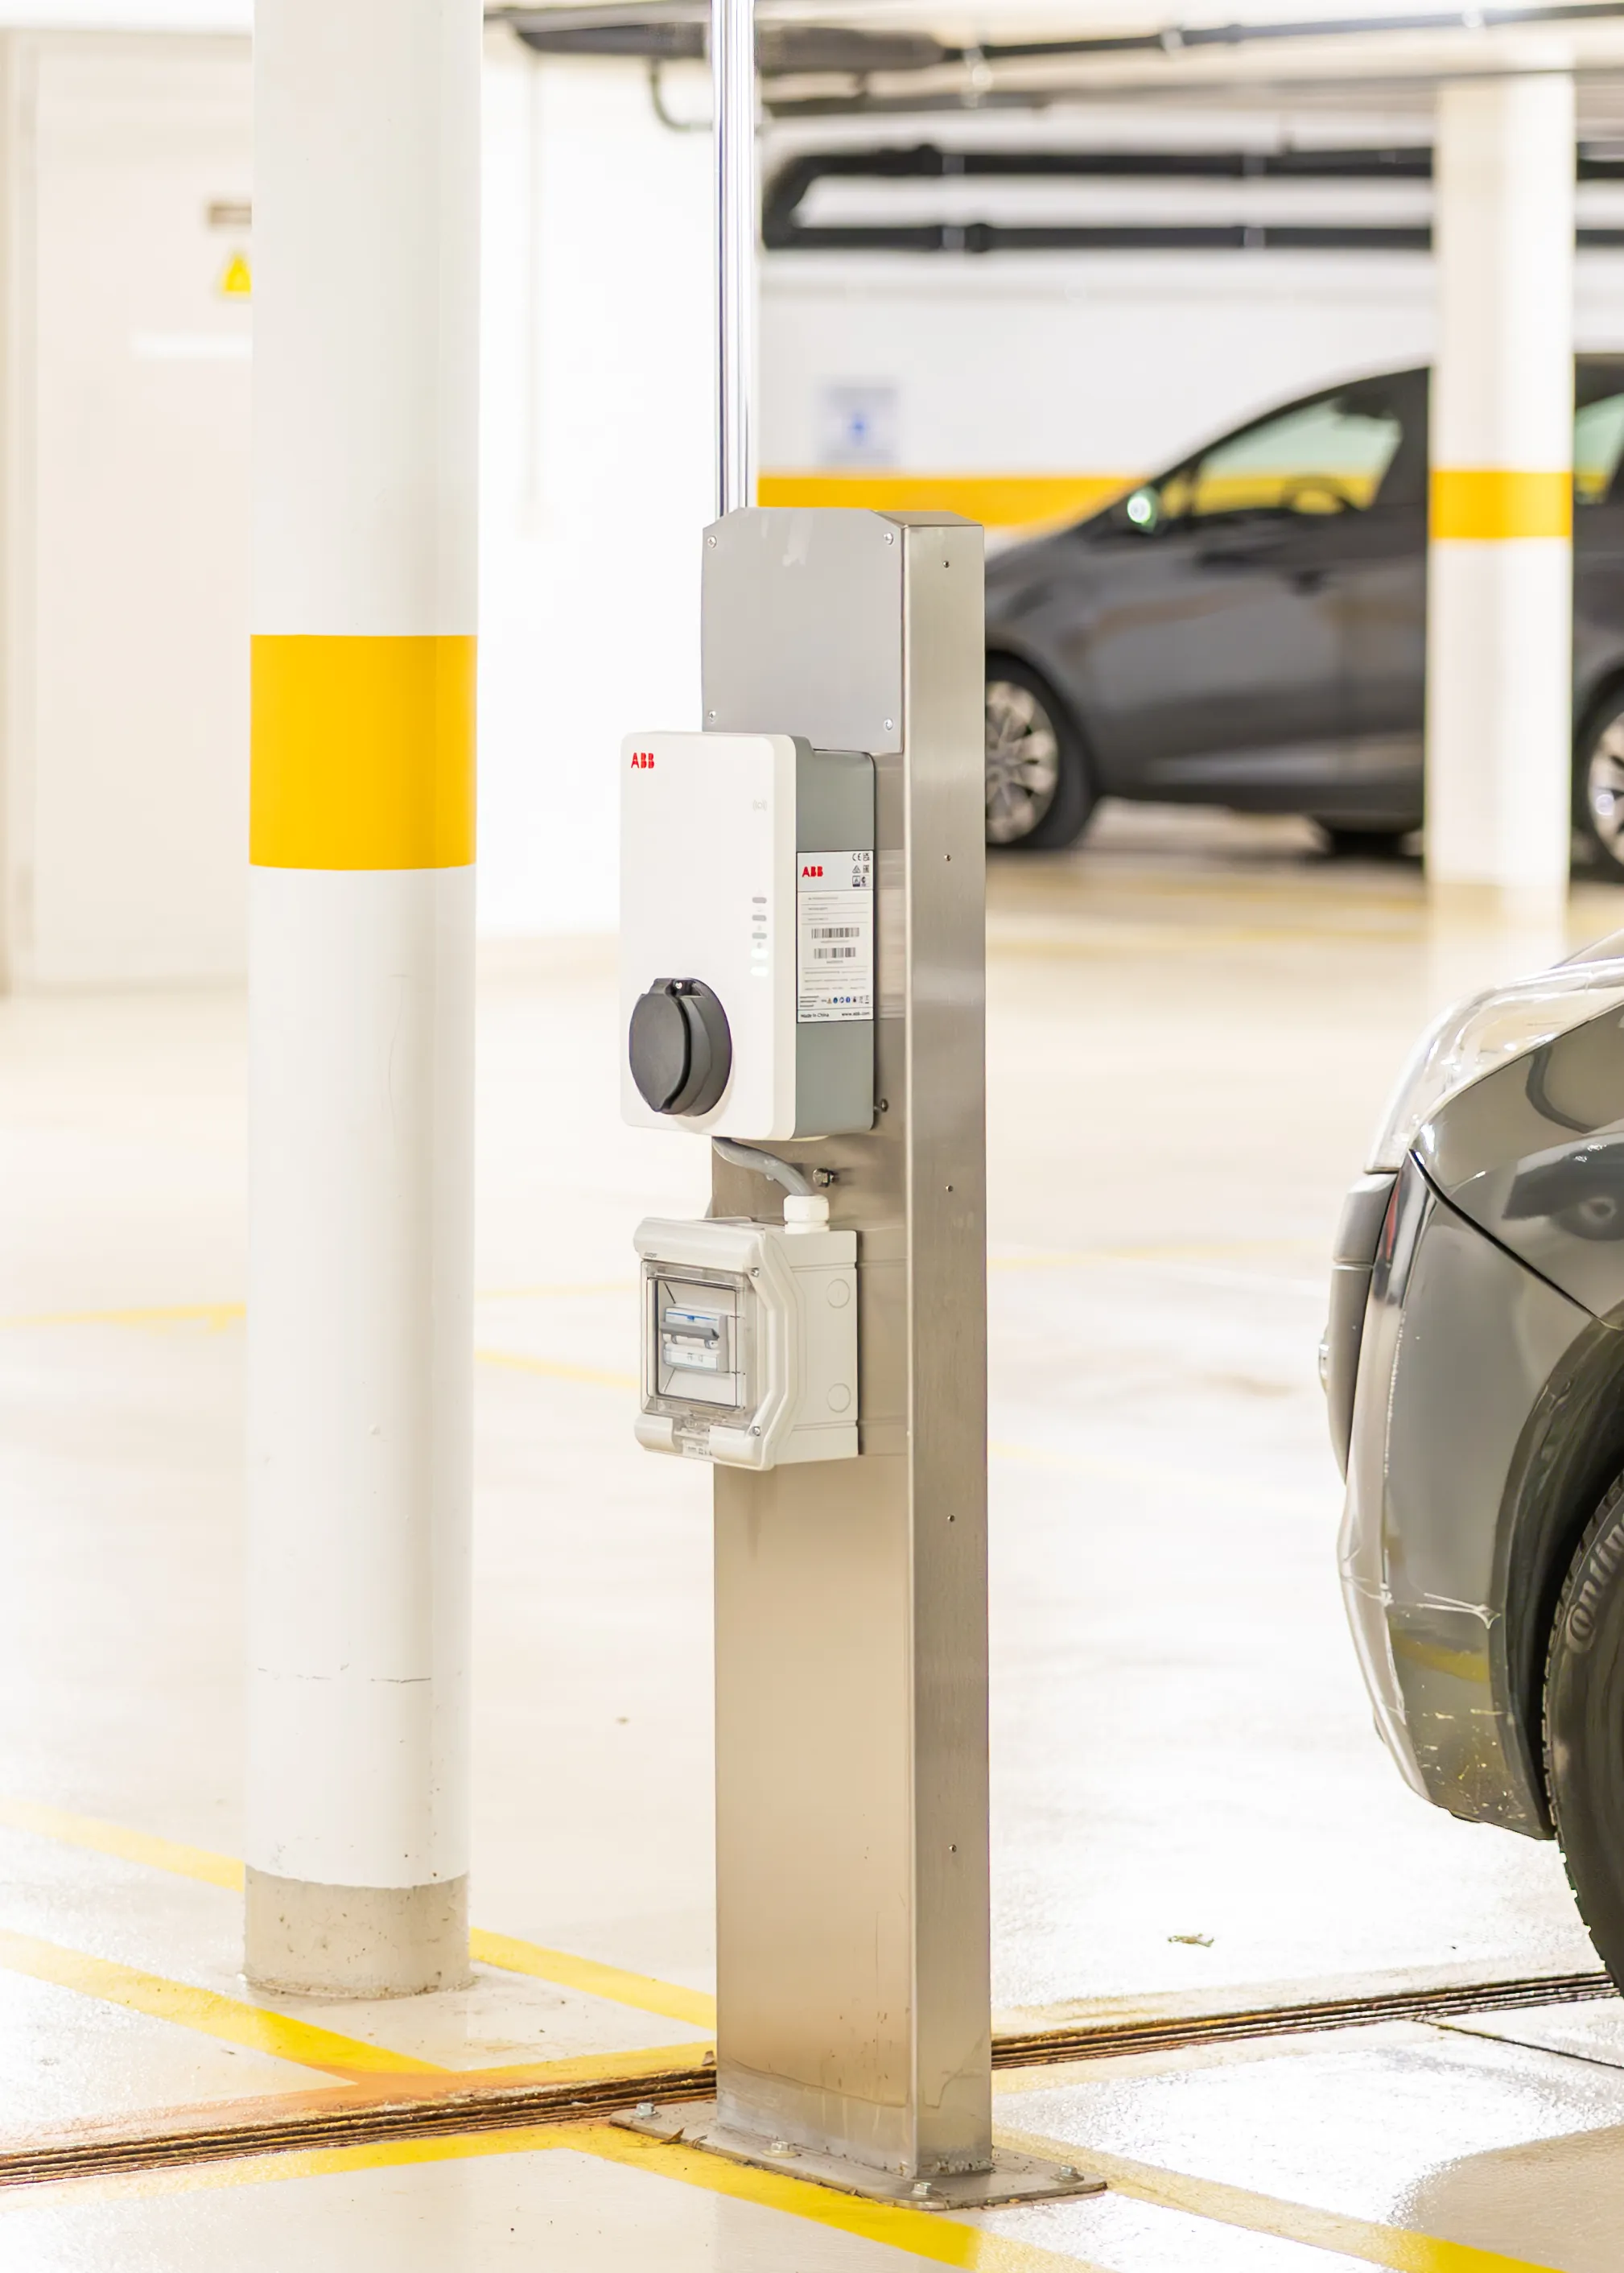
ABB Terra AC Installation Manual
ABB Terra AC - Datasheet (Switzerland)
Terra AC Pedestal Metal Stand Manual
Hager Witty Pro - datasheet
Hager Witty Pro - installation manual
Public charging station
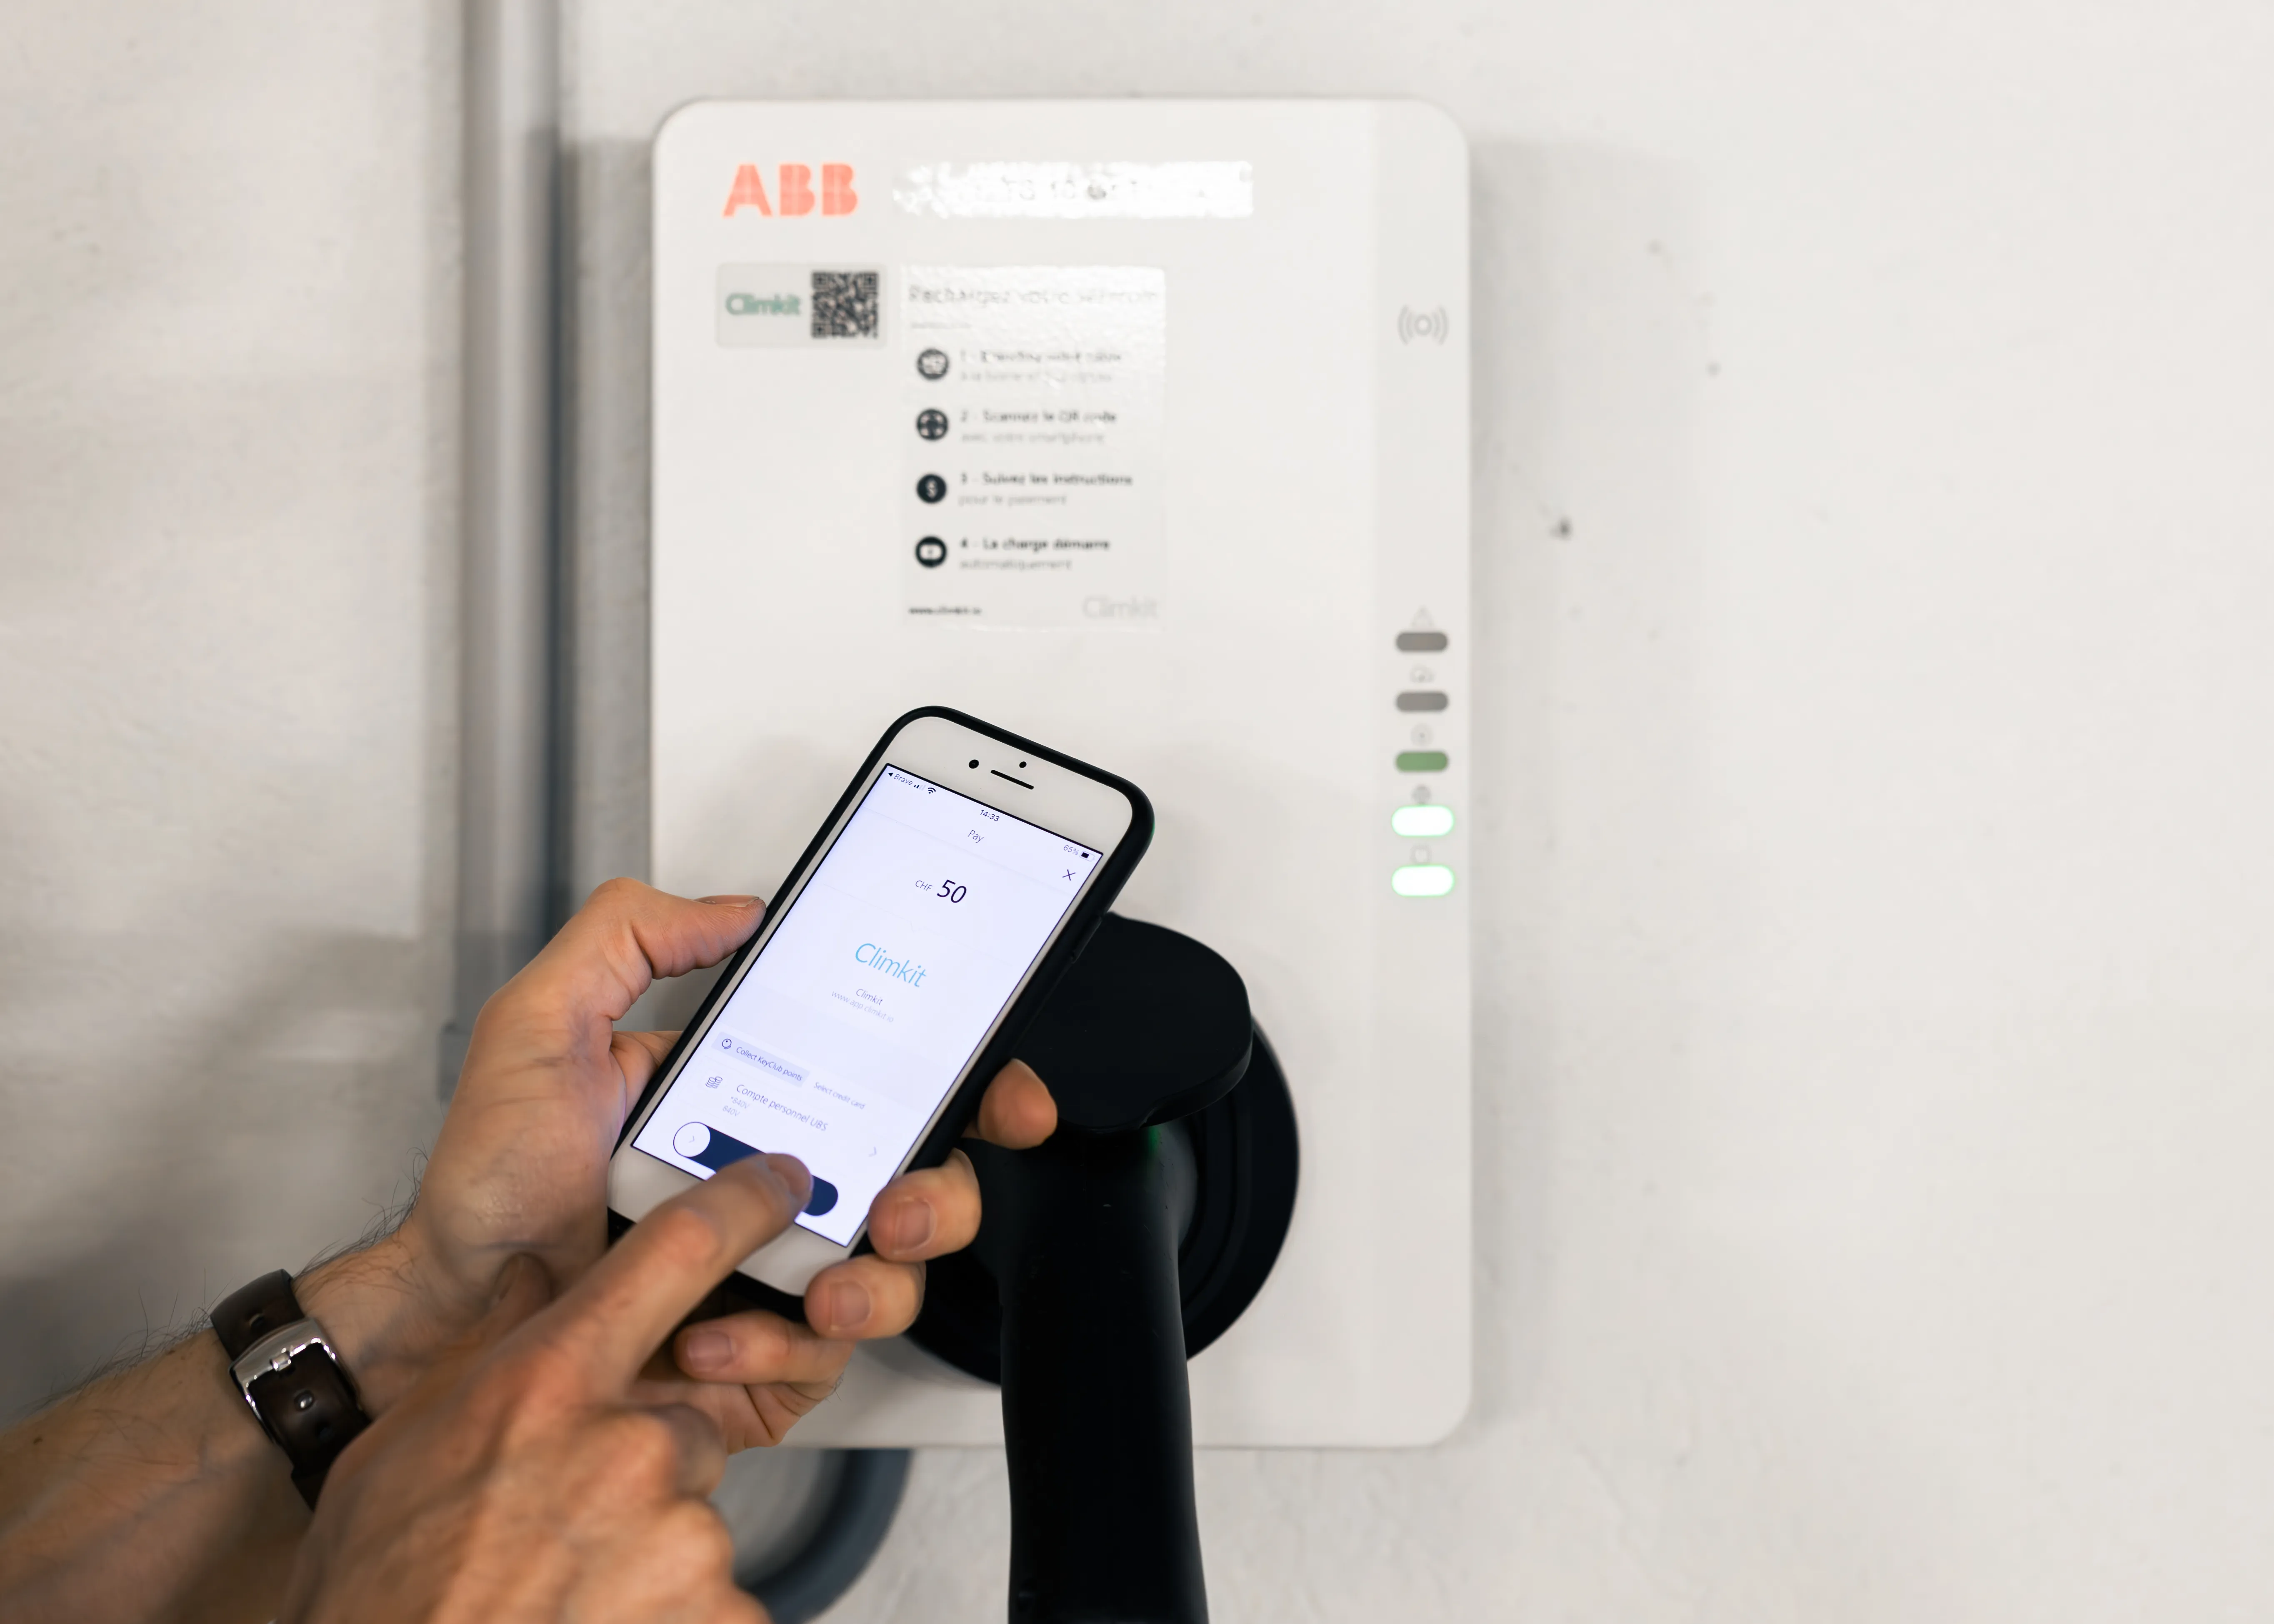
Each charging station can also optionally be activated in public charging station mode to allow visiting users to pay via TWINT by scanning the QR code affixed to the station with their smartphone.
Other charging stations connectable to the Climkit Gateway
All OCPP (1.6) compatible charging stations can theoretically be connected to the Climkit Gateway to benefit from dynamic load management and user access management. The most common models include Schneider, Eaton, Keba, and Fronius.
During the operational phase, troubleshooting support is exclusively the responsibility of the installer.
For a complete solution and guaranteed support from installation onwards, we strongly recommend choosing a charging station provided by Climkit.
3. Other configurations depending on site type
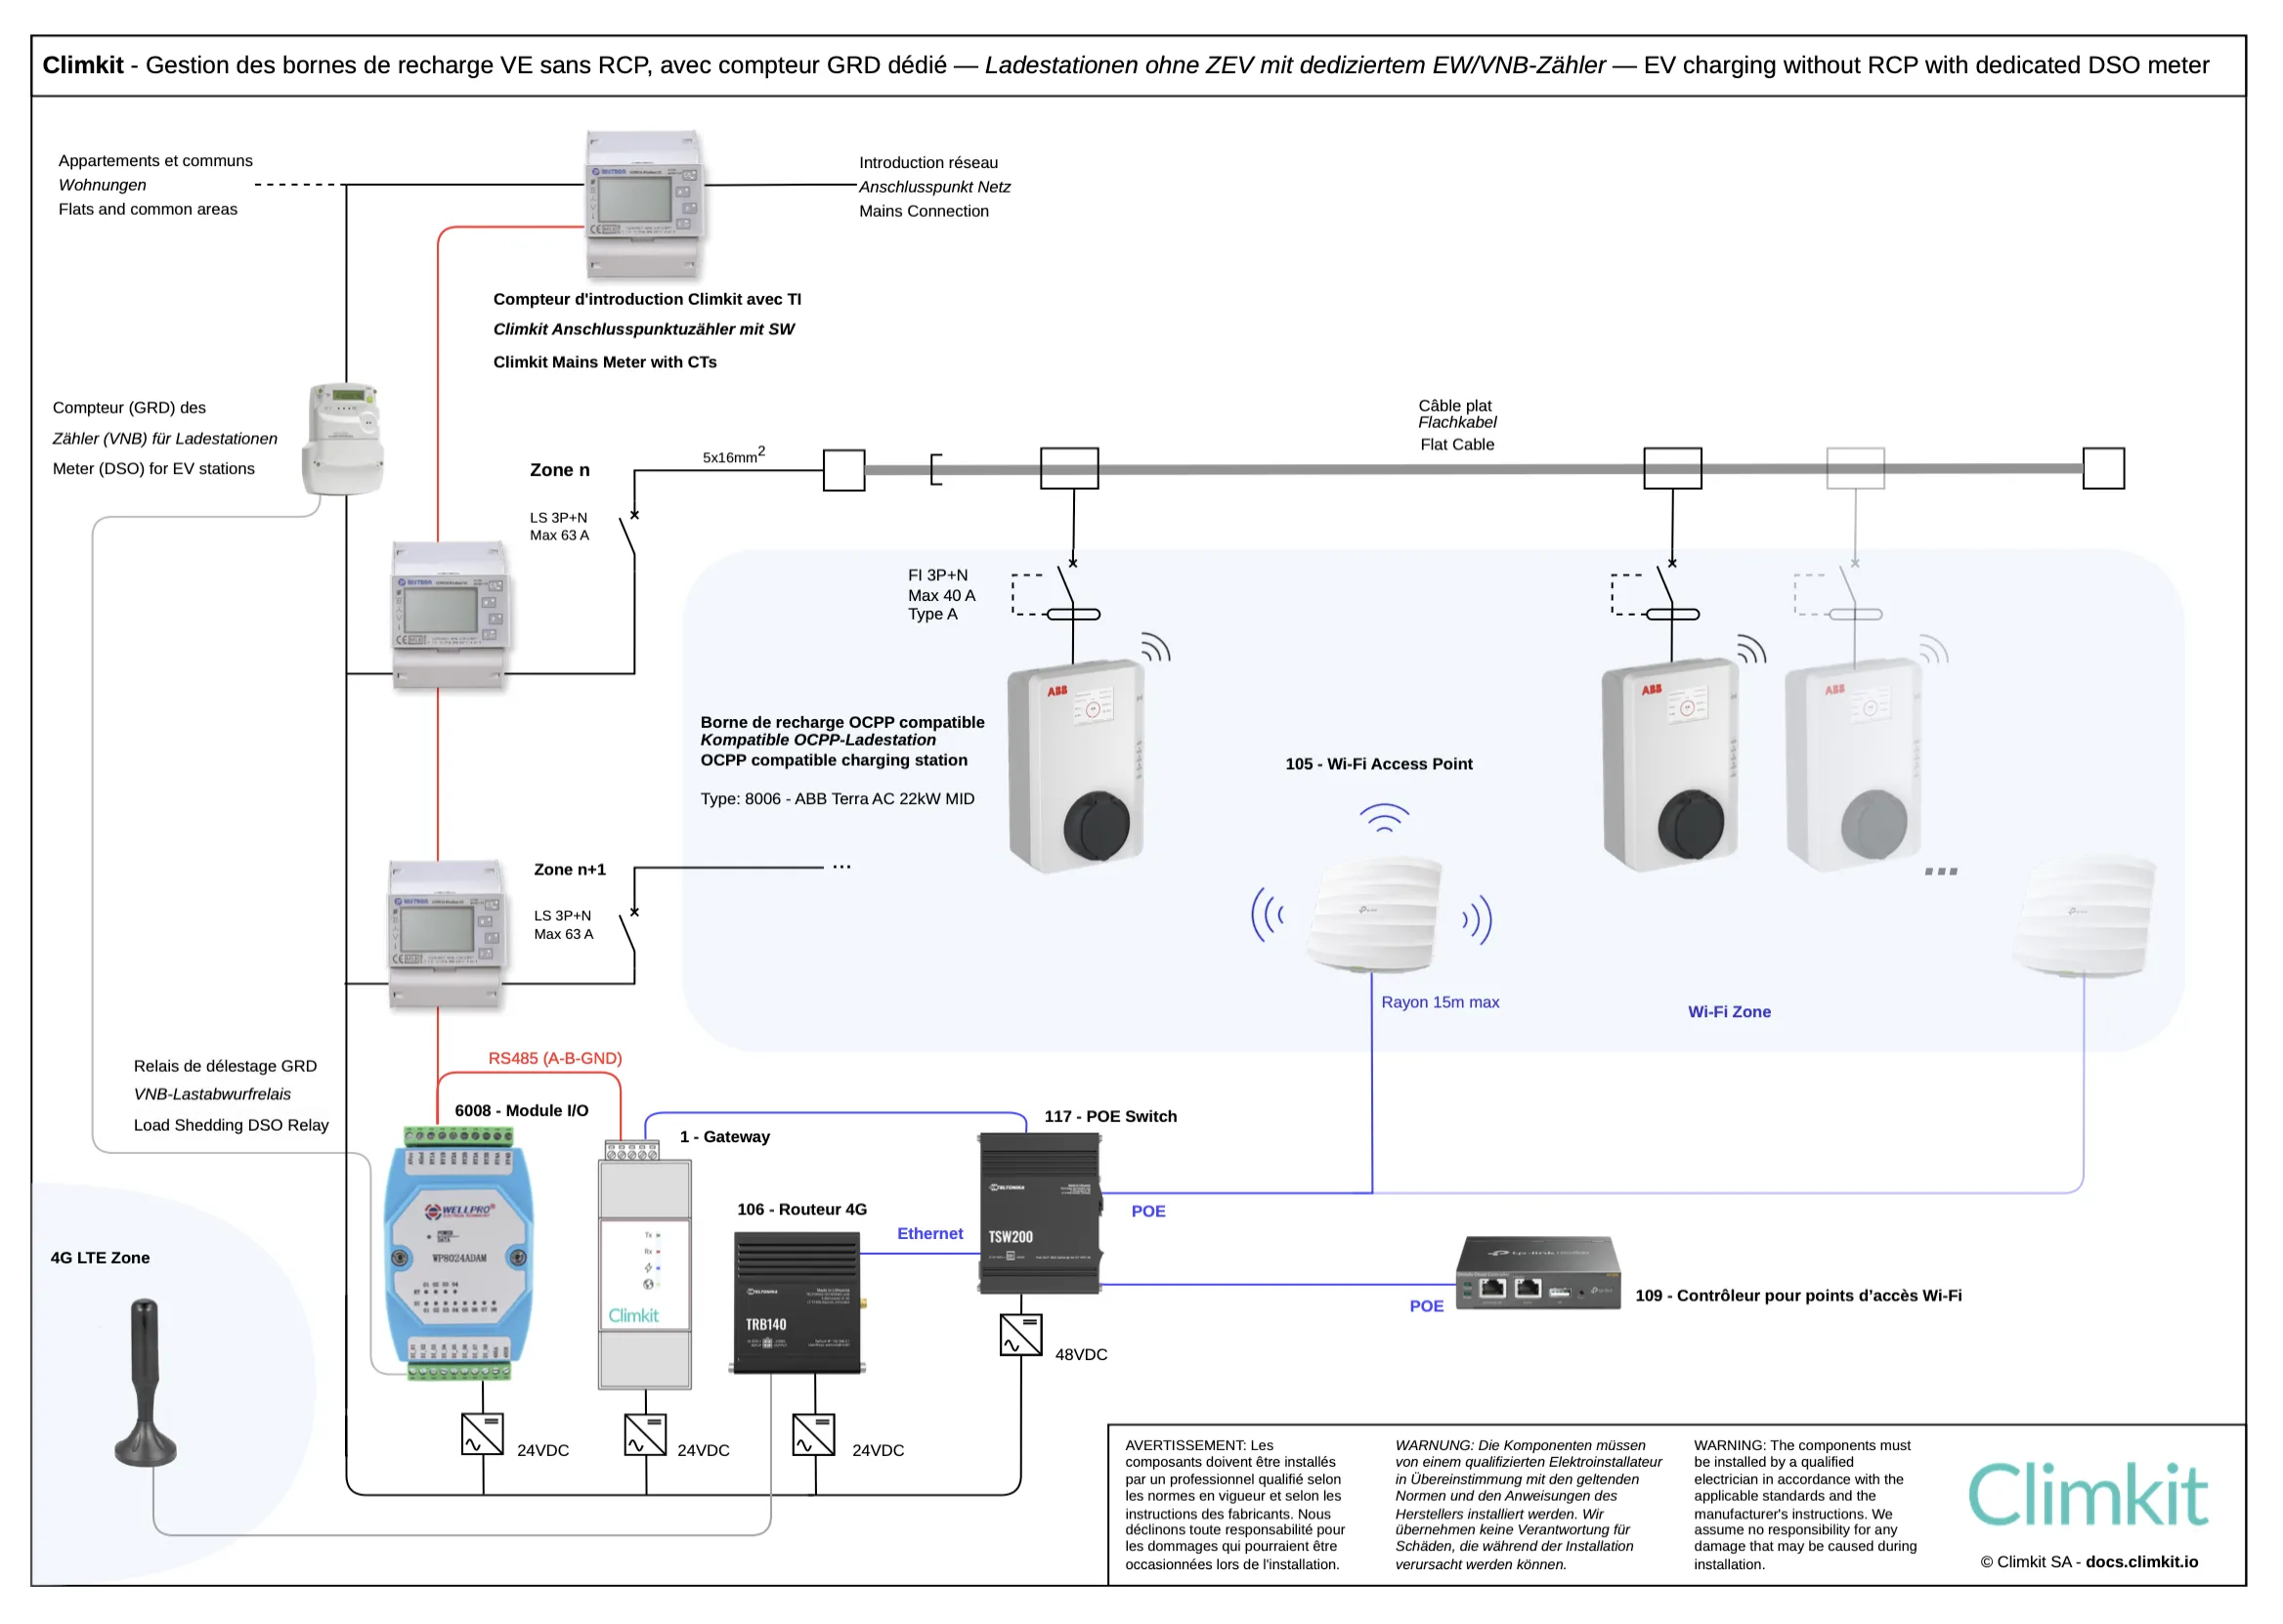
Connection diagram - without RCP
The connection differs from the standard diagram with RCP only by using DSO meters for site consumers instead of private meters.
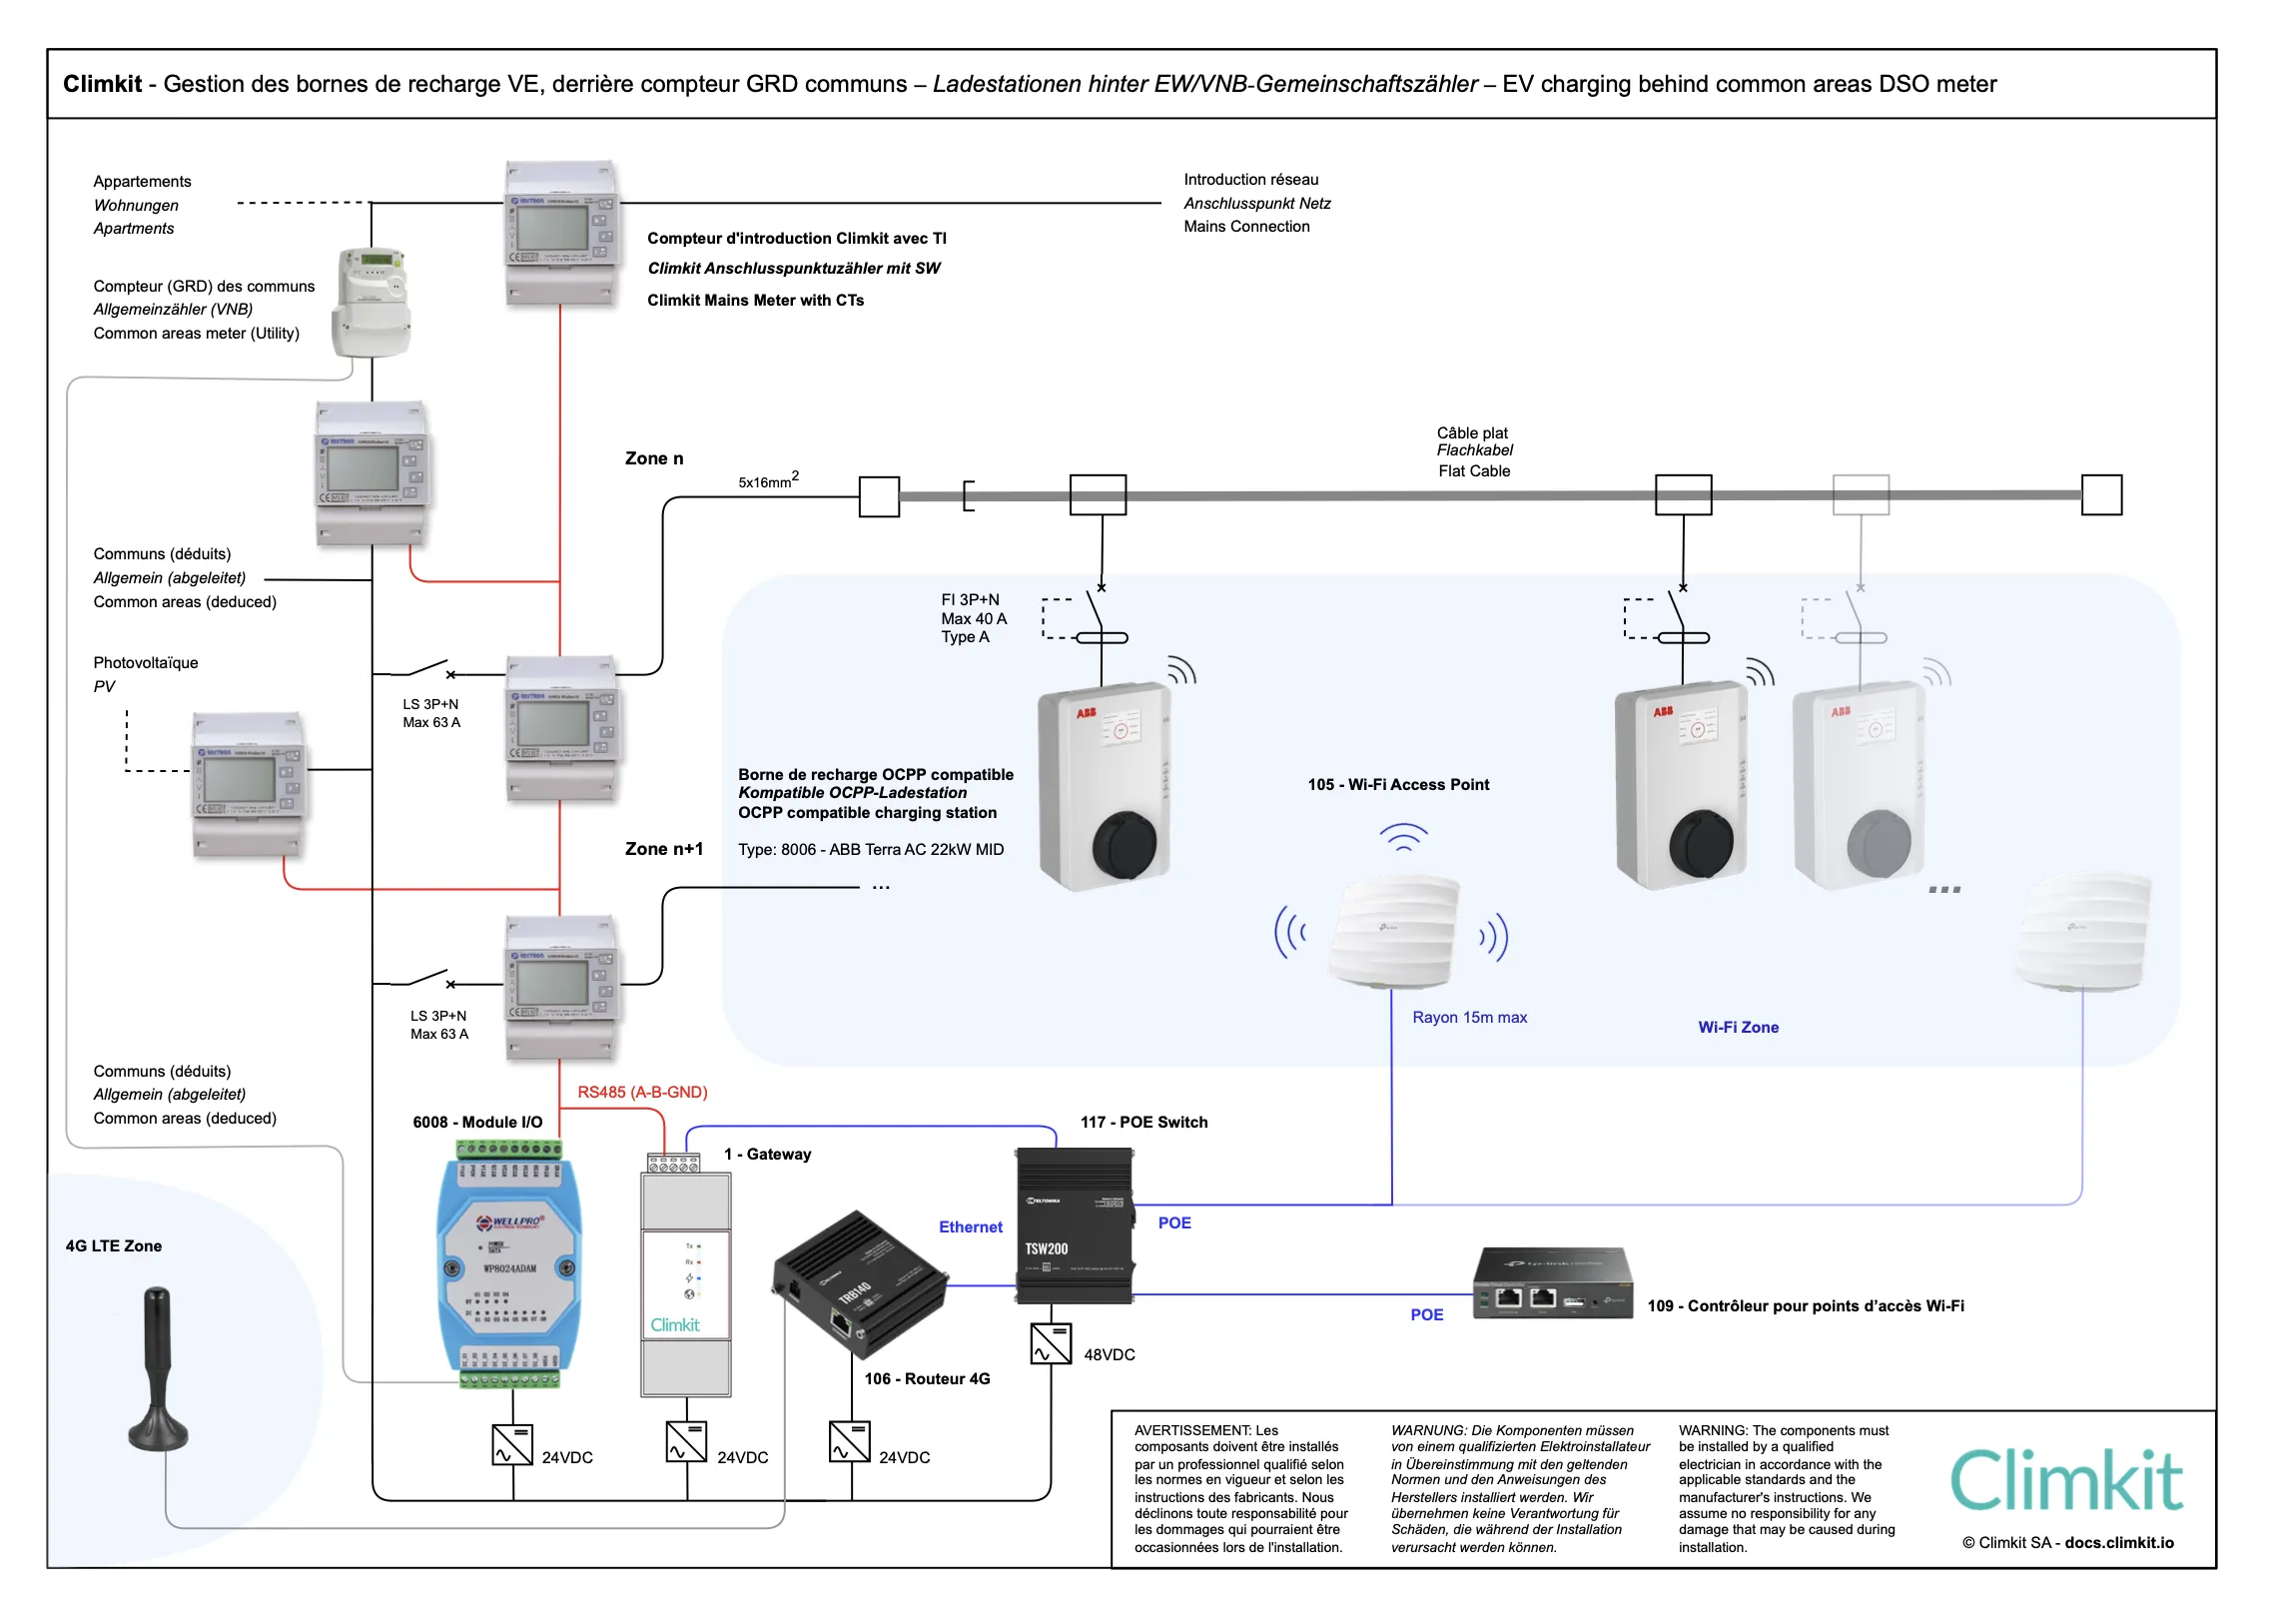
In this case, the flat cable is connected either behind the common areas DSO meter, or behind a DSO meter dedicated to the charging stations.
In both cases, a private meter is installed at the grid connection point for continuous dynamic power regulation (by the Gateway) to avoid exceeding the grid connection capacity limit.
Connection behind a DSO meter dedicated to charging stations
This allows clearly distinguishing charging station consumption from common areas consumption during billing, but incurs additional fees related to the installation and management of this meter by the DSO.
In addition, it is not possible to benefit from photovoltaics for vehicle charging if the PV system is connected to the common areas meter.
Connection behind the common areas DSO meter
This saves the cost of an additional DSO meter, but requires installing a private meter on the common areas feeder to ensure dynamic load management.
Indeed, since this feeder was initially sized only for the common areas, adding charging stations requires continuous regulation of charging power via the Gateway in order not to exceed maximum capacity, as is already done for the main grid connection.
A meter is also added on the feeder of each zone as well as on the photovoltaic system, if present. Common areas consumption will then be deducted via a rule meter.
During billing, it will thus be possible to distinguish consumption related to vehicle charging and, if applicable, differentiate electricity coming from the grid from solar electricity.
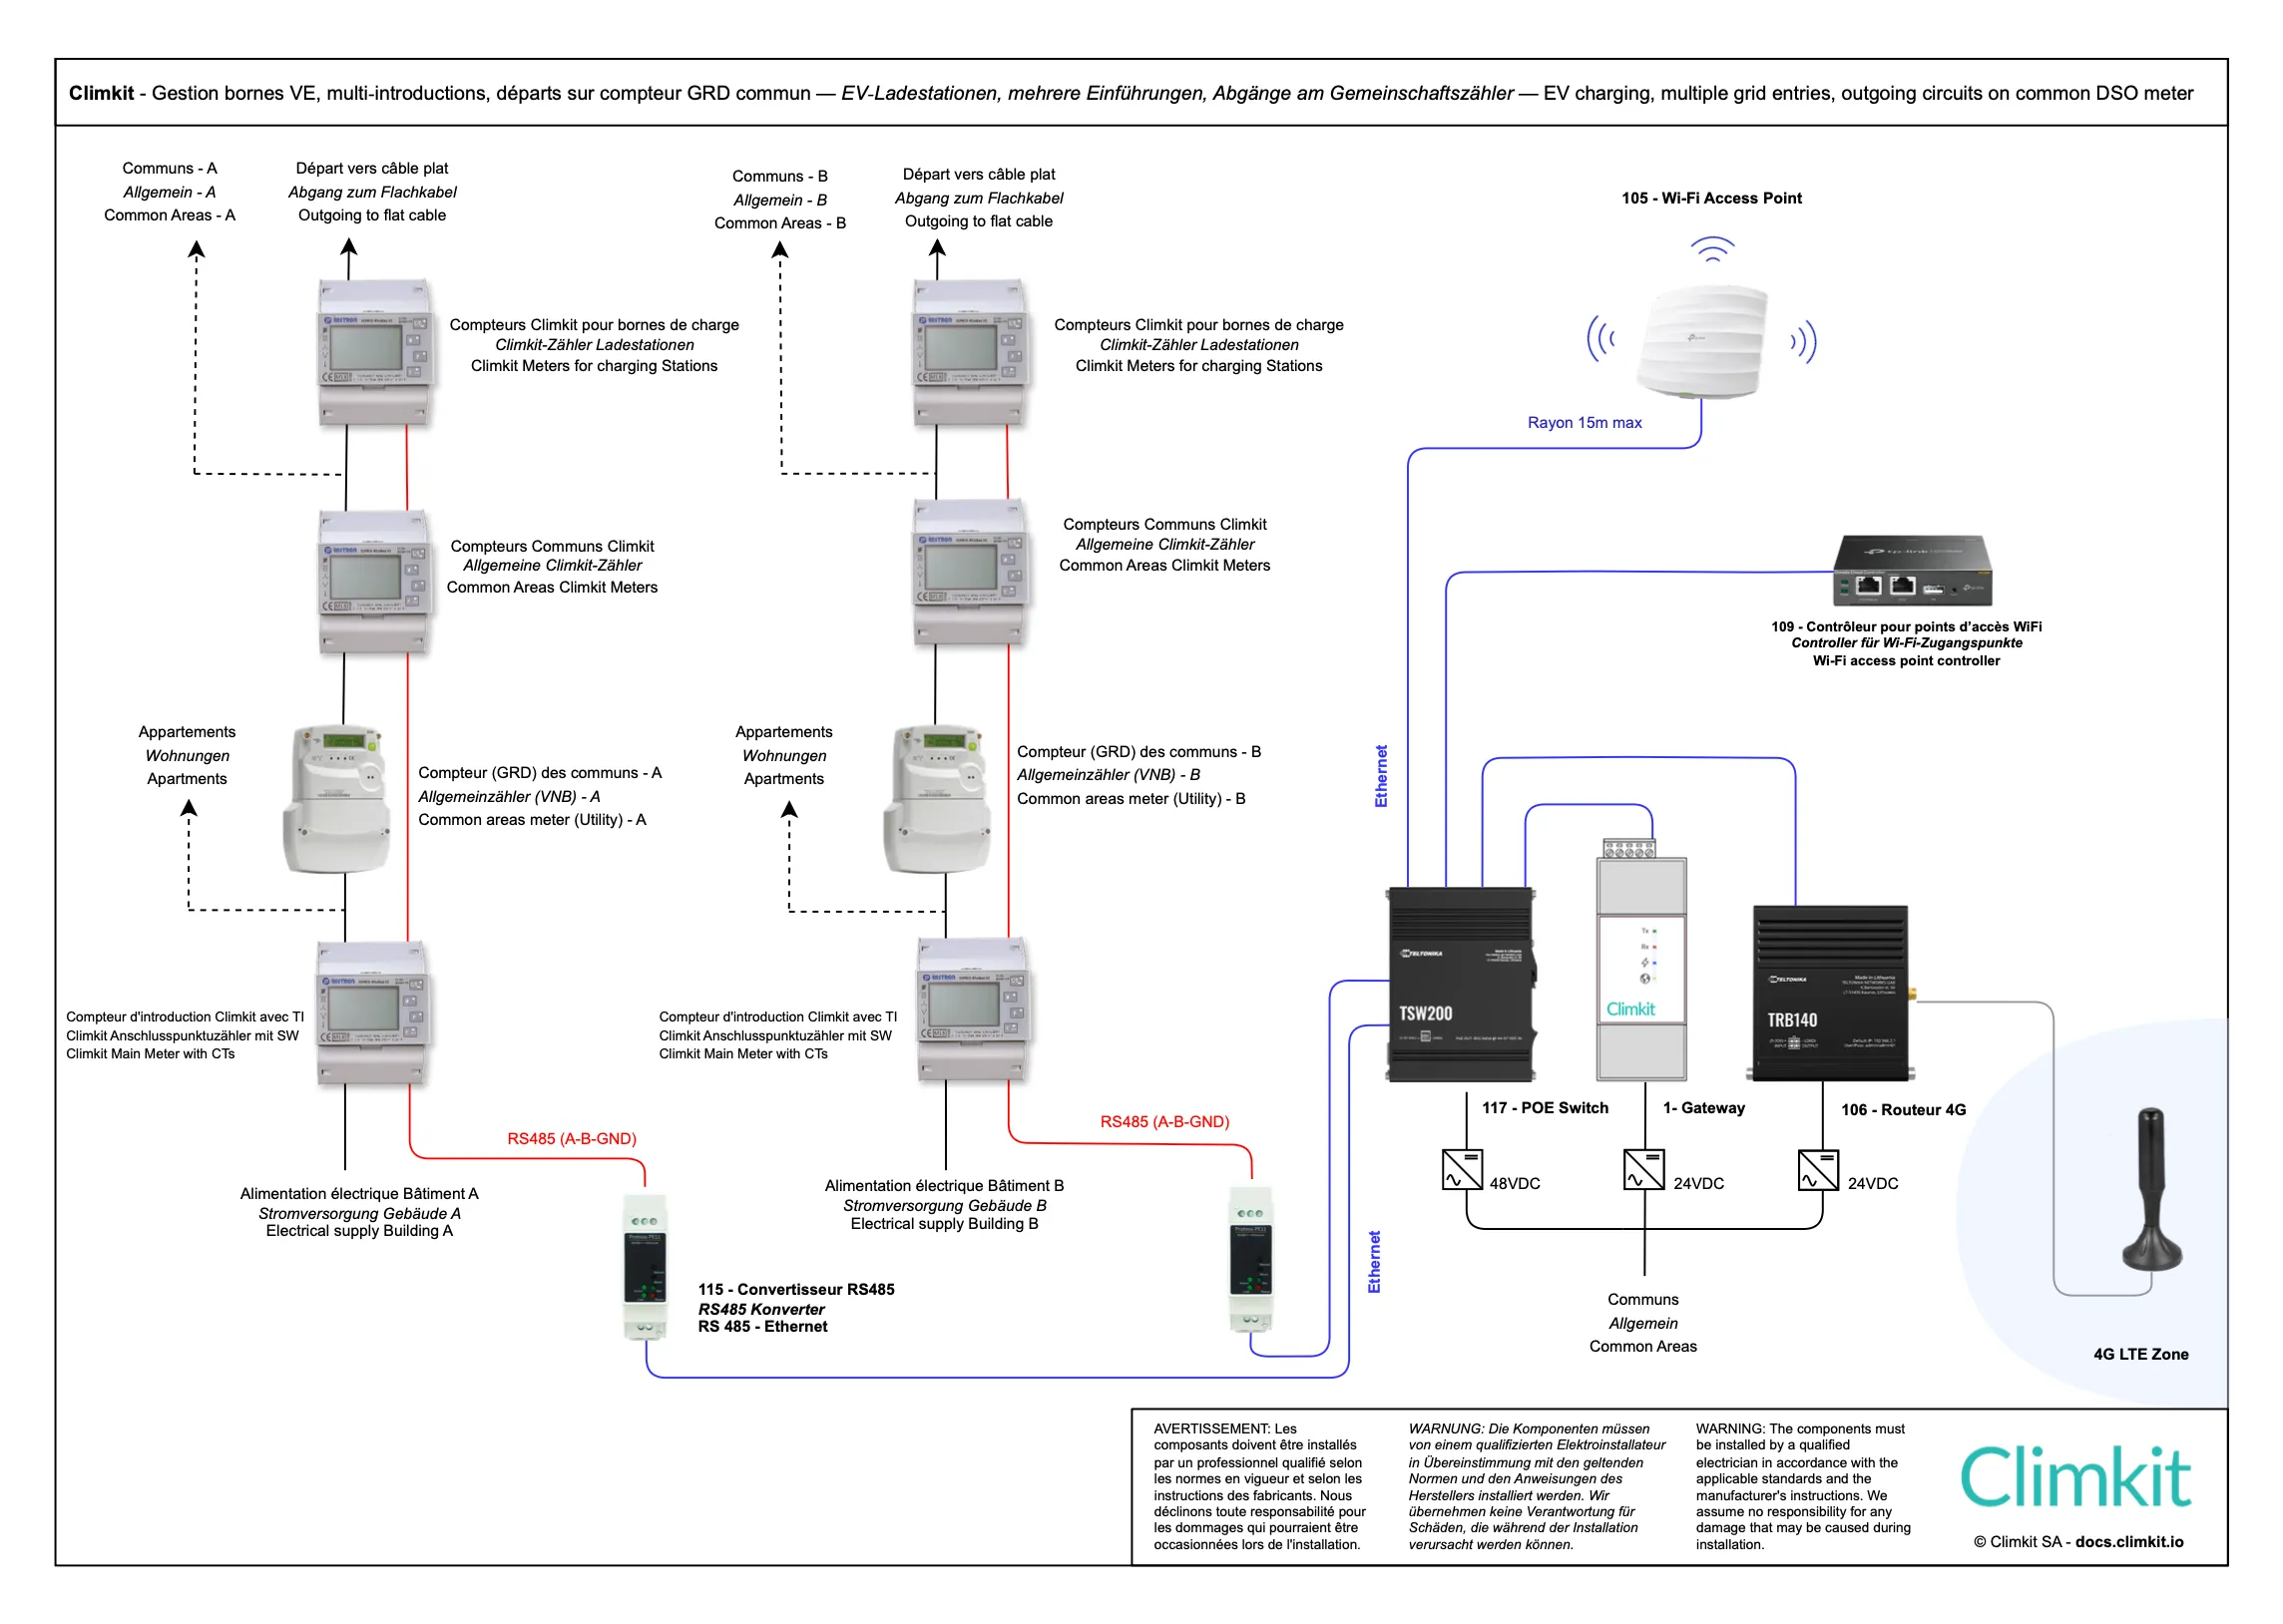
Connection with two or more grid connections and common areas DSO meter
When there are multiple grid connections available for the same car park, each flat cable feeder (63A) can be taken from each of the grid connections.
Only one Gateway and one 4G router are required. Control meters for power regulation are connected to the Gateway via an RS485 bus or IP-Ethernet using RS485-Ethernet converters.
In cases where charging stations are connected behind the common areas DSO meter, it is necessary to install a meter on the common areas feeder and another on the charging stations feeder, for the same dynamic load management reasons explained previously.
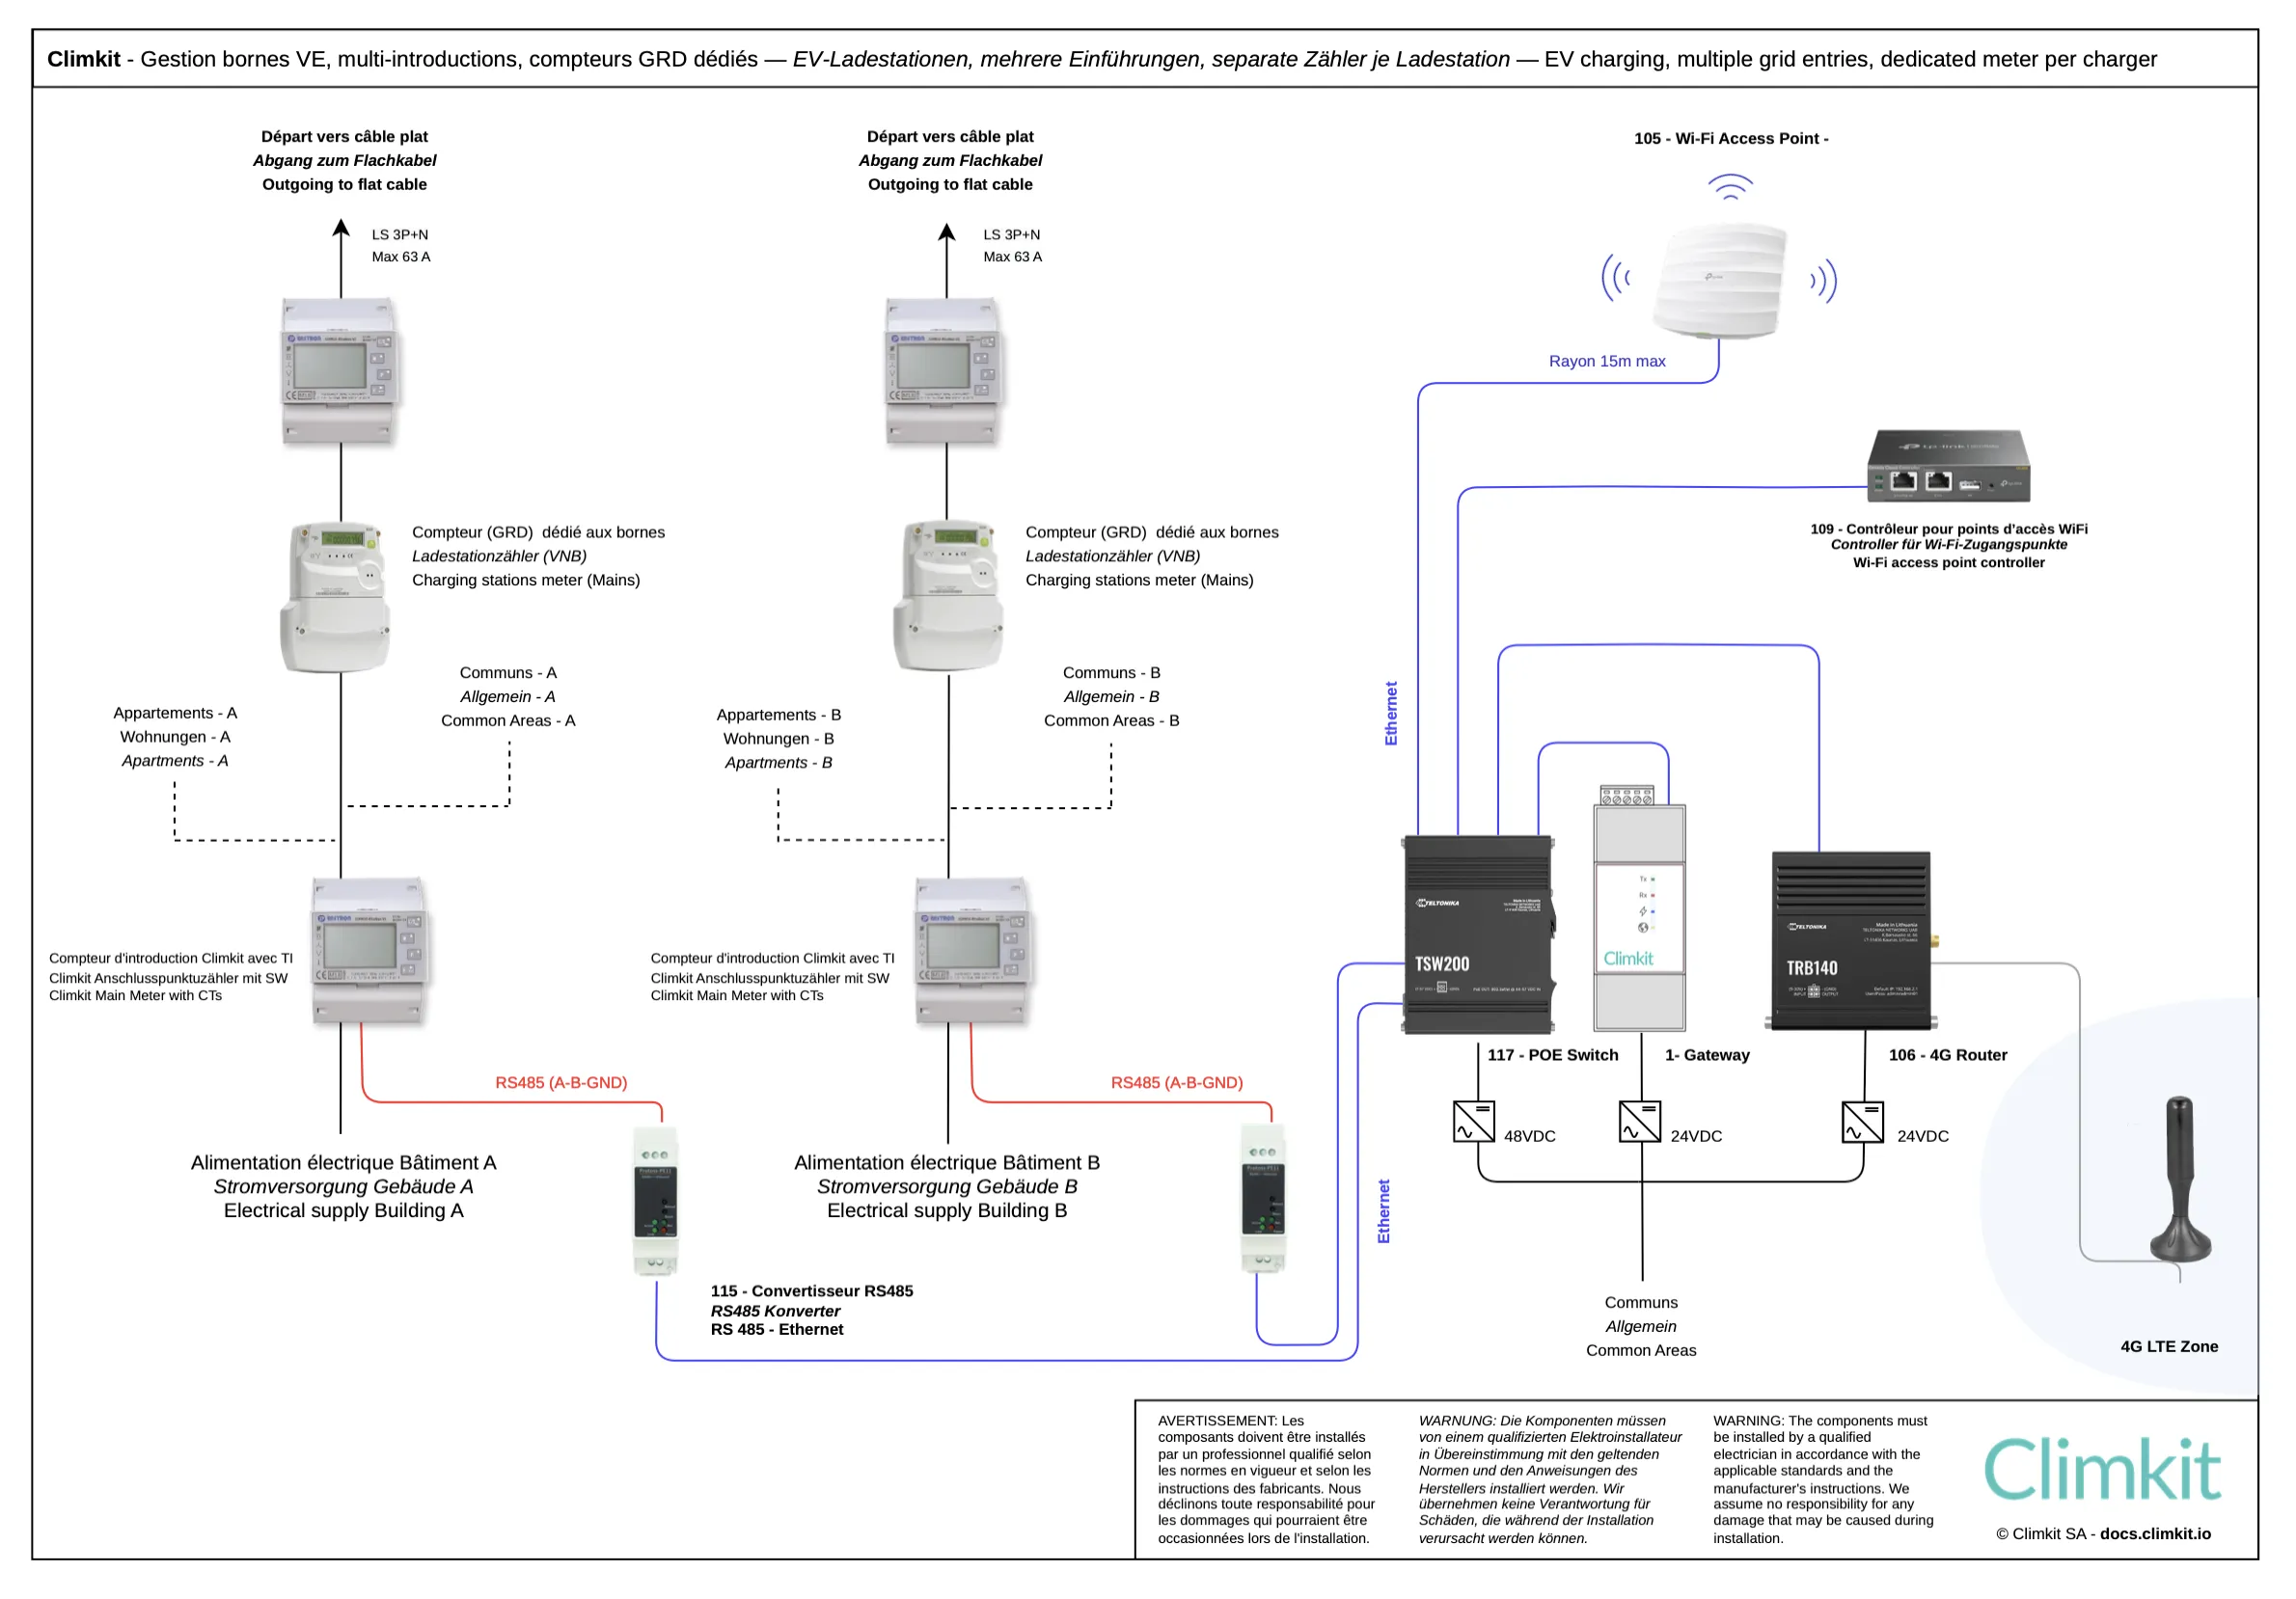
Connection with two or more grid connections and dedicated DSO meter
When flat cable feeders are connected behind a dedicated DSO meter for charging stations for each building, installing private Climkit meters is not required.
Connection behind apartment meters (not recommended)
Connecting a charging station behind an individual apartment meter is strongly discouraged, as it prevents dynamic load management based on the building's available energy and makes it impossible to separate the charging station's consumption from the dwelling's consumption.
This configuration also prevents sharing the charging station or renting the parking space to another user, limiting long-term management flexibility.
For these reasons, Climkit does not offer a solution for this type of connection and recommends applying standard SIA 2060 and a centralized connection for charging stations even in small sites with only a few spaces.
Third-party charging station systems and OCPP Remote server
When a third-party charging station system is installed and handles both the charging stations and dynamic load management, installing Climkit equipment is not necessary, as all network communication and power regulation are provided by this system.
In this case, Climkit only manages user access via their RFID badges and sends transactions to the platform for billing.
To allow communication between the third-party system and Climkit, the third-party system's OCPP settings must be configured to communicate with the Climkit OCPP Remote server.
Common systems of this type include:
- Easee
- Zaptec
- Schneider EcoStruxure EV Charging Expert
During the operational phase, troubleshooting support is exclusively the responsibility of the installer.
For a complete solution and guaranteed support from installation onwards, we strongly recommend choosing a charging station provided by Climkit.