Virtual assistant
Installer
Planning
Installer startup guide (read first)
Global planning of a Climkit site
Process for setting up a Climkit site
Plan the connection of the Climkit Gateway and network connectivity
Plan electricity management
Plan the management of electric vehicle charging stations
Schedule the management of heating costs, water, and ancillary costs
Plan collective laundry management
Plan to manage eBike charging
General terms and conditions of sale
Platform configuration
Request for an Installer account
Creation of a new site
Add the router (4G or LAN)
Adding the Climkit Gateway
Adding electricity meters
Save the Photovoltaic installation information
Save the battery info
Adding charging stations
Add the OCPP Remote Electric vehicle charging station
Add the 4-relay I/O module
Adding RFID readers
Adding heat and water meters
Installation and connection
Install the 4G Router
Install the LAN router
Installing the Climkit Gateway
Install the RS485-Ethernet converter
Install the M-Bus converter
Install the standard Ethernet switch
Install the PoE Ethernet switch
Install Wi-Fi Access points
Install the electricity meters
Install the charging stations
Install the heat and water meters
Install the RFID reader
Install the three-phase Relay meter
Installing the Shelly relay meter
Install the 4-relay I/O module
Verification and testing
Owner
Administrative setup
Getting started guide - administrative setup
Form - 1. Contact details
Form - 2. Solutions
Form - 3. Billing rates
Contract and documents to be completed
Online account for owners
Information flyers for consumers
Online Access, RFID badge and charging stations
FAQ and other information
Resident
Account and app
Electricity invoice
Electric vehicle charging station
Building laundry room
Electric vehicle charging (eBike)
Platform
Platform Access
Terminology
Site
Settings
Creation/editing of a note or an issue to be addressed
Close an issue to be processed
Site statuses
Add/Modify building(s)
The steps for setting up a site
Delete/deactivate a site
Add/Edit equipment
Edit the basic information of a site
Equipment
Add/modify a gateway
Add/modify a router
Add/modify an electricity meter
Bulk insert meters
Bulk assign meters to a gateway
Add/modify a distribution zone
Add/edit a charging station
Add/modify a thermal meter or water meter
Add/edit a DSO meter (FTP transfer)
Connect remotely to a Climkit gateway
Administration
Stakeholders
Management terms
View the site management conditions
Enabling/disabling a solution
Configuration of the operating method
Visualize the financial conditions
Creation/edition/addition of a financial condition
Deletion of a financial condition
Accounts
Create a consumer account
Create a contact
Visualize and download account invoices
Send Platform Access to a contact
Add/modify the postal billing address
Link an existing account to a site
Change the correspondence method
Rates and billing points
Creation/editing of a billing point
Registering a move (transfer)
Assignment of an account to a billing point
Add/modify the default charge advance payment of a billing point
View site billing rates
Editing a consumption tariff
Creation/editing of a consumption tariff
Creation/editing of a consumption tariff component
View fixed rates and subscriptions
Customize invoice line item labels/titles
View the Financial conditions billed to the billing points
RFID badges
Accounting
Tools
Meter inspection
Visualization
Expense statements
Introduction to the Expense statement generation tool
Create/edit an accounting period for expense statements
Modify the expense statements settings
Add/modify a general invoice for an expense statement
Edit the advance payments collected for an expense statement
Special feature of room heating and hot water production fees
Verify and download meter readings for the expense statement period
Make the cost allocation and generate the expense statements
Export individual consumptions for the expense statements period
API
Table of Contents
- Categories
-
- RFID reader and relay meter configuration
RFID reader and relay meter configuration
Create and configure the following elements on the online platform:
- Sensor (provides the ON/OFF relay status)
- Meter
- Relay
- RFID reader
Although the Shelly and the SDM530C are both a meter, a relay, and a sensor, they must be created separately.
1. Sensors
Sensors are used by the system to determine the closed or open status (ON / OFF) of the relay.
Under sensors, add a sensor. Settings according to the model:
Eastron SDM530C (Modbus RTU)
- Name: a unique name that identifies the equipment, its location, and the solution. Ex. Laundry meter/relay no 1.
- Type:
State On/Off - Address: Unique primary Modbus address from 1 to 250.
Save the address directly in the equipment. See the Eastron SDM530C user manual.
- Register:
0 - Protocol:
modbus - Model:
SDM530C
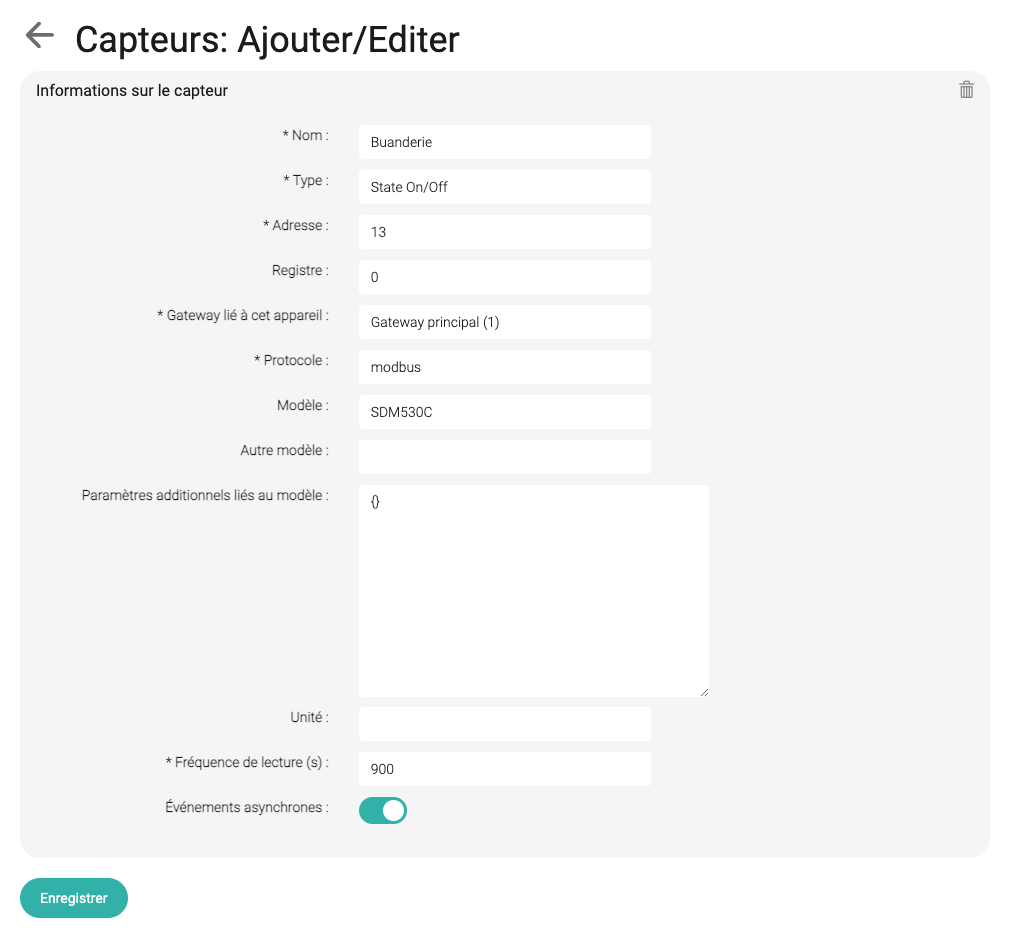
- Reading frequency:
900(recommended) - Asynchronous:
checked
This is the physical reading frequency of the sensor.
- asynchronous unchecked: the sensor is physically read, and the relay status is sent at the defined reading frequency.
- asynchronous checked: the sensor is physically read at the defined reading frequency, but the relay status is sent only if it is different from the last reading. In all cases, statuses are sent every hour.
Services (laundry, optimization, or e-bike charging) read the sensors and activate the relays when requested, but these services never send the sensor status.
For relays used by the Optimization service, set a frequency lower than 60 seconds, but not lower than 30 seconds.
Eastron SDM530C (Modbus TCP)
SDM530C relay meters can communicate via ModbusTCP using an RS485-Ethernet converter.
The configuration is the same as above except for the following parameters:
- Protocol:
modbustcp - Model:
SDM530C_TCP - Additional parameters:
{'server_ip': 'IP ADDRESS OF CONVERTER', 'server_port': 502}
Shelly
- Name: a unique name that identifies the equipment, its location, and the solution. Ex. Bike socket Shelly no 1.
- Type:
State on/off - Address:
0 - Register:
ison - Protocol:
API - Model:
ShellyGen2 - Additional parameters: see below
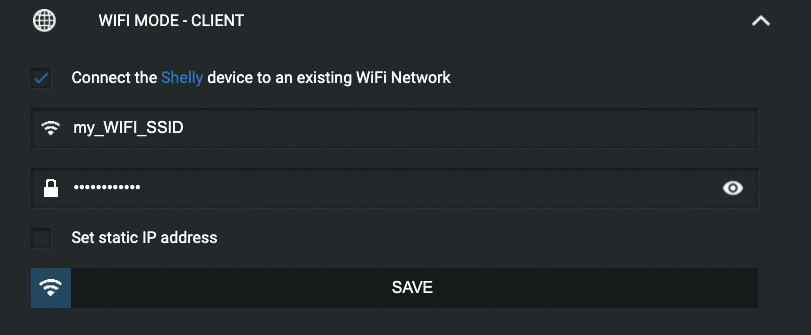
Start the Shelly and connect to the Wi-Fi network it broadcasts. The SSID is of type shelly1-XXXXX.
Open a web browser and connect to the default IP address of the Shelly: http://192.168.33.1.
Under "Internet & Security" --> "WIFI MODE CLIENT" --> Check "Connect the Shelly device to an existing WiFi Network" and enter the local Wi-Fi parameters (SSID and PASSWORD).
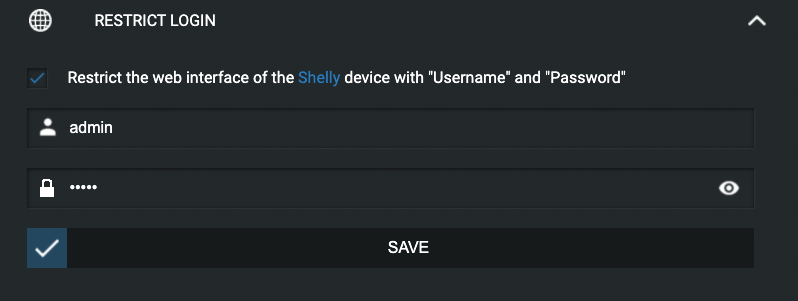
Under "Internet & Security" --> "Restrict Login" --> Check "Restrict the web interface" and enter "admin" in the User field and a unique secure password.
Configure a fixed IP address for the Shelly in the router (local LAN network) and restart the Shelly. See 4G Router Configuration.
Save the IP defined above preceded by http://, the chosen username, and password in additional parameters, formatted as shown below:
{
'api_address': 'http://192.168.1.60',
'api_username': 'admin',
'api_password': 'admin'
}
2. Meter
Create a meter under the Meters tab.
Parameters identical to the Sensors paragraph above.
When using the SDM530C with Modbus TCP, select the model: eastron_modbus_tcp and under additional parameters:
Key | Value |
| IP ADDRESS OF THE RS485 CONVERTER |
|
|
3. Relay
Create a relay under the Sensors/Relays tab --> Sensors
Parameters identical to Sensors above.
Link the relay to a sensor.

4. RFID reader and linked object
Add an RFID reader
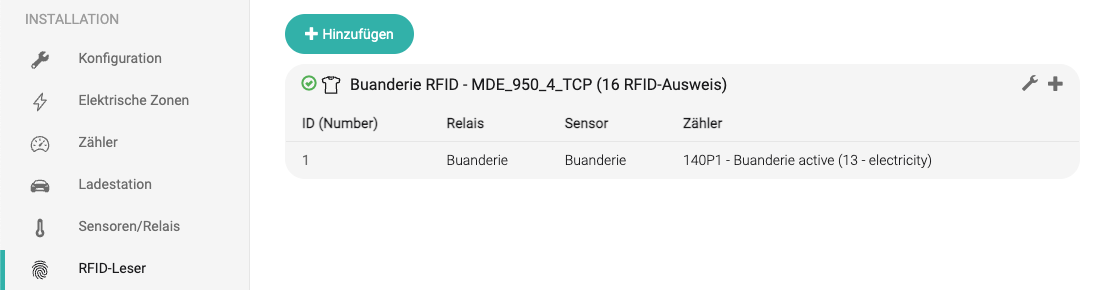
Add an RFID reader under the RFID Readers tab.
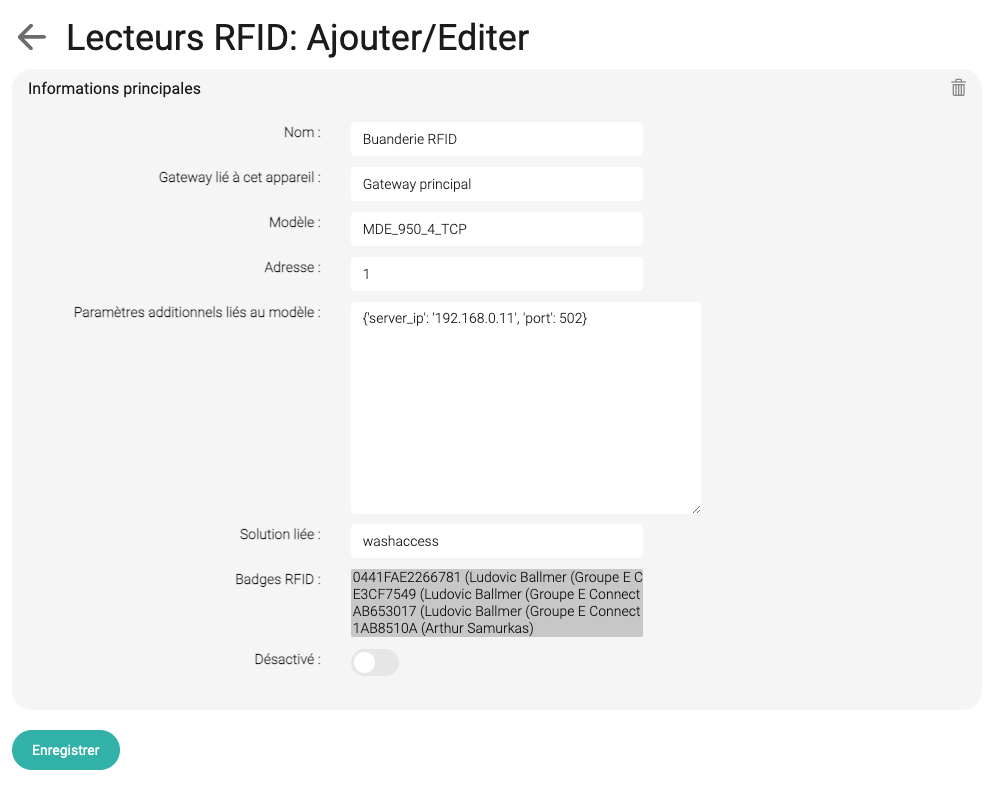
- Name: a unique name that identifies the equipment, its location, and the solution. Ex. RFID reader Laundry no 1.
- Model:
InveoIndLed_HTTP_GETwithout a keyboard orInveoIndLed_Keyboard_HTTP_GETwith a keyboard - Address (modbus):
1(the address 1 is generally left by default) - Additional parameters: specify the connection parameters of the Ethernet-connected RFID reader (IP address, port, username, and password) following the format below:
{'server_ip': '192.168.2.11',
'server_port': 502,
'username': 'admin',
'password': 'admin00'}- Linked solution:
WashAccessoreBike
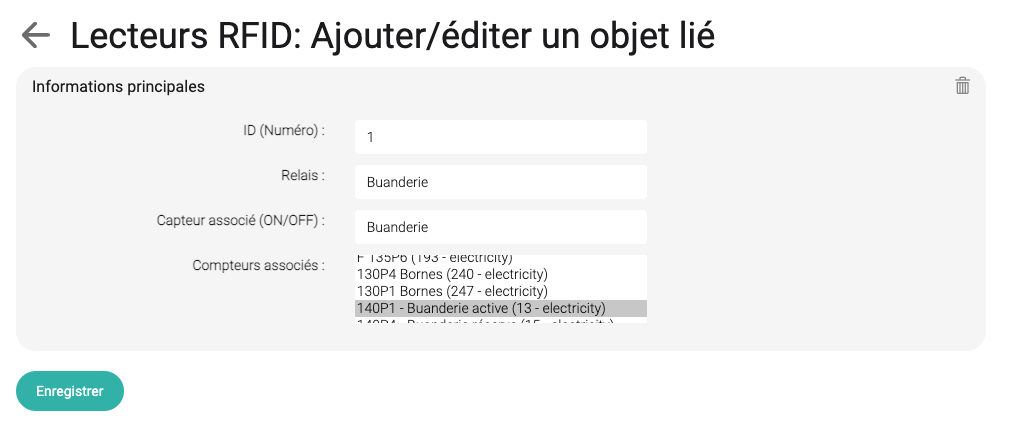
Add a linked object
Click on + of the RFID reader created above.
- ID (Number): if the reader is equipped with a numerical keypad, enter the socket number.
Ex: 1, 2, 2 etc. or 1111 for InveoIndLed_Keyboard_HTTP_GET
Socket numbers must have 4 digits.
For readers without a keyboard (InveoIndLed_HTTP_GET), enter something unique.
- Relay: Select the relay
- Associated sensor (ON/OFF): Select the sensor corresponding to the relay
- Associated meters: Select one or more meters. Usually the meter corresponding to the relay meter.
At least one meter (generally electrical). It is also possible to associate a water meter for the laundry service, for example.
5. Inveo RFID card readers
Inveo RFID readers connect via Ethernet and can be powered separately or via PoE (Ethernet).
Connect the reader to a computer, use the address 192.168.111.15 to access the web interface.
Default Username: admin
Default Password: admin00
Network
Change the fixed address of the equipment to: 192.168.2.20. Be careful if there are multiple RFID readers, continue with 192.168.2.21, then 192.168.2.22 etc.
Under Network > IP Configuration:
- Host Name: Serial Number of the equipment
- IP Address: address defined above.
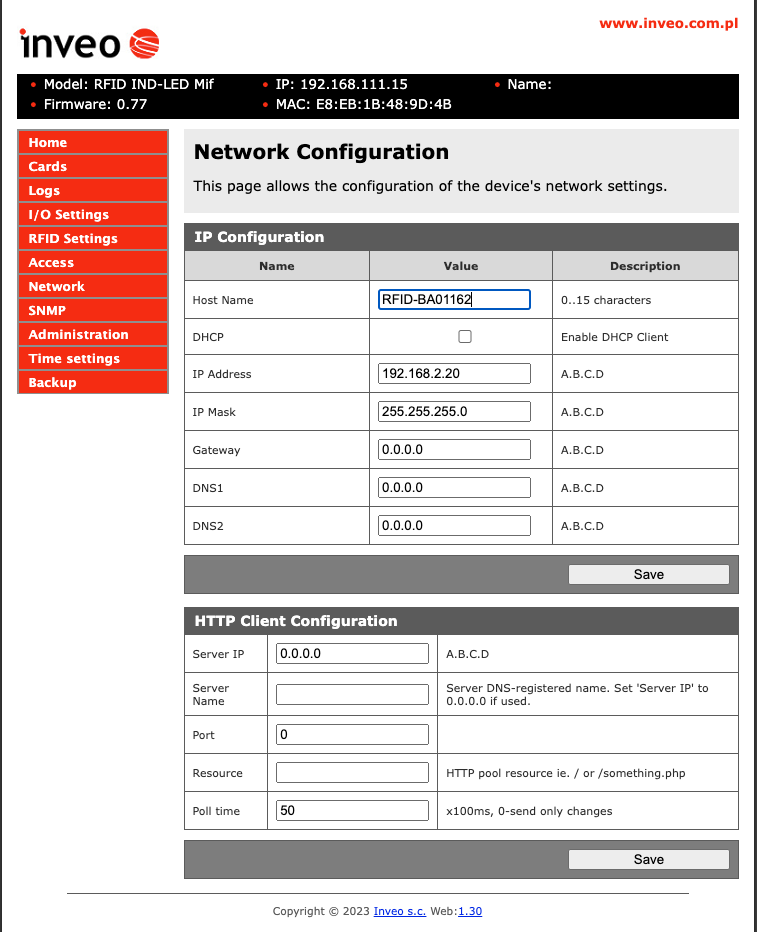
Enable DHCP in Network and connect the equipment to the same network as the computer and the Gateway. Define a fixed IP address for the reader via the network router's web interface.
Check DHCP (or define a fixed IP according to desired network settings)
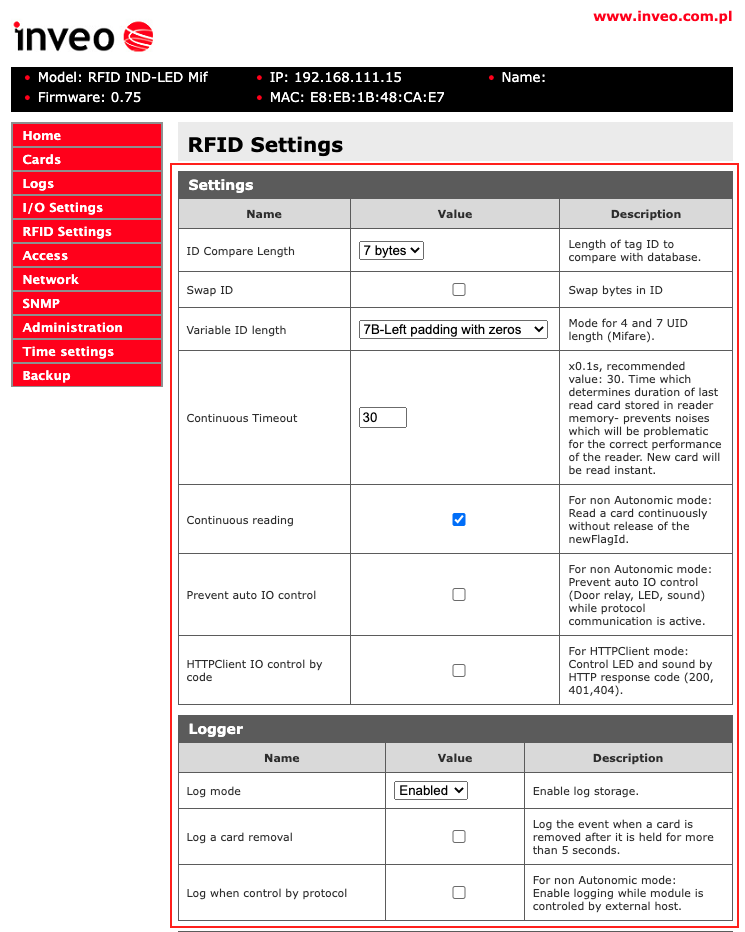
RFID Settings
Check Continuous reading
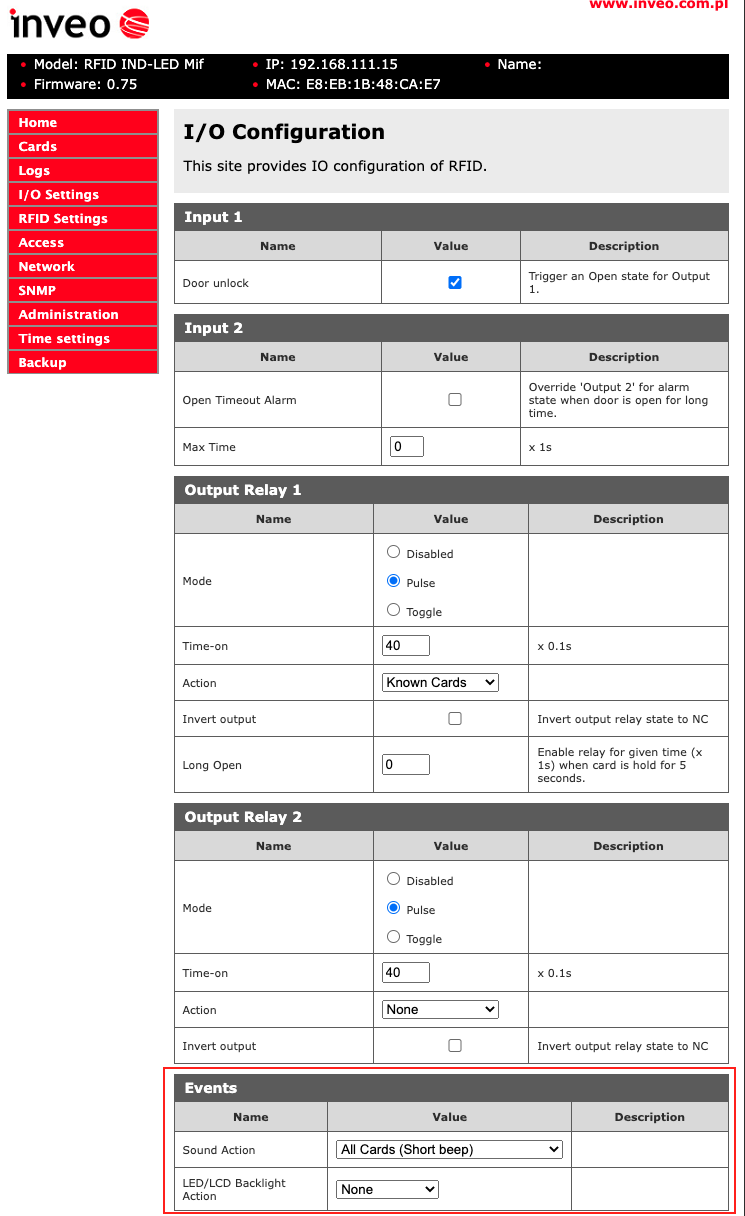
I/O Settings
Select:
Card Action: All Cards (Short beep)
LED LCD Backlight Action: None
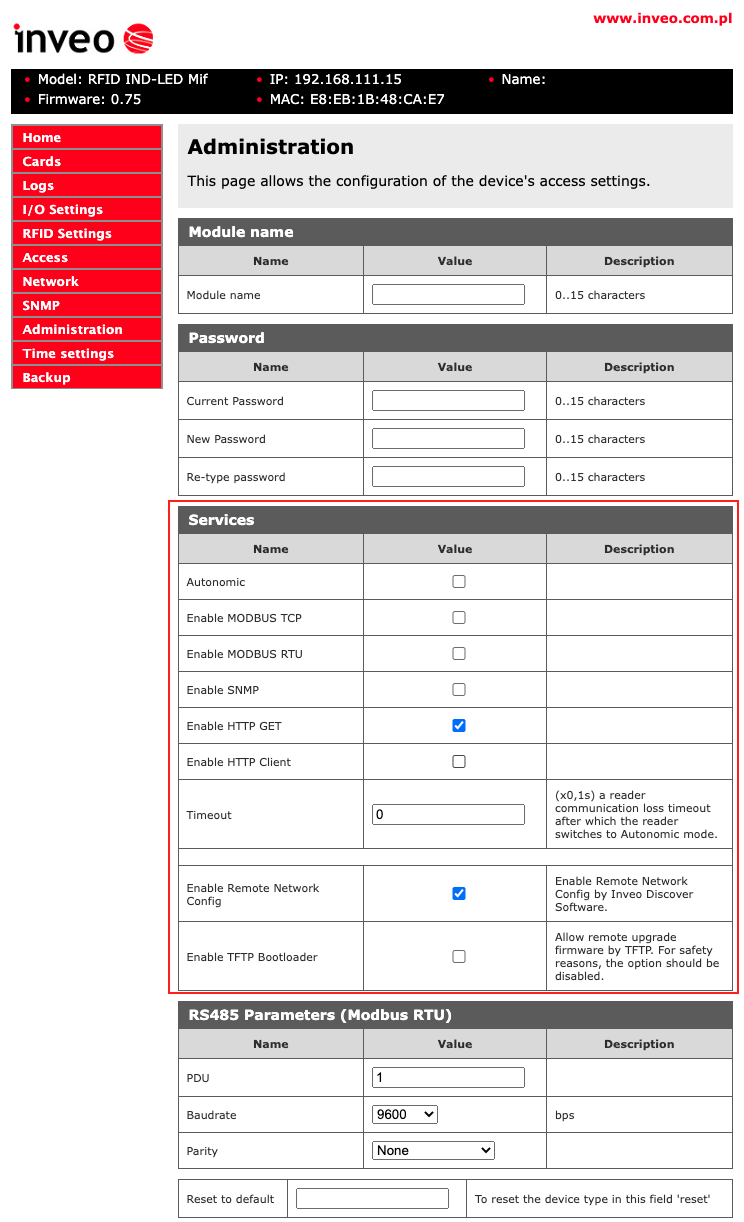
Administration
Check:Enable HTTP GET
Inveo card reader with numerical keypad
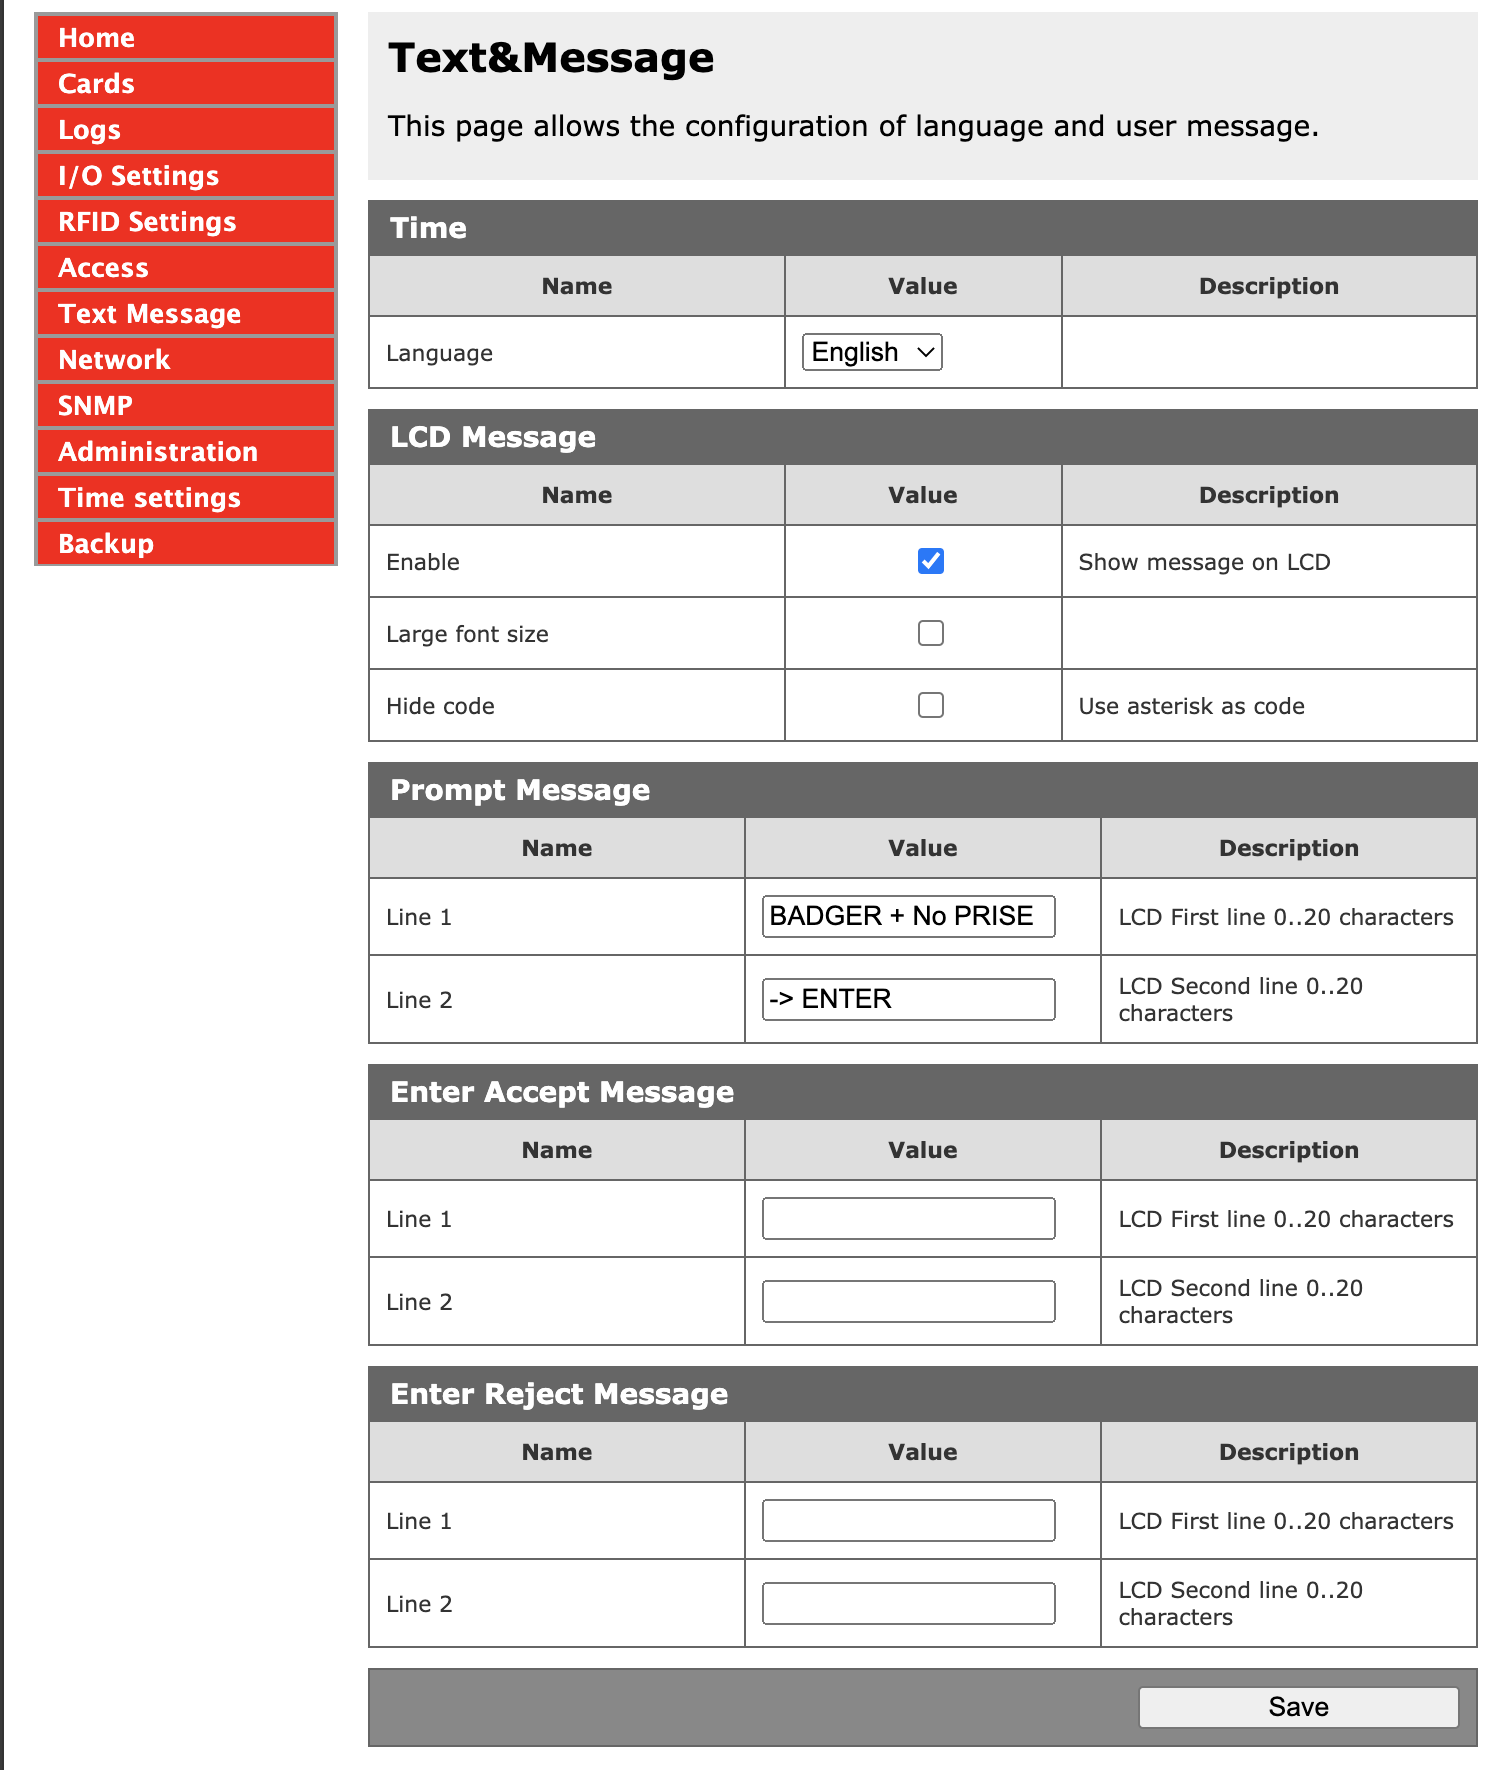
Text Message
Prompt Message
Line 1: BADGER + No SOCKET
Line 2: -> ENTER