Table of Contents
Charging station configuration
1. Configuration in the online portal
Charging stations must belong to an electrical zone. Generally, a zone is limited by a 63A circuit breaker to which one or more charging stations are connected.
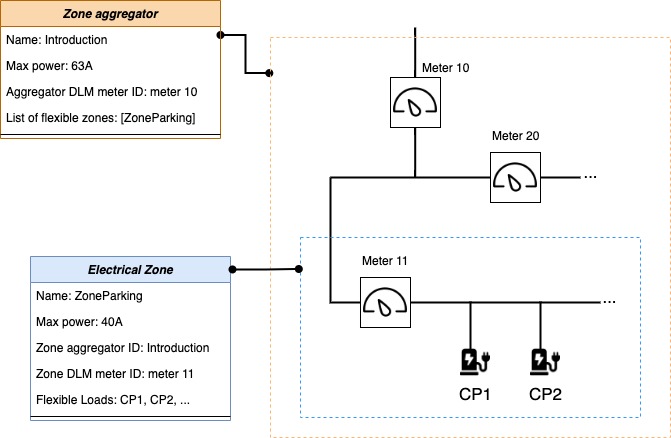
Under Electrical zones, first create a zone with a maximum current and associate one or more DLM (Dynamic Load Management) meters.
It is possible to create one or more zones depending on the parking lot configuration.

The purpose of associating one or more DLM meters with a zone is to limit the zone's current based on other non-controllable loads. For example, if the zone is connected behind the common areas' meter, a DLM meter is added to the common areas. See connection diagram.
If a meter is installed at the start of the zone and only measures the zone, do not select it as a DLM meter.
Select the meter closest to the zone as the consumption meter (e.g., Meter 11 in the diagram above).
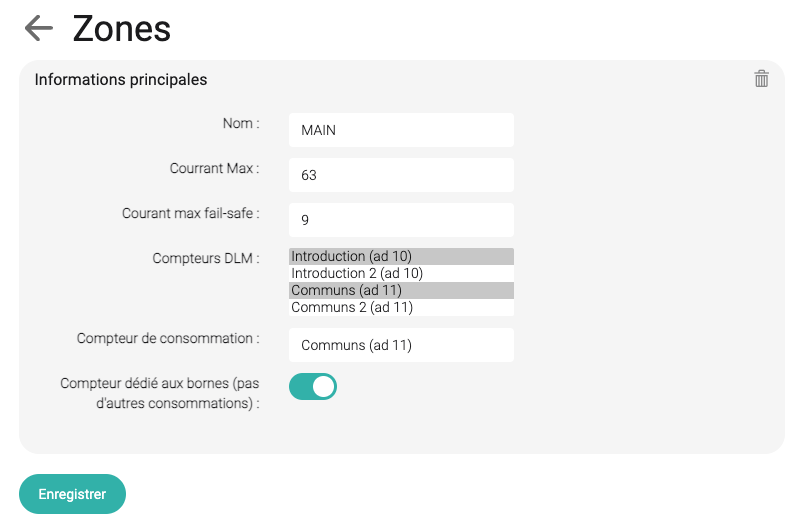
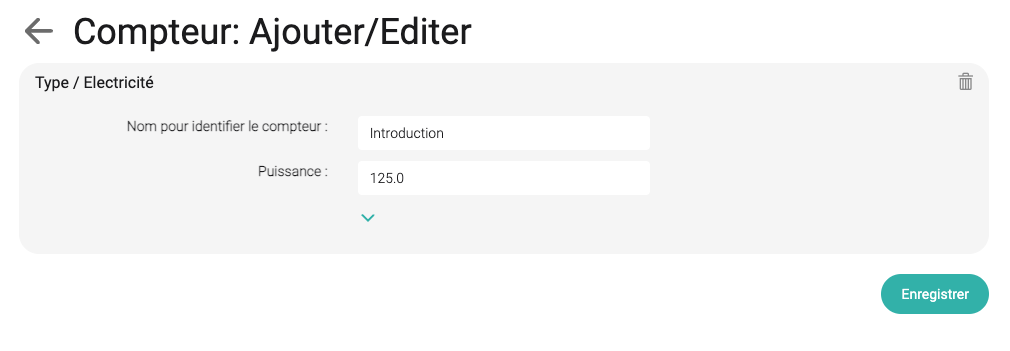
It is necessary to correctly define the amperage of the selected DLM meter in the meter settings under Meters and associate them with the Climkit Gateway that will read and control them.
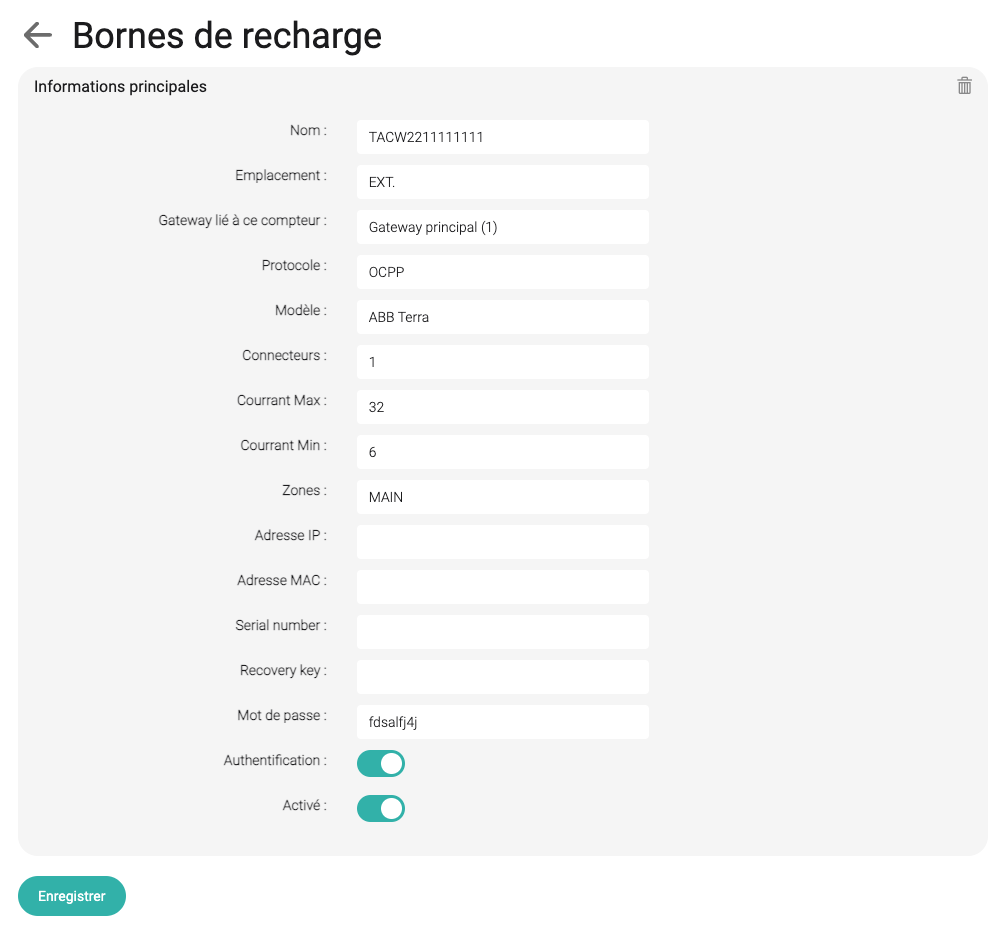
Next, create the charging stations under Charging stations and assign them to the Climkit Gateway and the zone they are connected to.
Under the Name field, enter its unique OCPP identifier. This is its serial number for ABB Terra stations (e.g., TACW1142021G1XYZ).
Select the ABB Terra model for ABB stations or standard OCPP for other models (Schneider, etc.).
2. Charging station configuration
The Climkit system is compatible with charging stations equipped with the OCPP communication protocol.
Depending on the manufacturer, charging stations are configured via their internal web server (accessible with the station's IP address) or via a mobile application (iOS or Android), as is the case for ABB Terra AC or Schneider stations, for example.
Configure the OCPP station with the Climkit OCPP server URL, which corresponds to the static IP address of the Climkit Gateway (to be defined in the router) and port 9000:
ws://192.168.2.10:9000
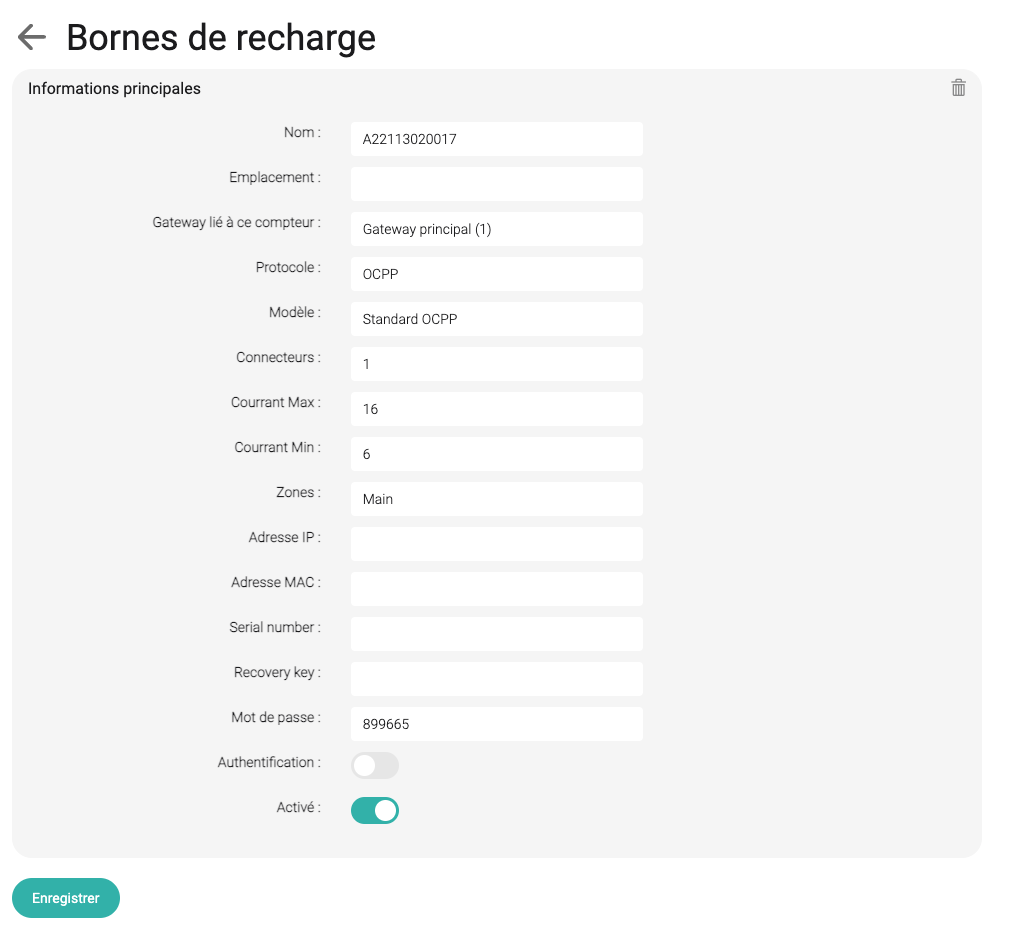
Then, enter the charging station's unique OCPP identifier, which it uses to connect to the OCPP server, in the Climkit online portal under the station's name. ABB Terra stations have an identifier like "TACW2242920G0720".
Here is an example with the identifier "A22113020017":
See the Advanced Configuration section of this documentation for configurations of specific station models: ABB, Schneider, Zaptec...
3. Climkit Remote OCPP Server
When a Climkit Gateway is not installed, it is possible to connect a charging station directly to the Climkit online portal via the remote OCPP server.
This configuration allows for metering, user authentication via RFID badges, and billing, but not for dynamic load management, for which a Gateway is essential.
Insert the remote OCPP server URL into the station's configuration:
ws://ocpp.climkit.io:9000
Create a Gateway of type ocpp-remote in the online portal, create the charging station with its unique identifier under the Name field, and associate it with this Gateway.
This configuration is mandatory for Easee or Zaptec charging stations, which cannot be locally connected to a Climkit gateway.
4. Troubleshooting
Connect to the Gateway's internal webserver.
Check the gateway's internet connection and the station's connection to the Gateway.
Users cannot use their badge
Search for the keyword Authorizing request and the charging station's serial number in the logs under Charge Points.
If the badge is still rejected, manually update the badge list on the Gateway by clicking Update configuration.
DLM meter reading issue
DLM meters are not being read. Error message:
DLM meters can't be read: "Last Main meter continuous reading: last reading older than ... seconds"
DLM meters (for example, Introduction) must communicate periodically with the service managing the charging stations so that the zones can regulate their power accordingly. Check:
- The service continuously reading DLM meters has crashed. Restart the service and check if it remains active (green indicator in the top right of Charge points).
- The DLM meter cannot be read. Check the bus connection by attempting to manually read this meter under the Meters tab using its unique Modbus address.
Users can charge, but slowly (6A)
This is a fail-safe behavior: when the zone does not know the status of the DLM meters, it sets the charging current to 6A.
- Verify the amperage set for the meter in the online portal.
- Verify that the meter(s) are being read (see above).
5. OCPP States
Charging stations will display states on the platform once connected. These states are as follows:
Available: No vehicle is connected to the station, and it is available for a new vehicle to connect to it.
Charging: The station is currently charging a vehicle.
Preparing: The station is no longer available for a new vehicle, but charging has not yet started. There is often a delay between the moment a vehicle connects and the start of charging. This may be due to station preparation, communication between the vehicle and the station, or waiting for payment or authorization.
Finishing: Charging is complete, but the vehicle is still connected, so the station is not yet available for another vehicle.
SuspendedEVSE: A vehicle is connected to the station, but it is not supplying energy due to an issue related to the station, such as charger power management settings or lack of authorization.
SuspendedEV: A vehicle is connected to the station, but the vehicle is not accepting energy from the charger. This occurs when the vehicle is fully charged, or when someone has configured the vehicle to stop charging at a certain threshold.
Reserved: The station is currently reserved for a specific user or vehicle, so it will refuse to charge other users or vehicles.
Unavailable: The station is not available for charging at the moment. This status is often used to indicate that the station is awaiting maintenance or about to restart.
Faulted: The station is currently experiencing a failure or issue. Depending on the station, this can occur in various situations. Sometimes, it means the charger will not be able to charge, but not always. If the fault status includes a more specific error code, this may provide more information about what is happening. In some cases, the fault can be resolved by restarting the charger, or by unplugging and replugging the vehicle (for example, if the cable is not properly seated in the socket, or if it is too taut).